
Roles and Permissions
Control user access by creating roles and configuring workspace permissions.
Table of Contents
Overview
Roles and Permissions determine what users can access within a Knockio workspace. Whether you're setting up permissions for field representatives, managers, or workspace owners, roles allow you to control what users can view and what actions they can perform.
This article explains how to create custom roles, configure permissions, and assign roles to users.
Accessing the Roles Section
To manage roles:
Click the Settings icon in the bottom-left corner of the screen.
Select Roles from the left-hand menu.
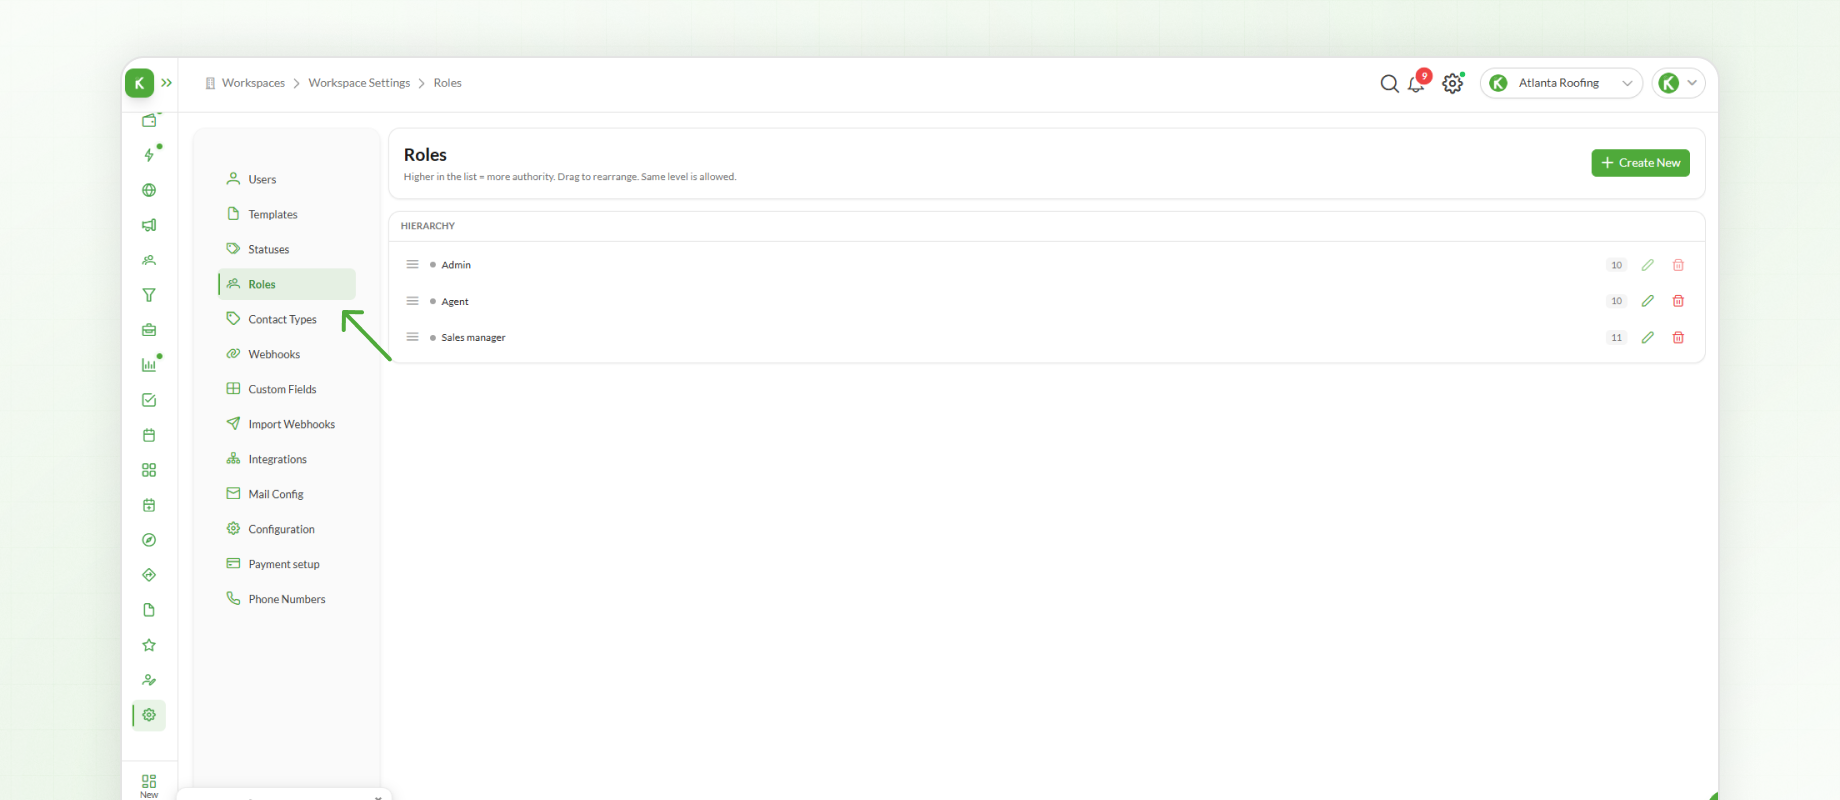
Every new workspace includes two default roles:
Owner – Has full access across the entire workspace.
Agent – Designed for users working in the field.
While these default roles are suitable for many teams, most organizations create custom roles that align with their own workflows and responsibilities.
Creating a New Role
To create a new role:
Click Create New.
Enter a Role Name. For example, General Manager.
Optionally, add a Description to help identify the role when managing multiple custom roles.
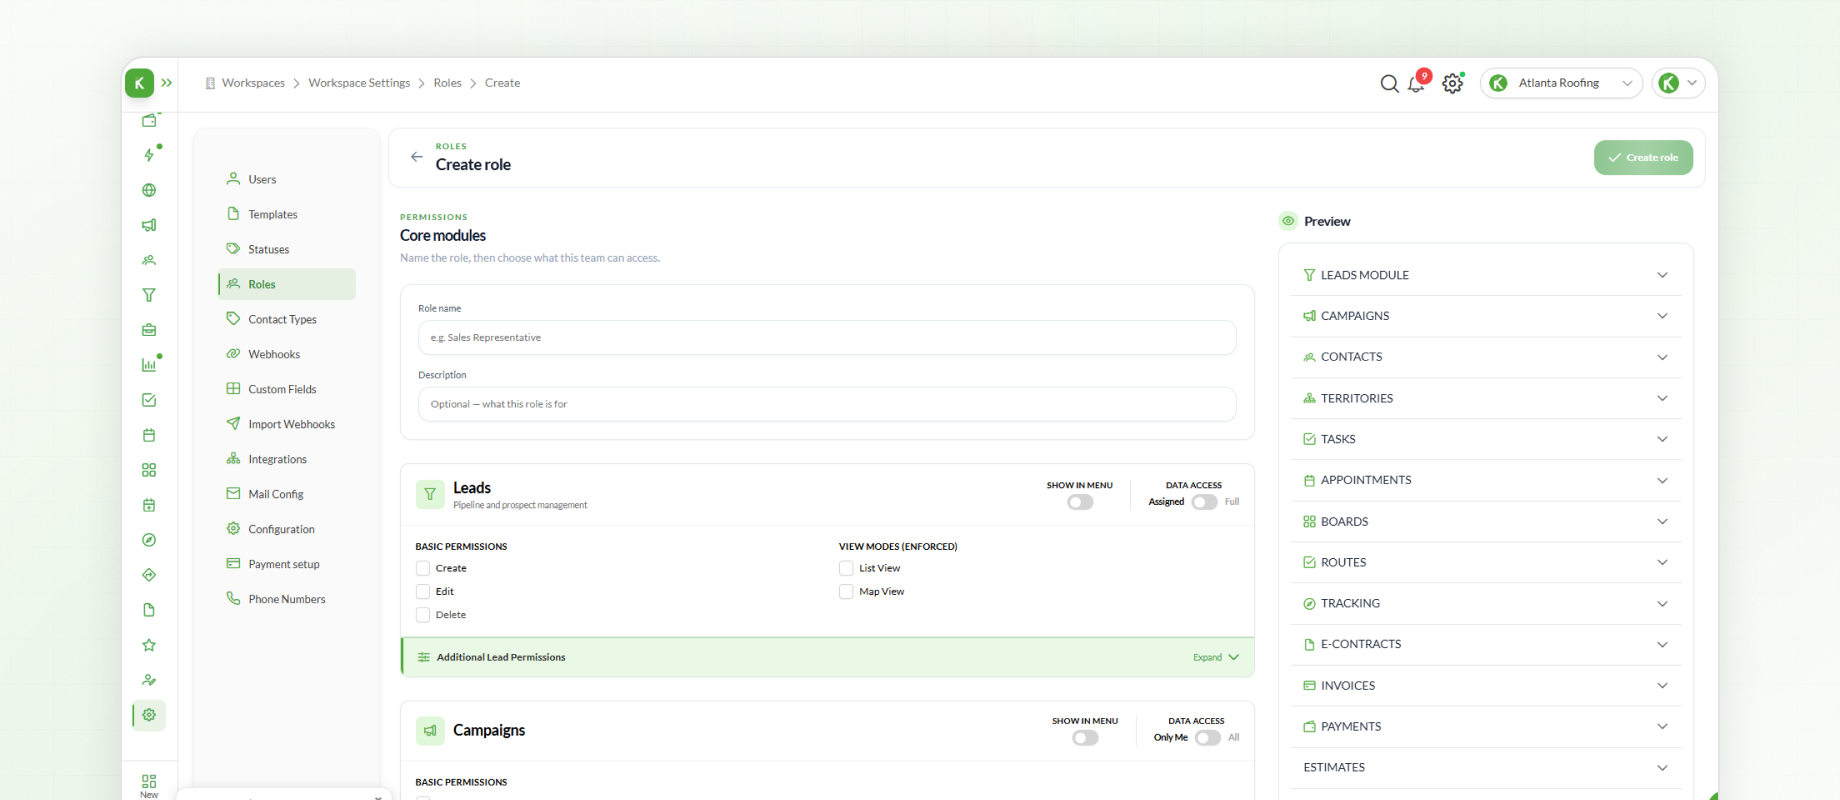
The next step is configuring permissions for the role.
Understanding Permissions
Each module within Knockio has its own permission settings, allowing you to control how users interact with that section of the platform.
Two permission settings appear throughout the permissions page:
Show in Menu
Show in Menu determines whether a module appears in the user's navigation menu and mobile application.
If enabled, the module is visible to the user.
If disabled, the module will not appear in the user's interface.
Data Access
Data Access controls the scope of information users can view within a module.
For the Leads module:
Assigned – Users can access only the lead records assigned to them.
Full – Users can access all lead records.
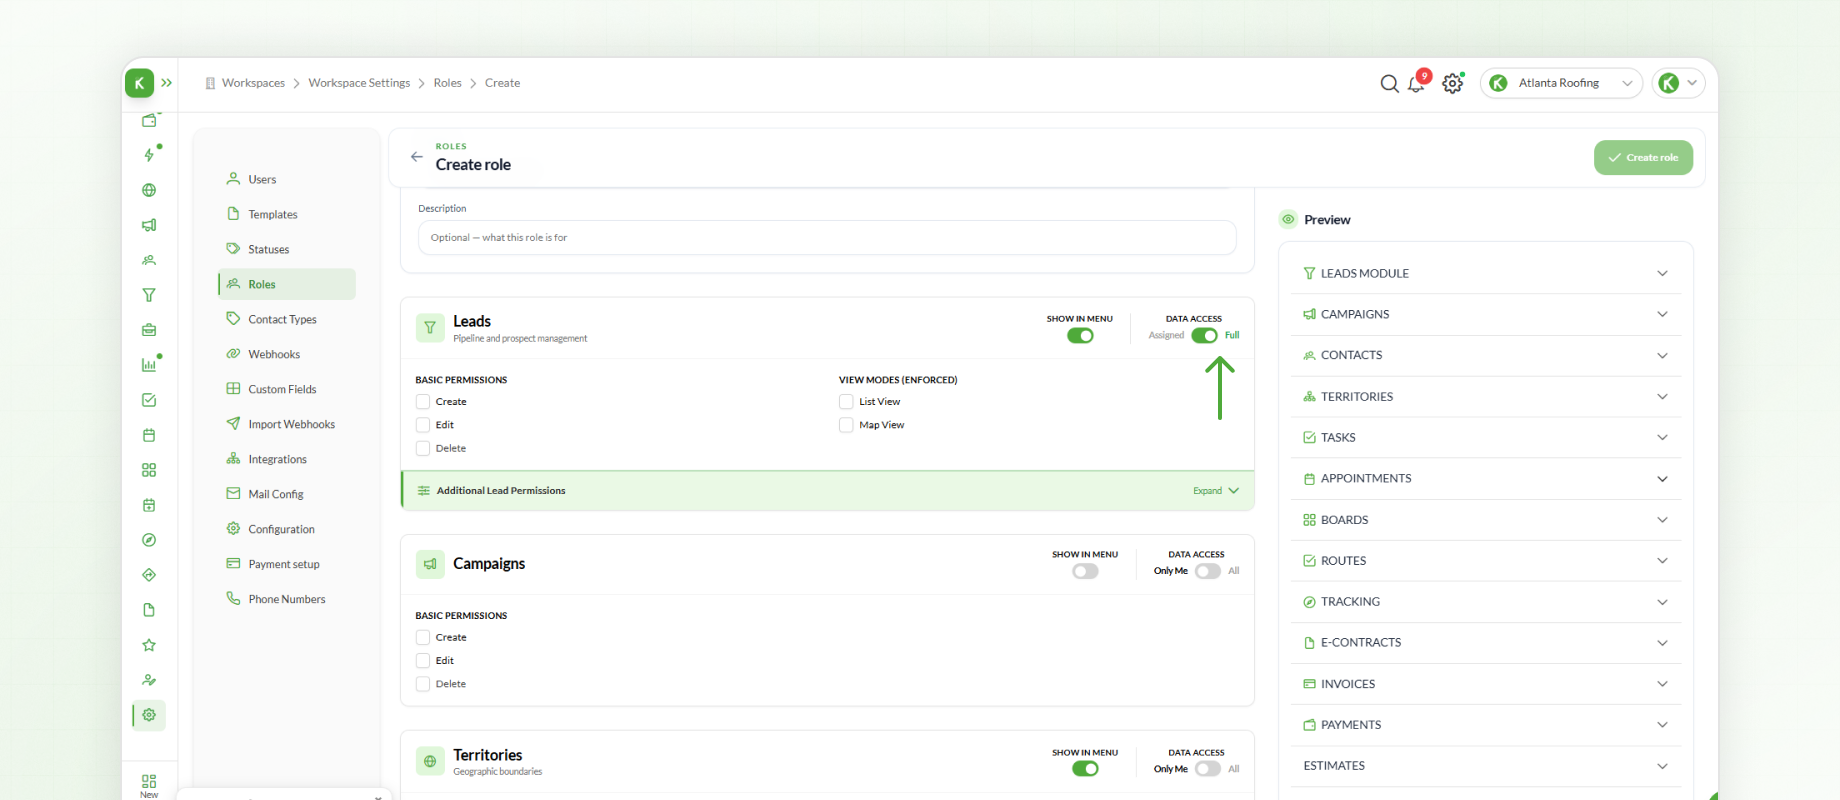
For all other modules:
Only Me – Users can access only their own records.
All – Users can access every record within that module
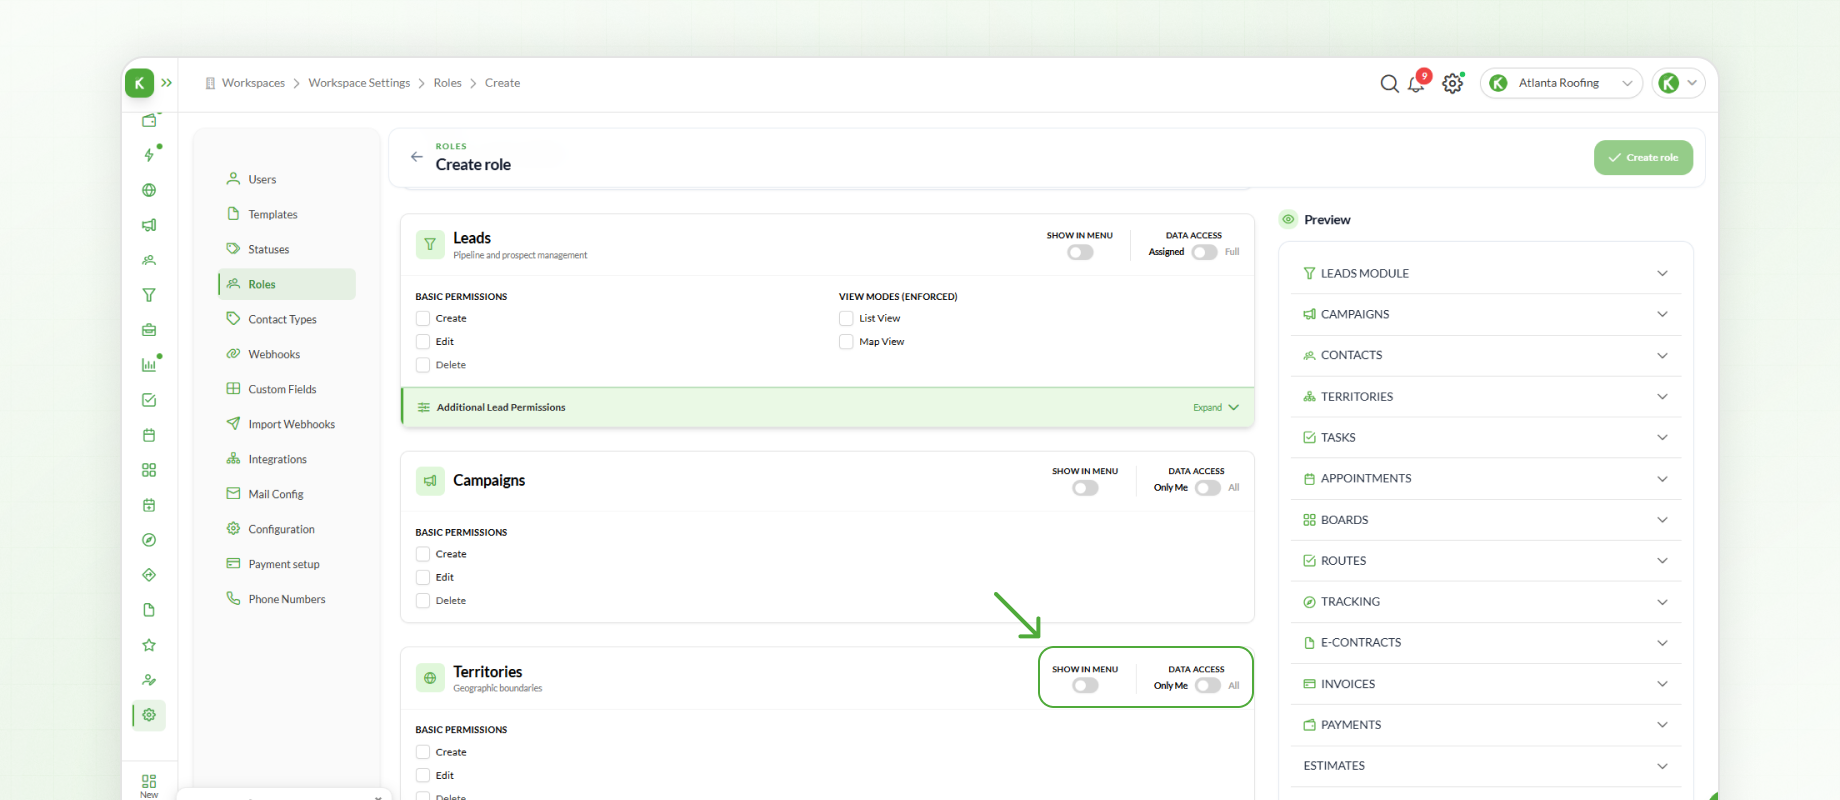
Data Access is one of the most important permission settings in Knockio, as it determines the visibility of data across the workspace.
Configuring Module Permissions
Scroll through the permissions page to configure access for each module.
For example, within the Leads module, you can decide whether users can:
Create leads
Edit leads
Delete leads
Access List View
Access Map View
Access both views
If additional control is required, click Show Additional Permissions to unlock more options, including permissions for:
Importing data
Exporting data
Viewing lead details
Uploading documents
Signing contracts
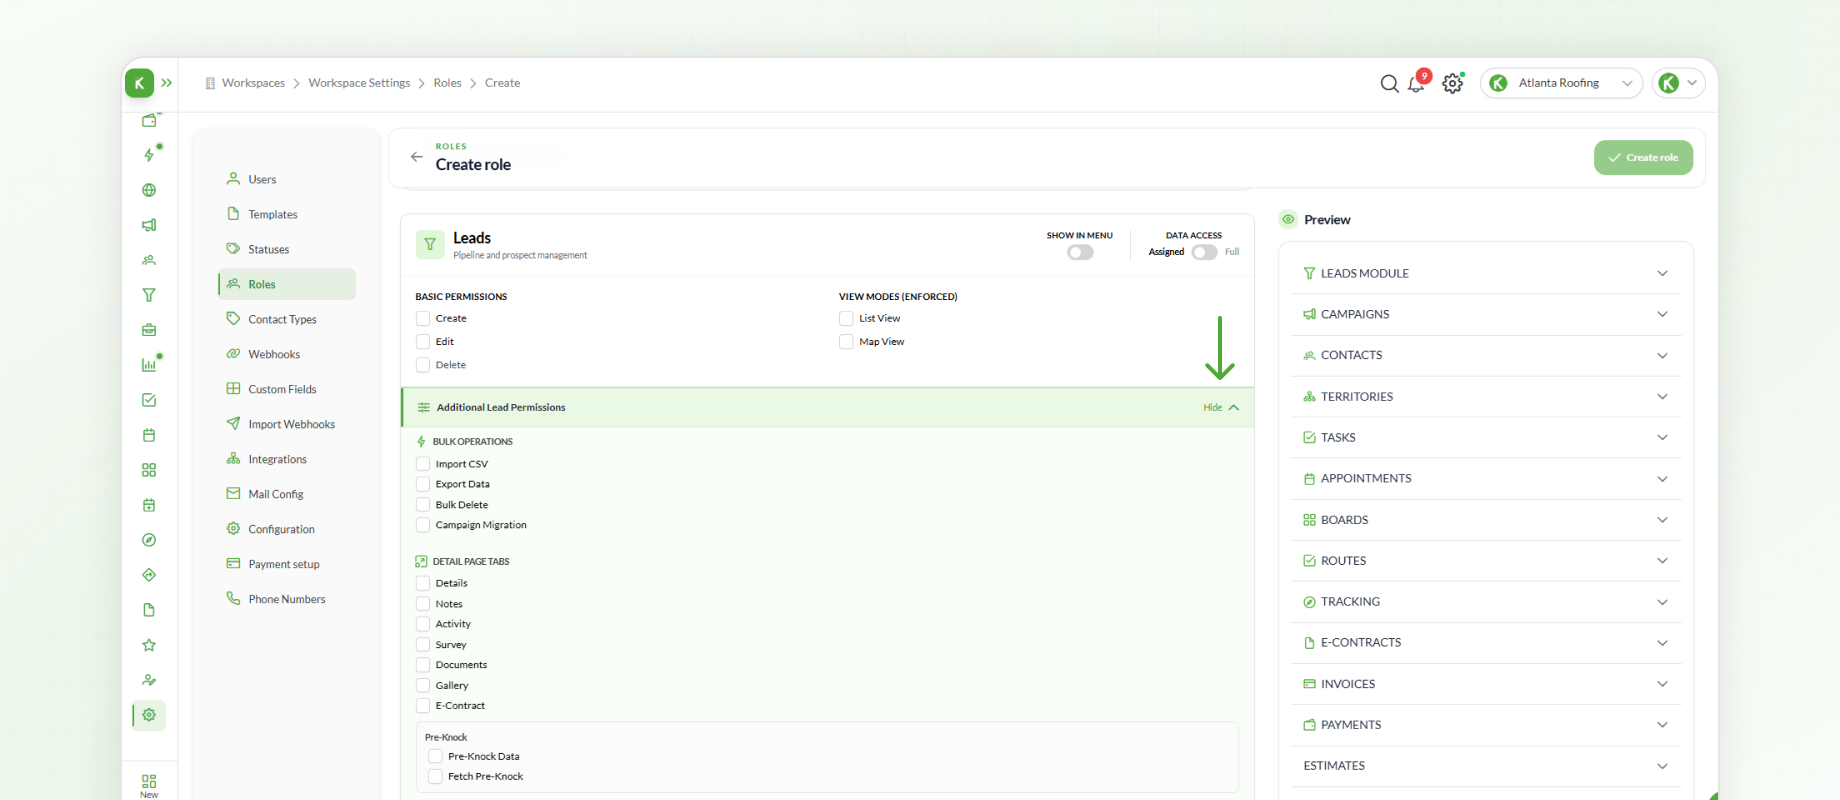
The same approach applies across other modules, including:
Campaigns
Territories
Contacts
Tasks
And many more
Workspace Settings Permissions
Further down the permissions page, click Enable Group under Workspace Settings to configure additional administrative permissions.
These include permissions for:
Creating users
Creating roles
Managing statuses
Managing contact types
Managing products
Managing templates
Managing custom fields
Sending and receiving messages
Placing calls
Sending emails
Other workspace-level features
Admin Settings Permissions
Click Enable Group under Admin Settings to configure permissions for advanced administrative features.
These include:
Creating or importing webhooks
Integrating third-party platforms
Creating email configurations
Updating workspace configurations
Assigning or unassigning communication numbers
Other advanced administrative functions
Understanding Full Data Access
Before saving a role, it's important to understand how Full data access affects user permissions.
For example, if a role has Full access to Campaigns, users assigned to that role automatically have access to every campaign within the workspace. Individual campaign assignments are not required.
The same behavior applies to other modules, including:
Statuses
Contact Types
And other modules that support data access permissions
This relationship between Full and "Assigned "or "Only Me" access is used throughout Knockio and is referenced in later sections of the documentation.
Assigning a Role to a User
Once the role has been configured, it can be assigned to one or more users.
To assign a role:
Open Settings.
Select Users.
Locate the user you want to update.
Click the three-dot Actions menu.
Select Edit.
Under Roles, choose the newly created role.
Click Update to save the changes.
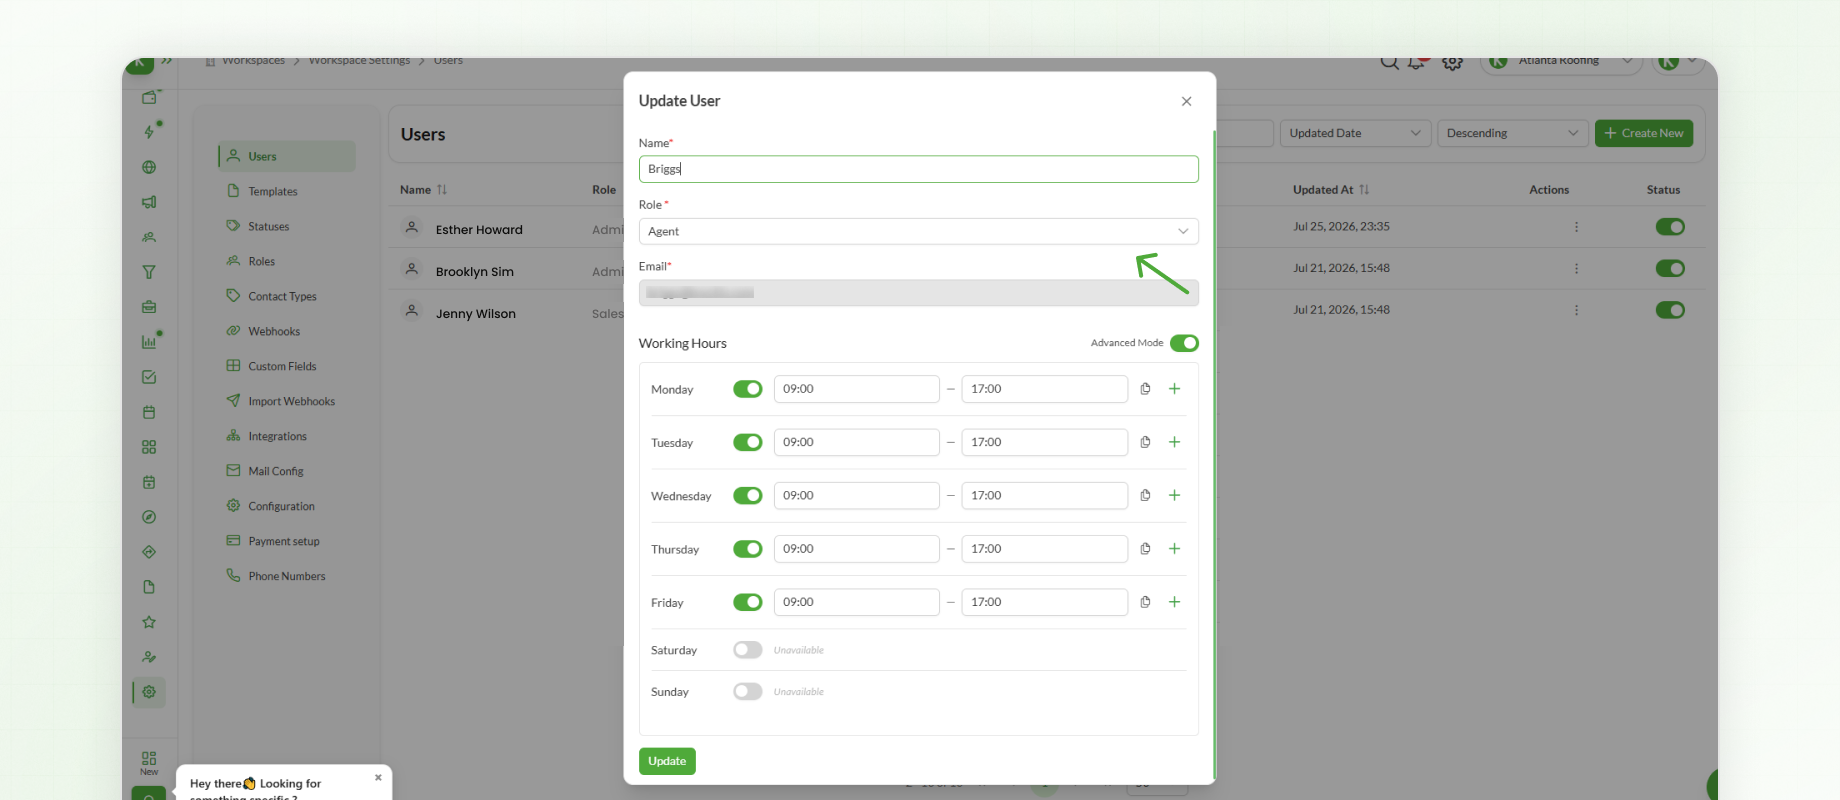
A user can have multiple roles assigned simultaneously. Their effective permissions are the cumulative result of all assigned roles.
Next Steps
After roles and permissions have been configured, the next step is creating and managing Statuses. Statuses help organize leads as they move through different stages of your workflow while working alongside the permissions configured for each role.