
Plan Your Routes
Set up routes, organize stops, and navigate between locations.
Table of Contents
- Overview
- Accessing the Routes Module
- Create a New Route:
- Setting the Route Dates
- Customizing the Route
- Adding Locations to the Route
- Reordering Route Stops
- Creating the Route
- Accessing Routes on Mobile
- Customizing a Route on Mobile
- Navigating Between Route Stops
- Viewing Lead Details
- Using Real-Time Navigation
- Conclusion:
Overview
The Routes module helps field teams organize job visits, plan travel sequences, and navigate between locations efficiently. Routes can be assigned to team members, scheduled for specific dates, and customized based on how much control the assigned user should have over the route order.
Routes can be created from the web application and accessed from the mobile app, where team members can optimize their route, navigate between stops, view lead details, and add notes while working in the field.
Accessing the Routes Module
To create or manage routes:
Select Routes from the left-hand navigation menu.
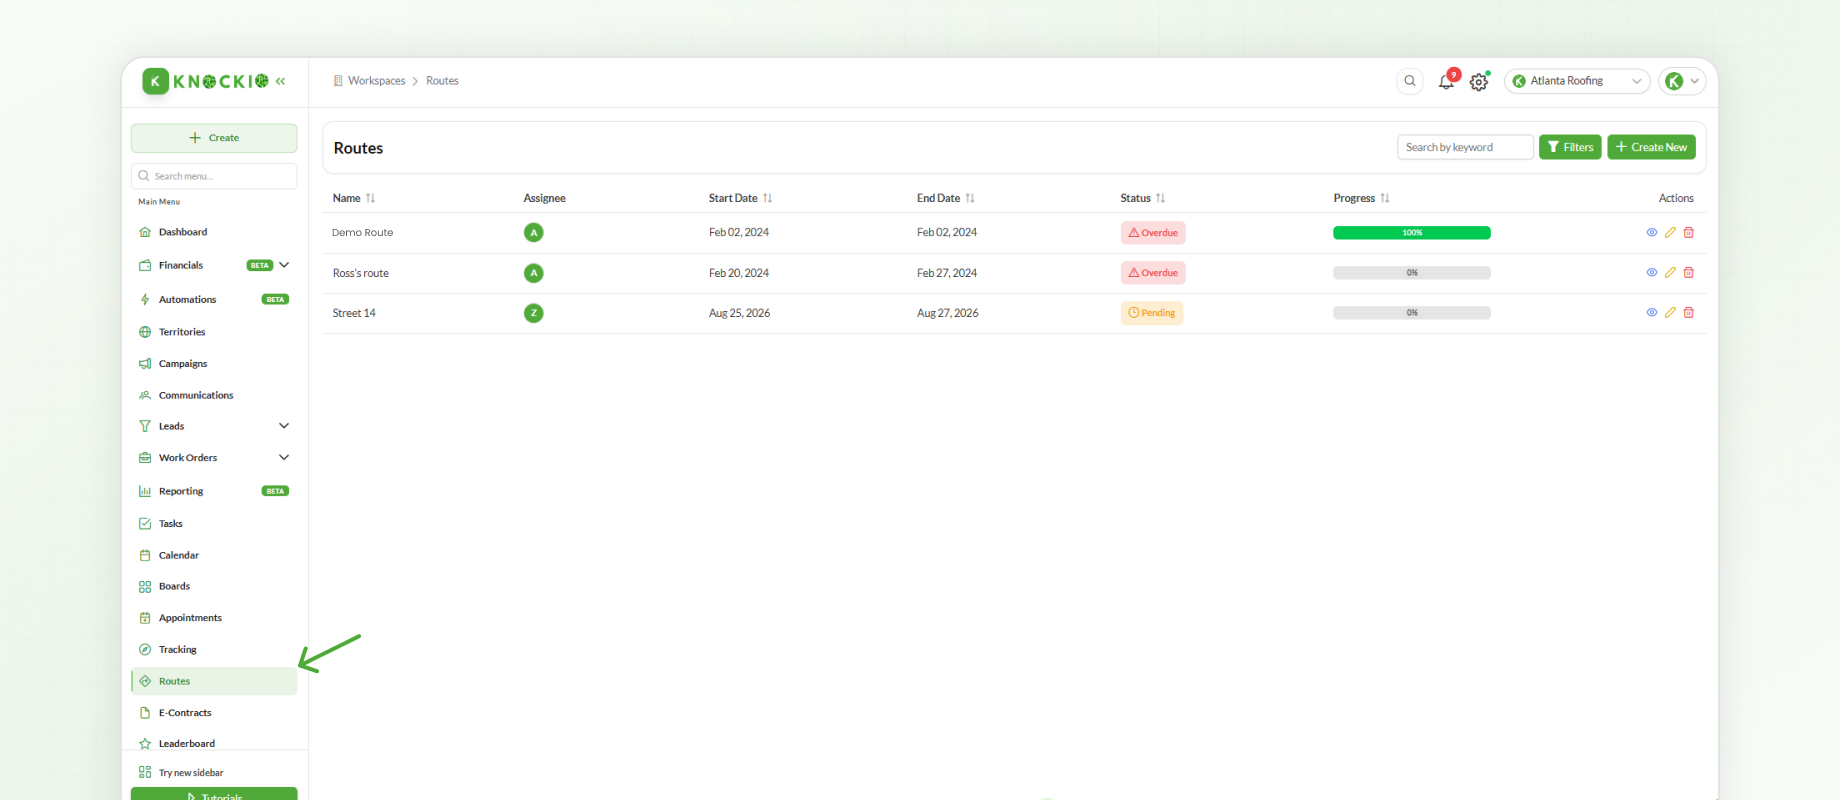
The Routes module displays existing routes and allows you to create new routes.
Create a New Route:
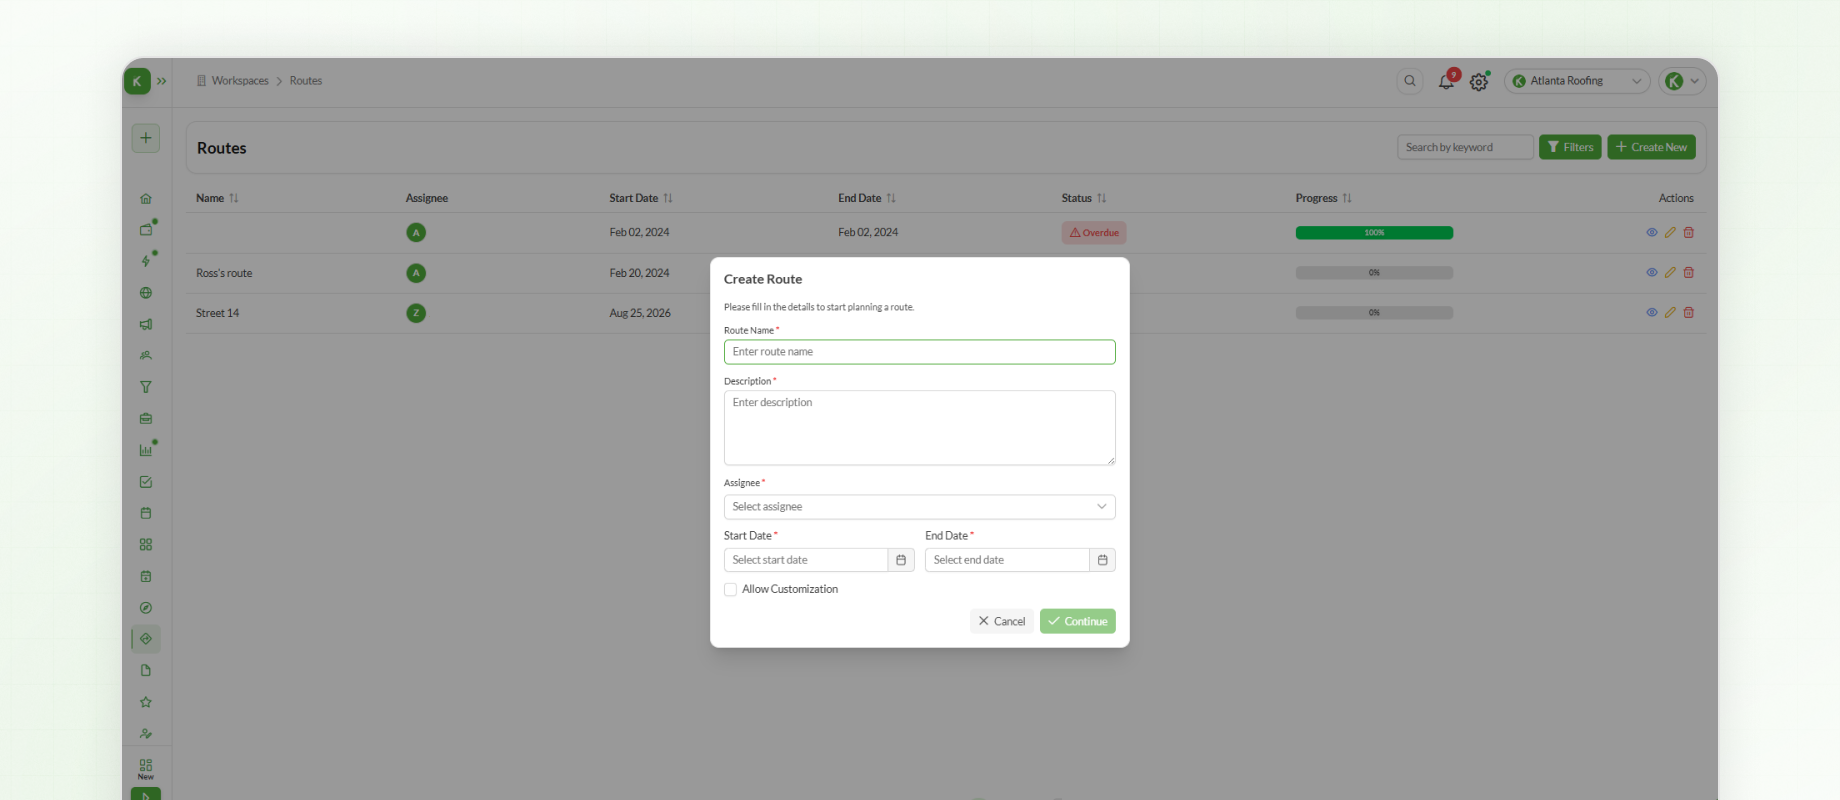
Click Create Route.
Start by providing the basic information for the route.
This includes:
Name – Enter a descriptive name that makes the route easy to identify.
Description – Add additional information about the route. This field is optional.
Assigned User – Select the team member who will use the route.
Setting the Route Dates
Define when the route should be available by selecting:
Start Date
End Date
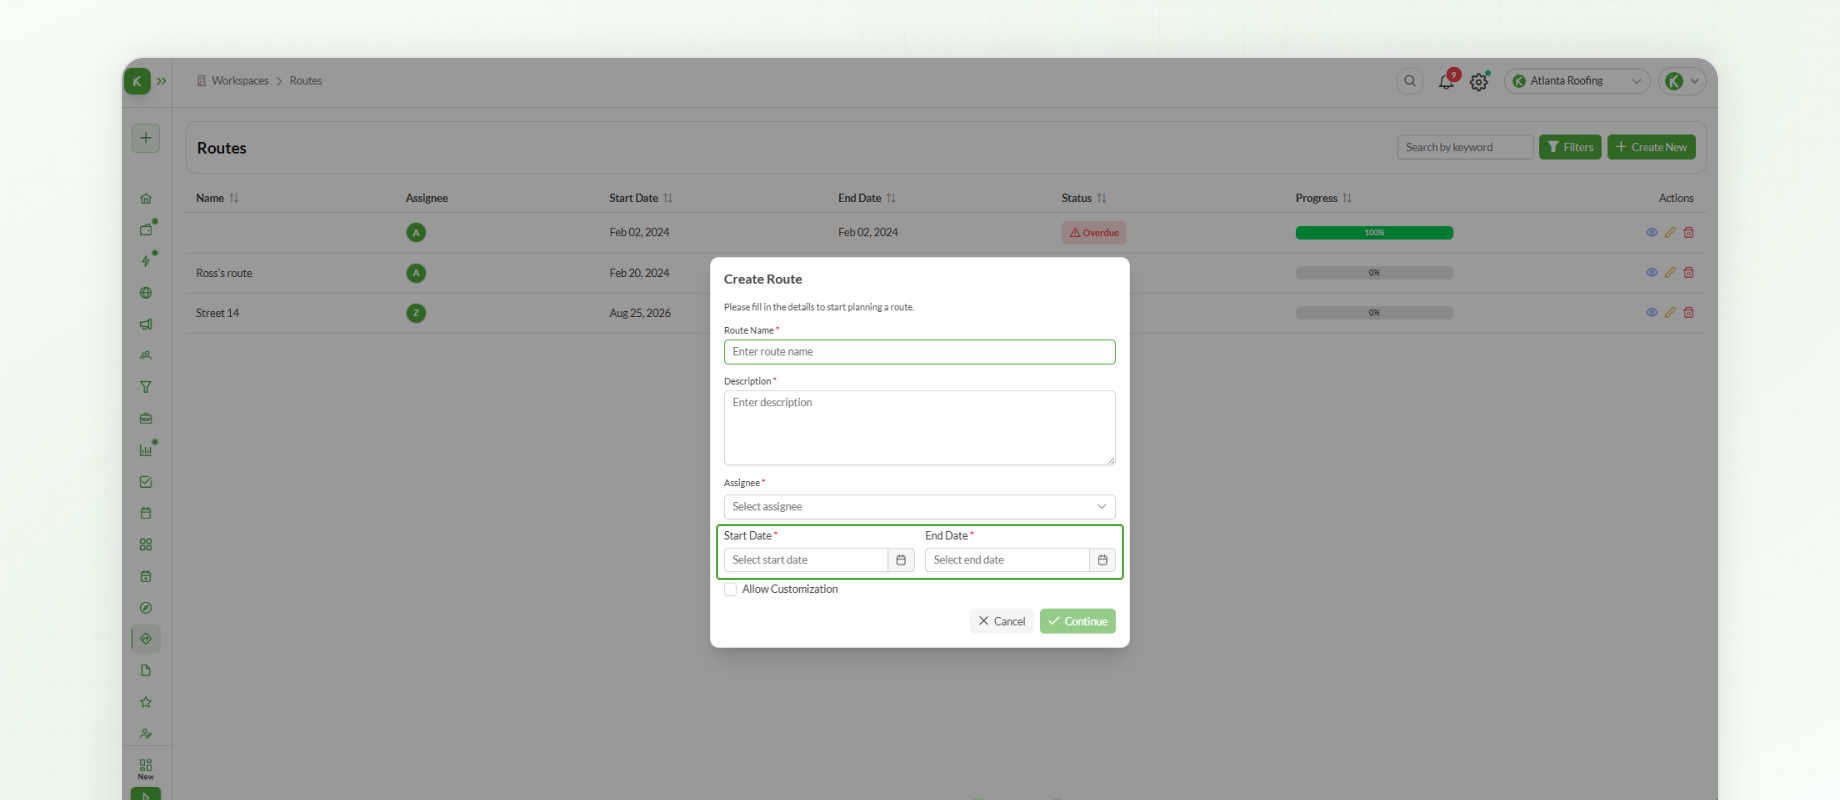
The route is available to the assigned user during the selected date range. Once the end date has passed, the route is no longer displayed as an active route.
Customizing the Route
The Customization option determines how much control the assigned team member has over the route order.
When Customization is enabled, the assigned user can change the order of the route stops from the mobile app.
When Customization is disabled, the assigned user follows the order created when the route was set up.
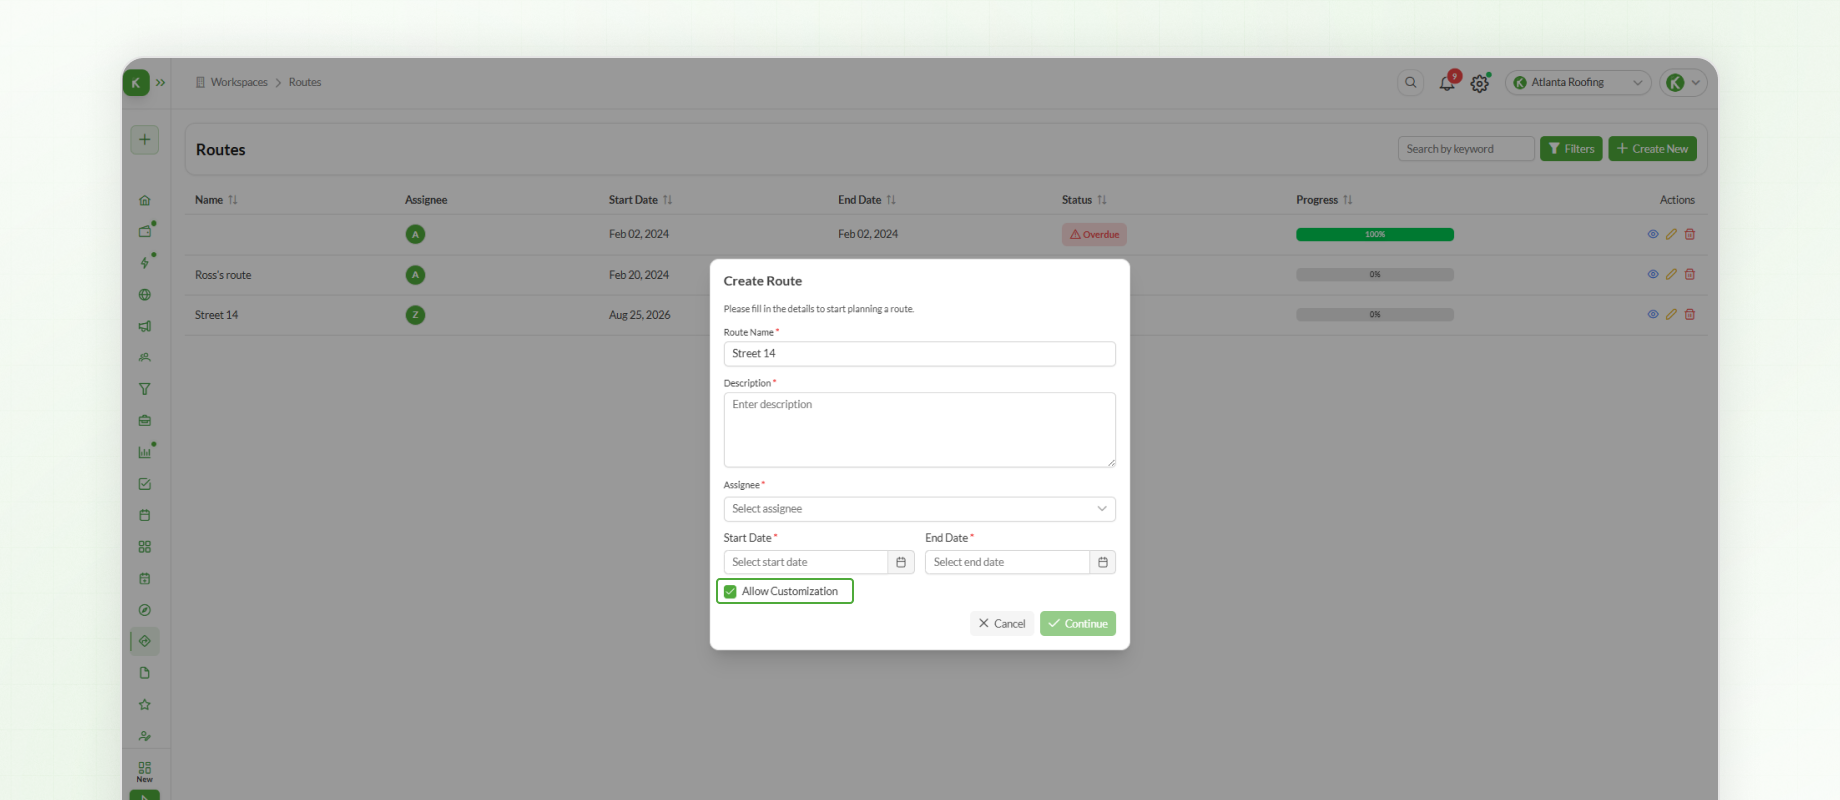
After entering the route details, click Continue to open the map.
Adding Locations to the Route
The map displays available jobs and leads that can be added to the route.
When the route is first opened, the map displays jobs assigned to or involving the selected team member. You can switch users to view the jobs associated with another team member.
The map also provides:
Map View – Displays locations in the standard map layout.
Satellite View – Provides a satellite view of the selected area.
Search – Find specific locations or select existing jobs and leads.
To add a location to the route:
Select a job or location on the map.
Add it as a Midpoint.
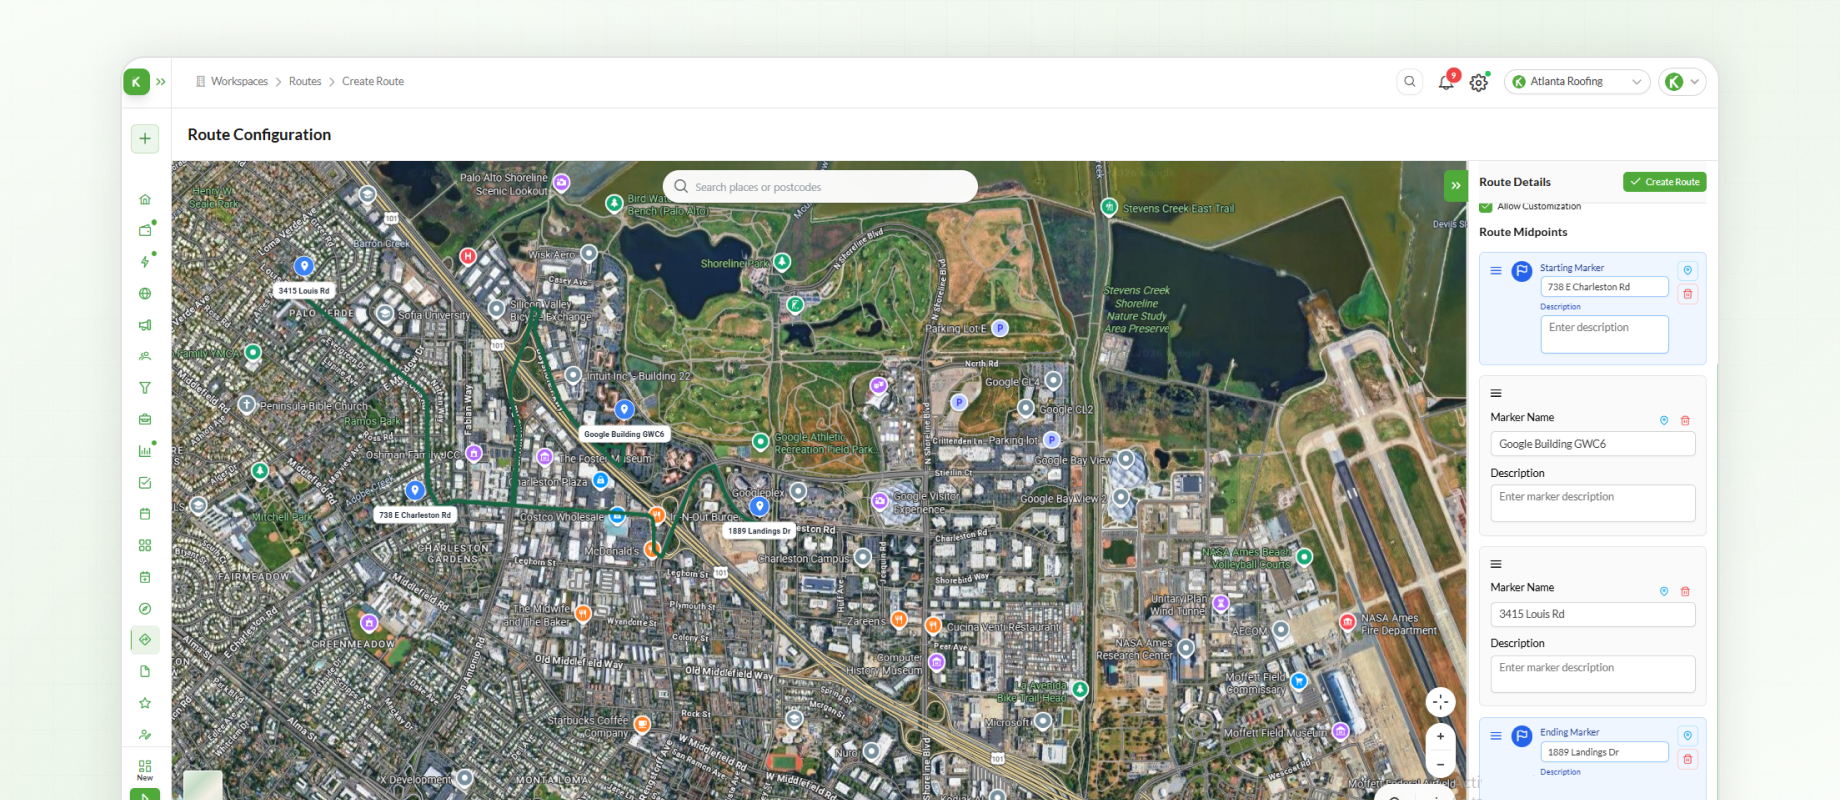
After adding a midpoint, you can enter or update its Title and add an optional Description.
Reordering Route Stops
Each location added to the route appears as a card.
To change the order of the stops:
Select and hold the required midpoint.
Drag it up or down.
Release it in the desired position.
Continue adjusting the order until the route follows the sequence you want the team member to use.
Creating the Route
After reviewing the route and its stops:
Review the midpoint order and assigned user.
Click Create Route.
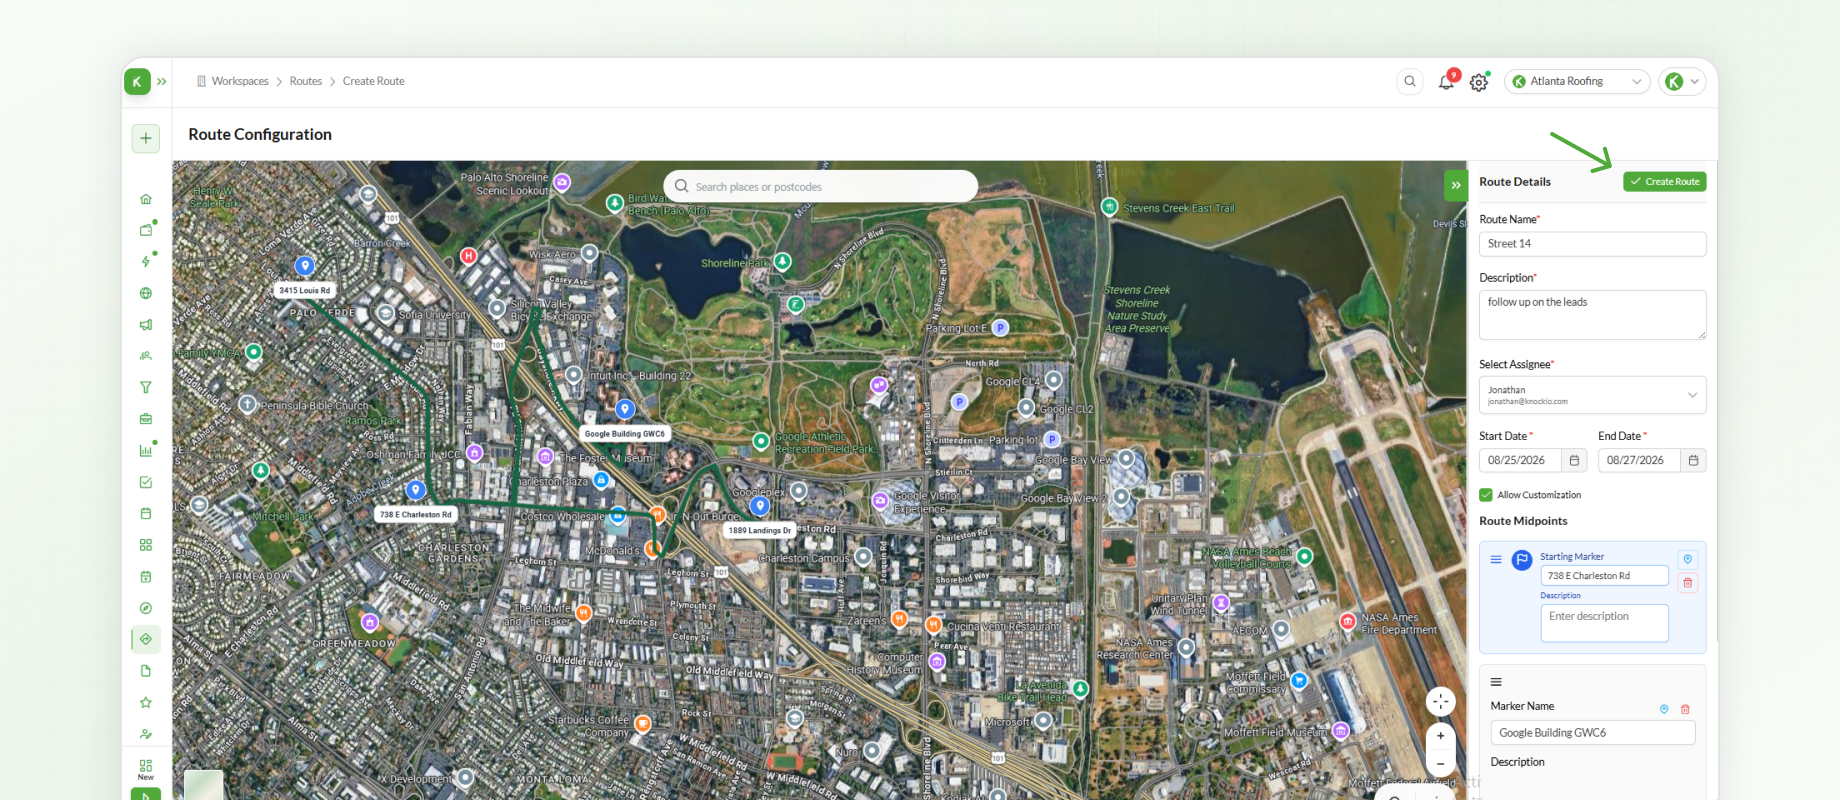
The route is created and becomes available to the assigned user through the mobile app.
Accessing Routes on Mobile
Team members can access their assigned routes from the Knockio mobile app.
To open a route:
Open the mobile app.
Open the left-hand navigation menu.
Select Routes.
Select the required route.
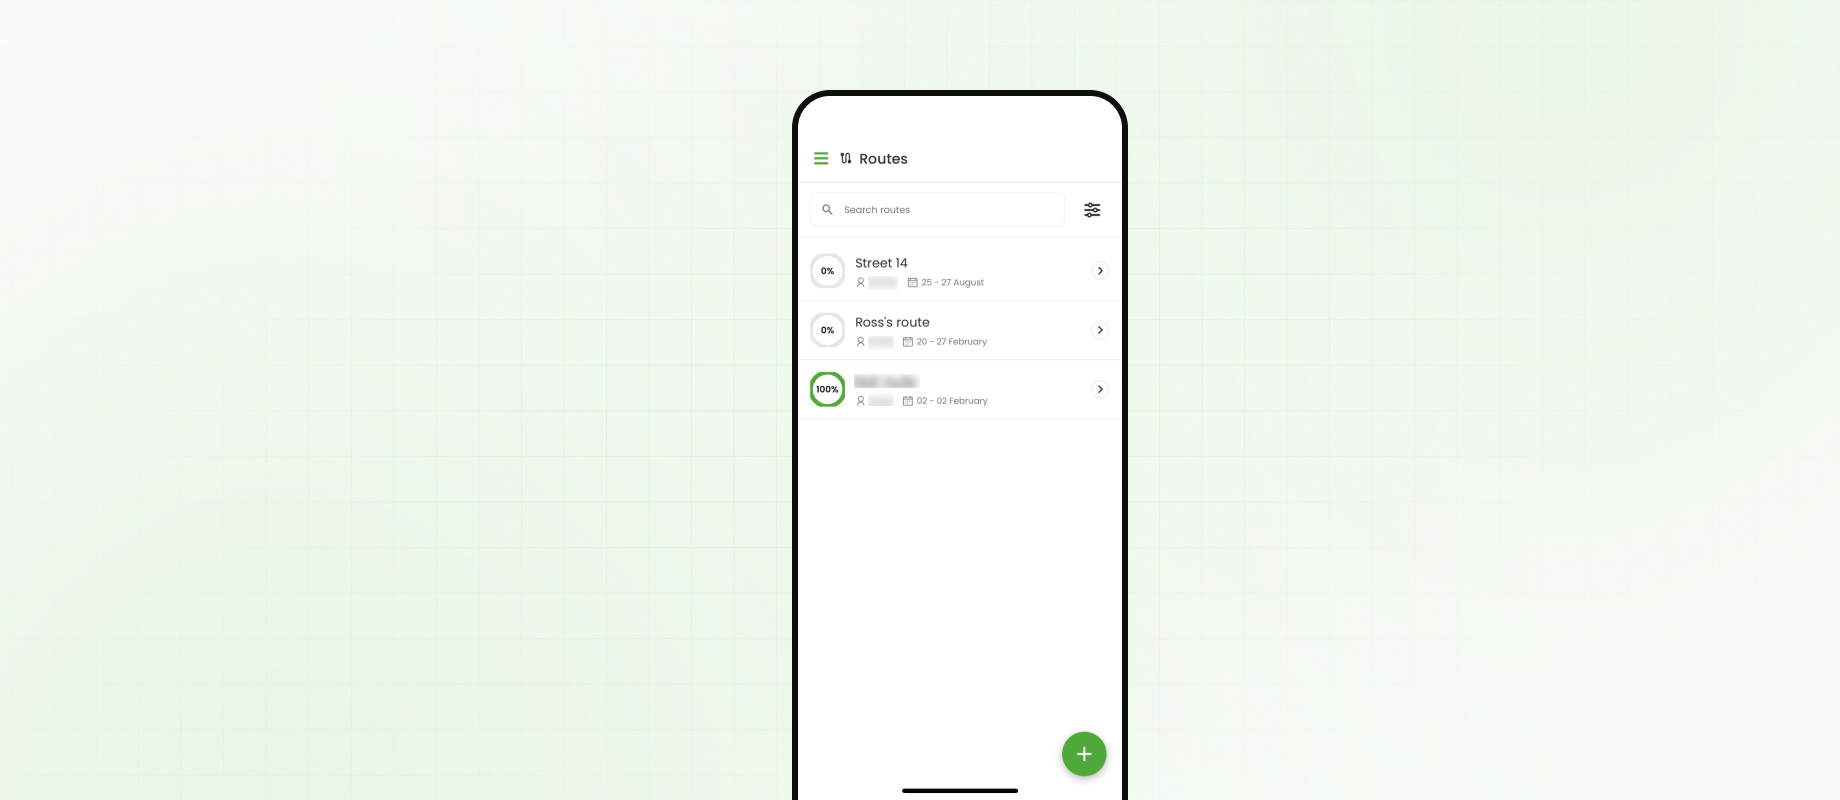
Depending on the route settings, the user can select Play or Customize.
Customizing a Route on Mobile
If customization was enabled when the route was created, the assigned user can modify the route order from the mobile app.
Select Customize to adjust the route.
The Optimize by Distance option determines how the route is arranged.
When Optimize by Distance is enabled, Knockio uses current traffic information to optimize the route based on distance and traffic conditions.
When the option is disabled, the user can manually arrange the midpoints by holding and dragging them into the desired order.
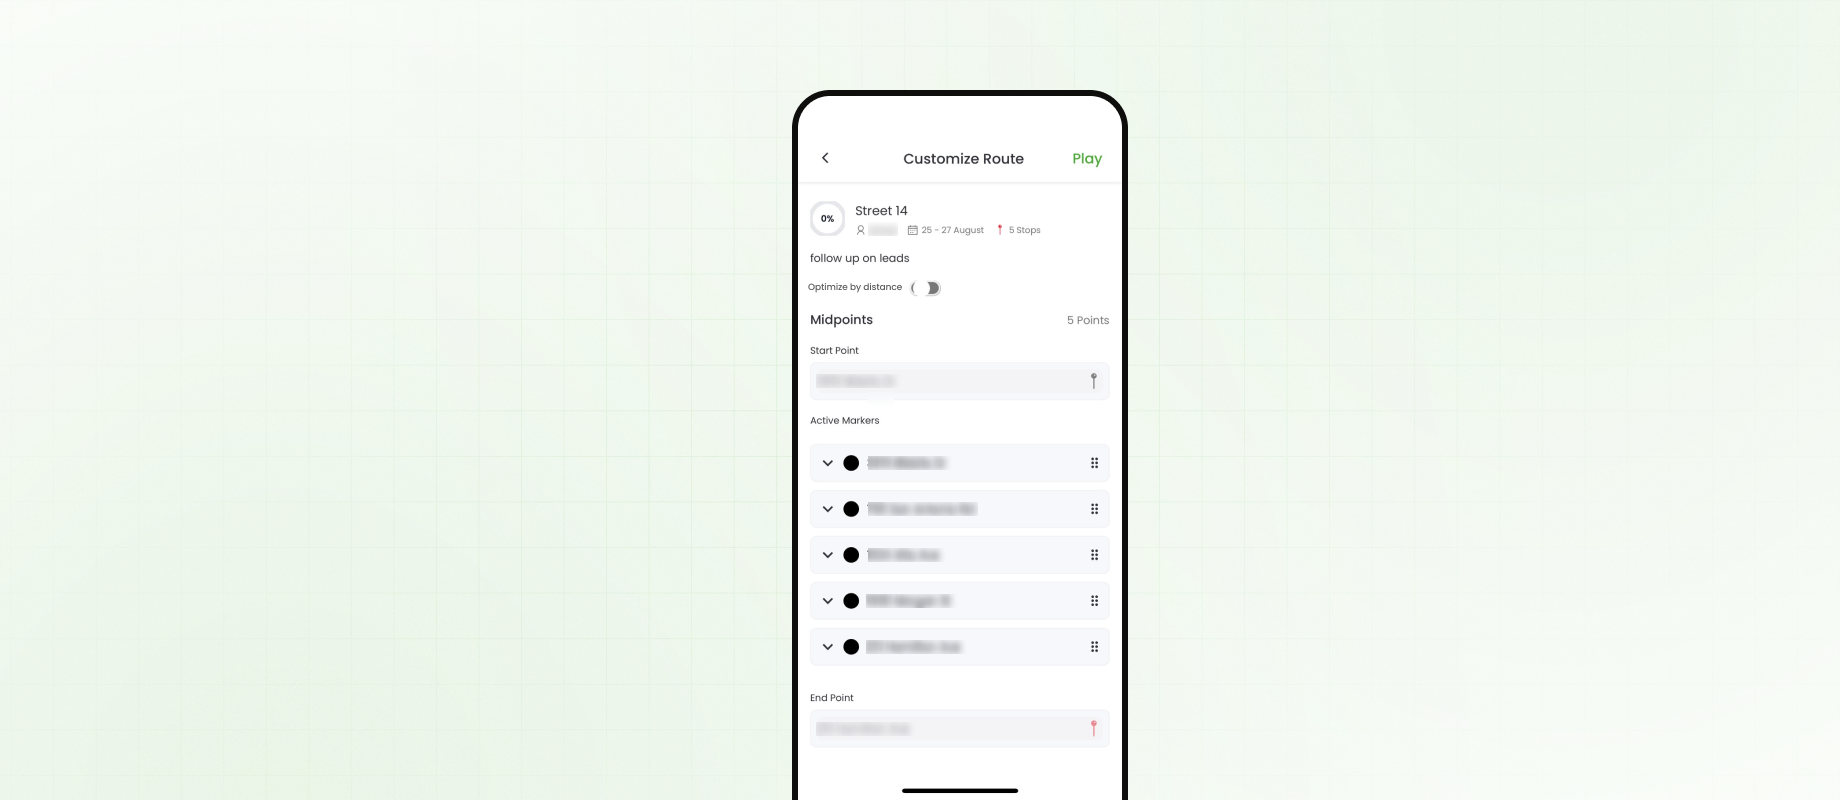
Once the route is arranged, click Play to begin navigating.
Navigating Between Route Stops
During navigation, the map displays the route and its locations.
You can:
Zoom in or out of the map.
Move around the map to view different areas.
Select Move to Next to proceed to the next midpoint.
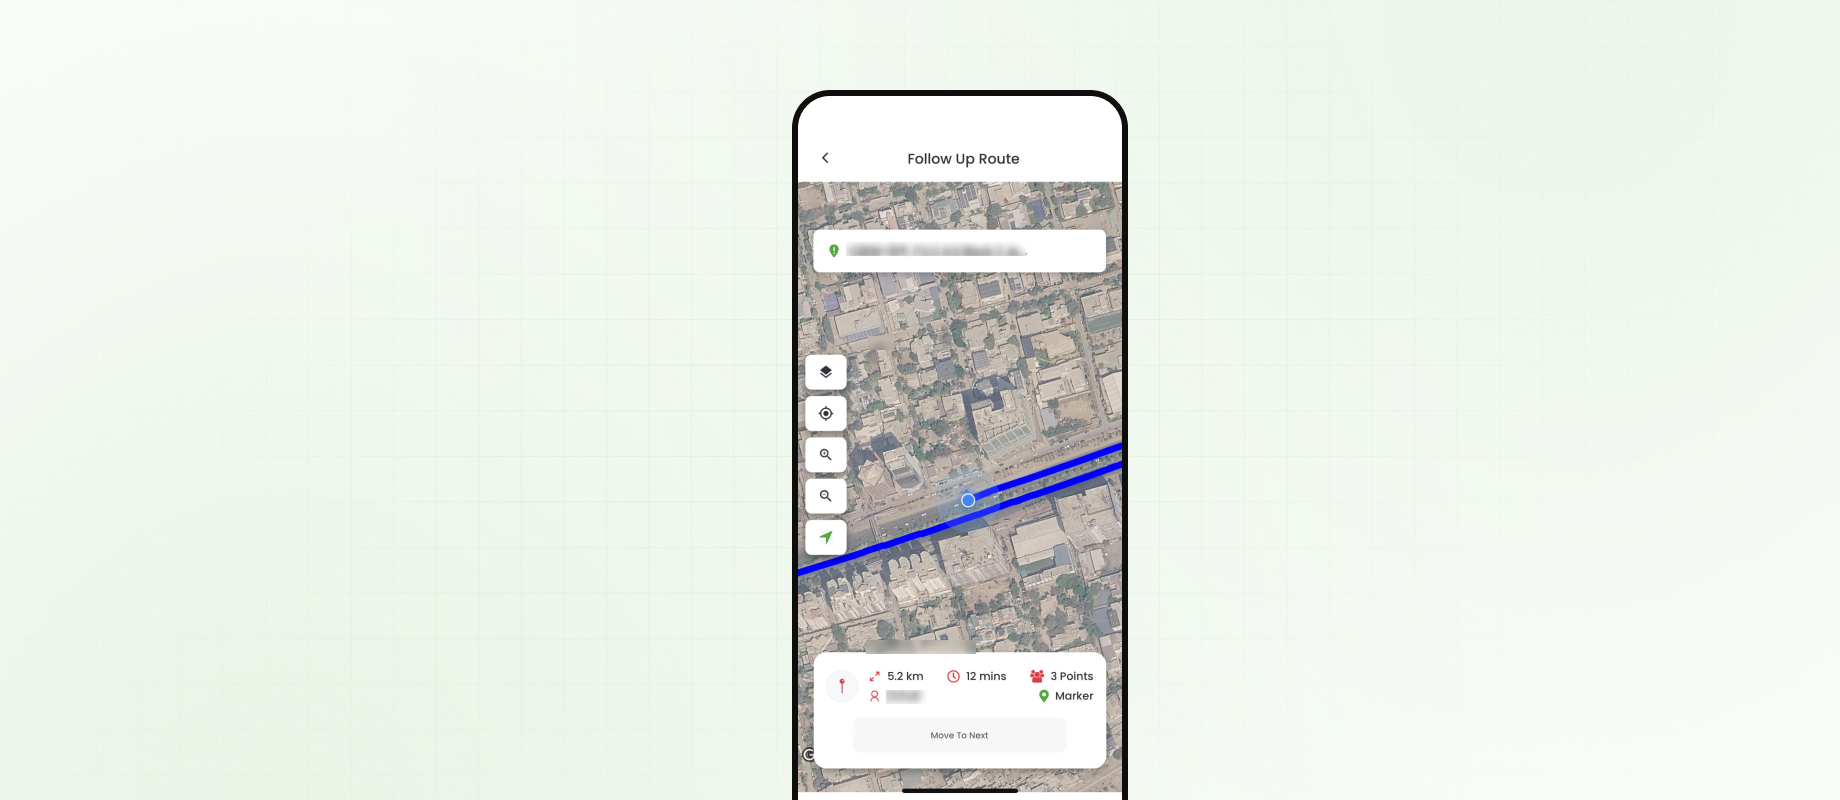
The Move to Next option becomes available when the next destination is within 50 meters.
When the next location is outside the 50-meter range, the option remains unavailable until the user reaches the required distance.
Viewing Lead Details
When you reach a route midpoint associated with a lead, the lead information is available directly from the map.
You can open the lead to:
View lead information.
Add notes.
Review relevant details.
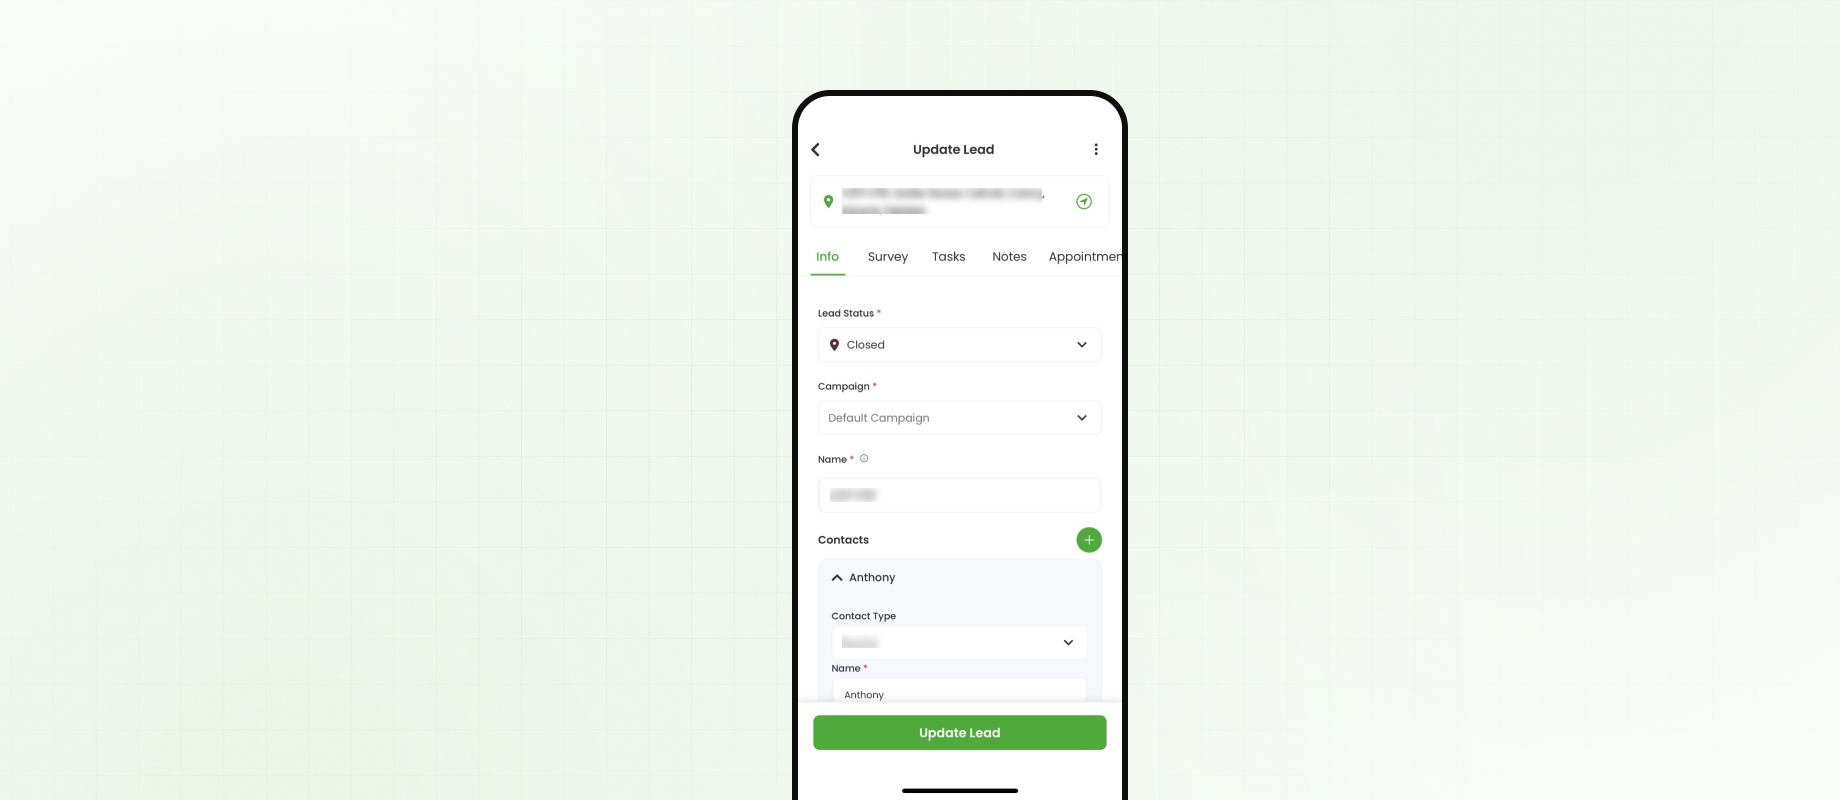
After completing the required actions, click Move to Next to continue to the next midpoint.
If notes need to be added before continuing, enter the required information and click Save.
Using Real-Time Navigation
The route map provides an overview of your planned stops, while real-time navigation provides turn-by-turn directions while travelling.
To start real-time navigation:
Click the Arrow icon on the left side of the map.
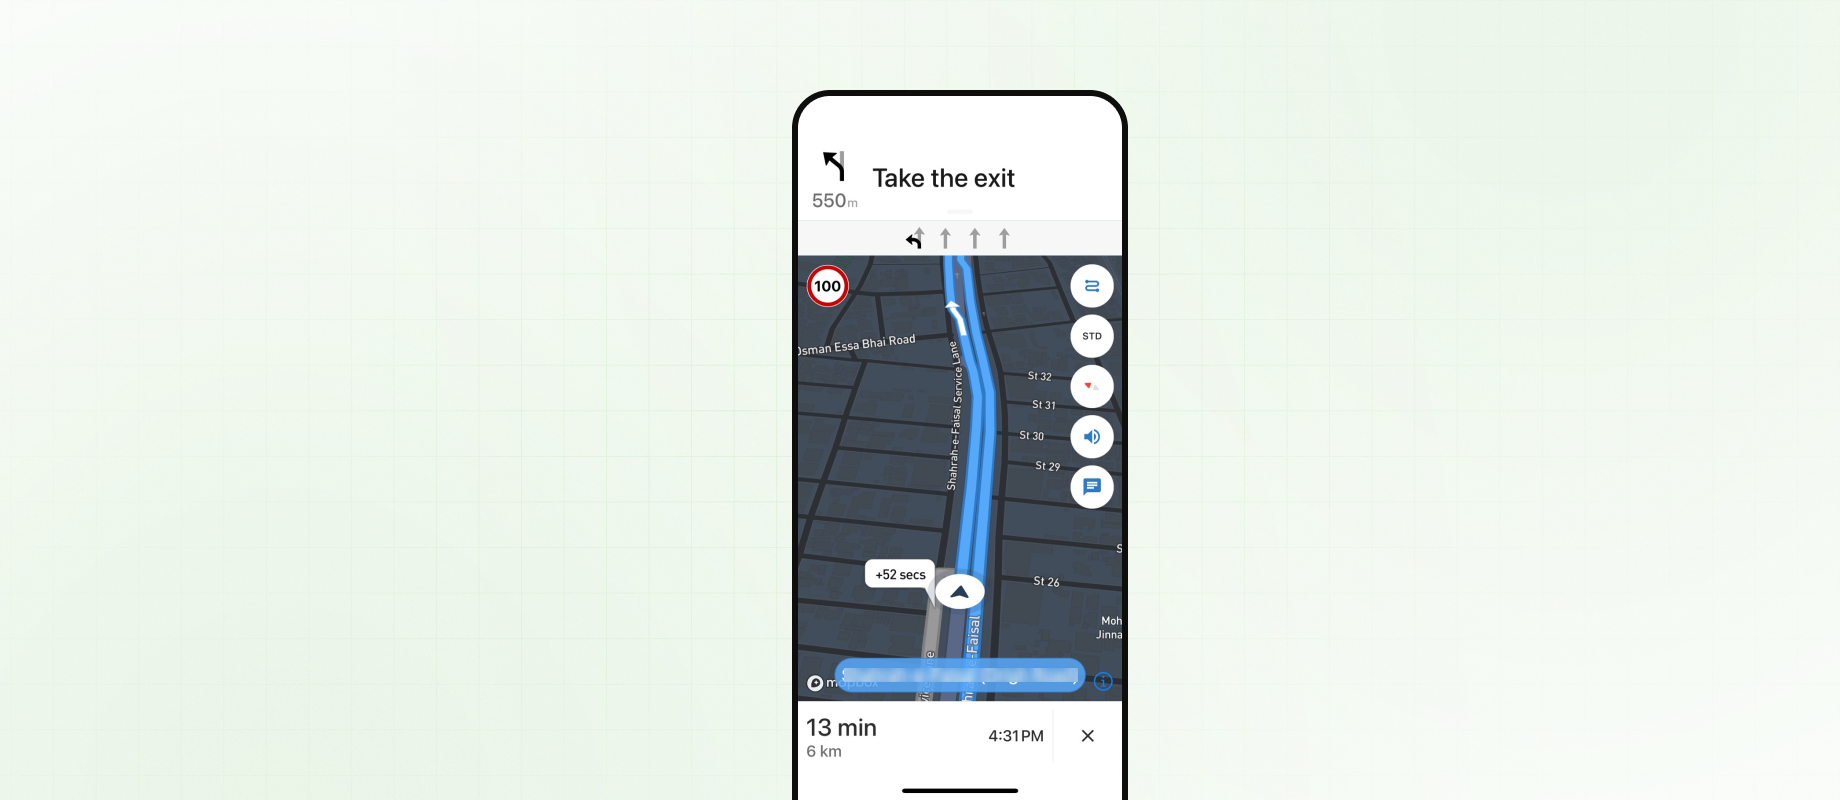
Knockio then provides live navigation and traffic information to help guide the user to the next location.
Conclusion:
After learning how to create and navigate routes, you can use them to organize field visits, assign stops to team members, and manage daily travel from the Knockio mobile app.
Routes can be updated and customized as needed to match changing schedules and field requirements.