
Creating Users
Add users to your workspace and assign them to the right campaign
Table of Contents
Overview
Before users can access Knockio, they must have a user account within the workspace. Once a user has been added, they can be assigned the appropriate role and connected to one or more campaigns, allowing them to begin working on the platform.
This article explains how to create a new user and assign them to a campaign.
Sign In to Knockio
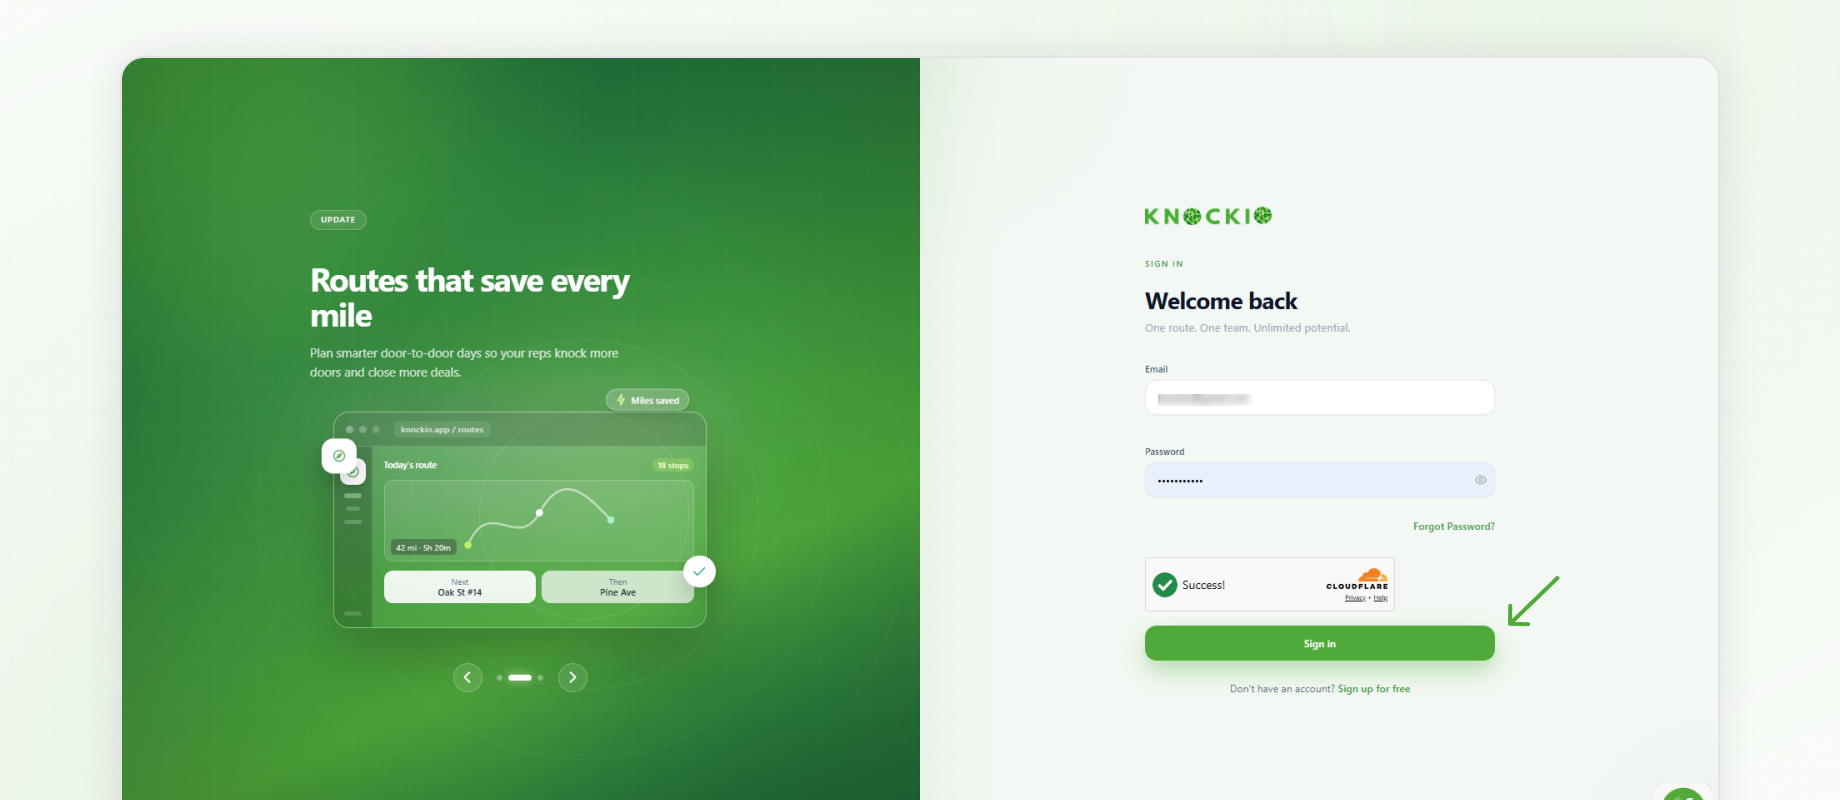
To begin, sign in to your Knockio workspace using your registered email address and password. After signing in, you'll be taken to the main dashboard, where you can manage users, campaigns, settings, and other workspace features.
Accessing the Users Section
To create or manage users:
Click the Settings icon in the bottom-left corner of the screen.
From the left-hand menu, select Users.
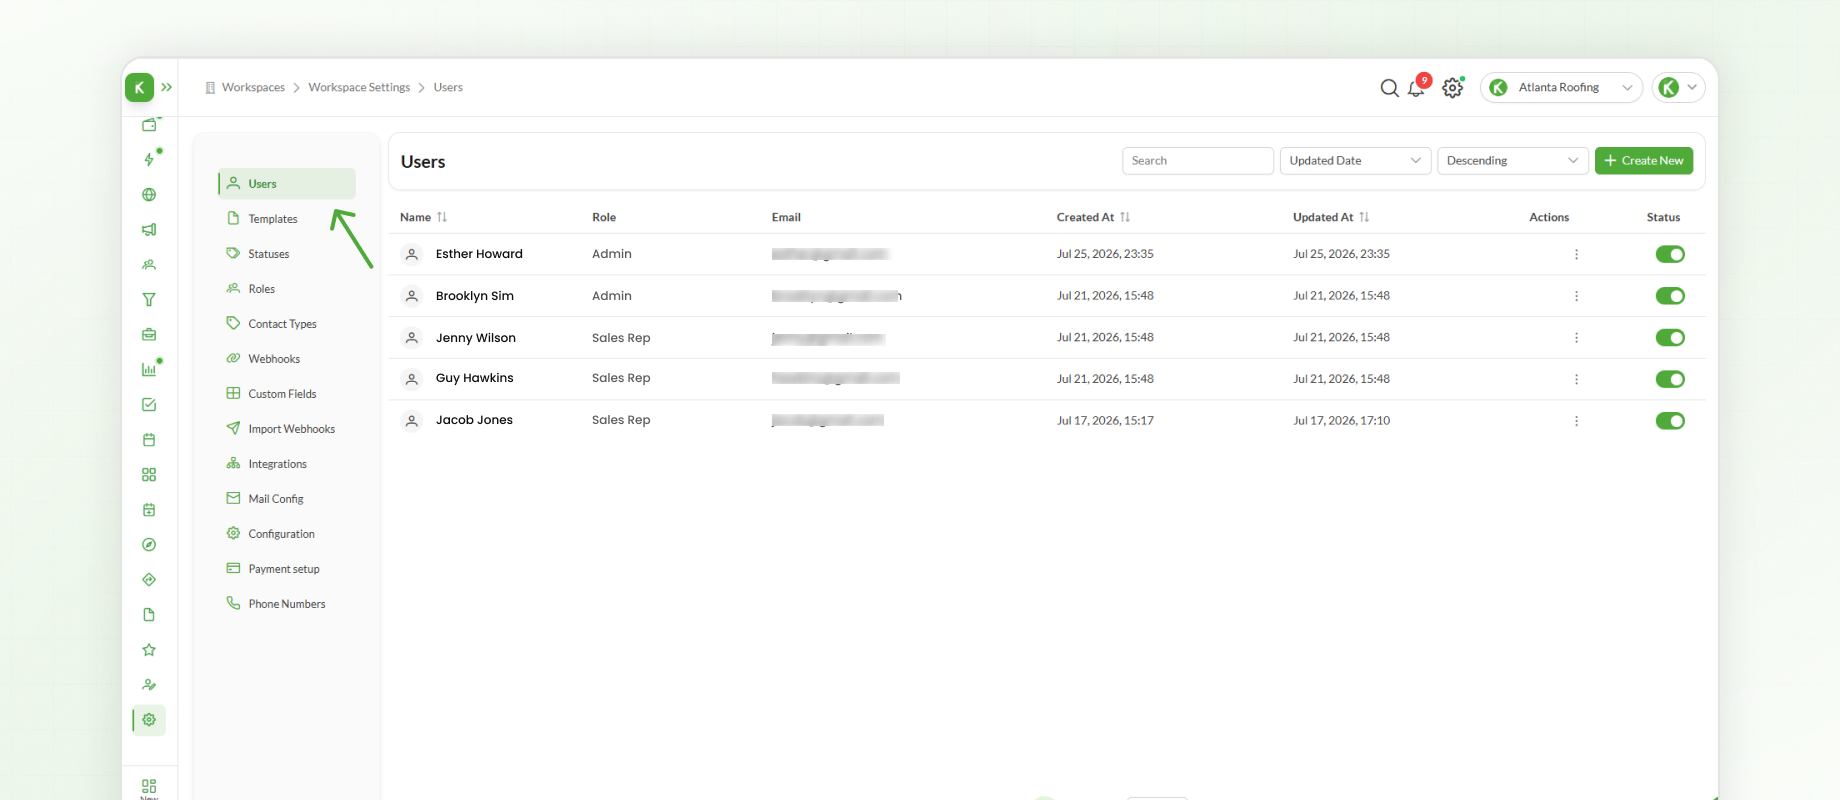
The Users section is where all workspace users are created and managed.
Creating a New User
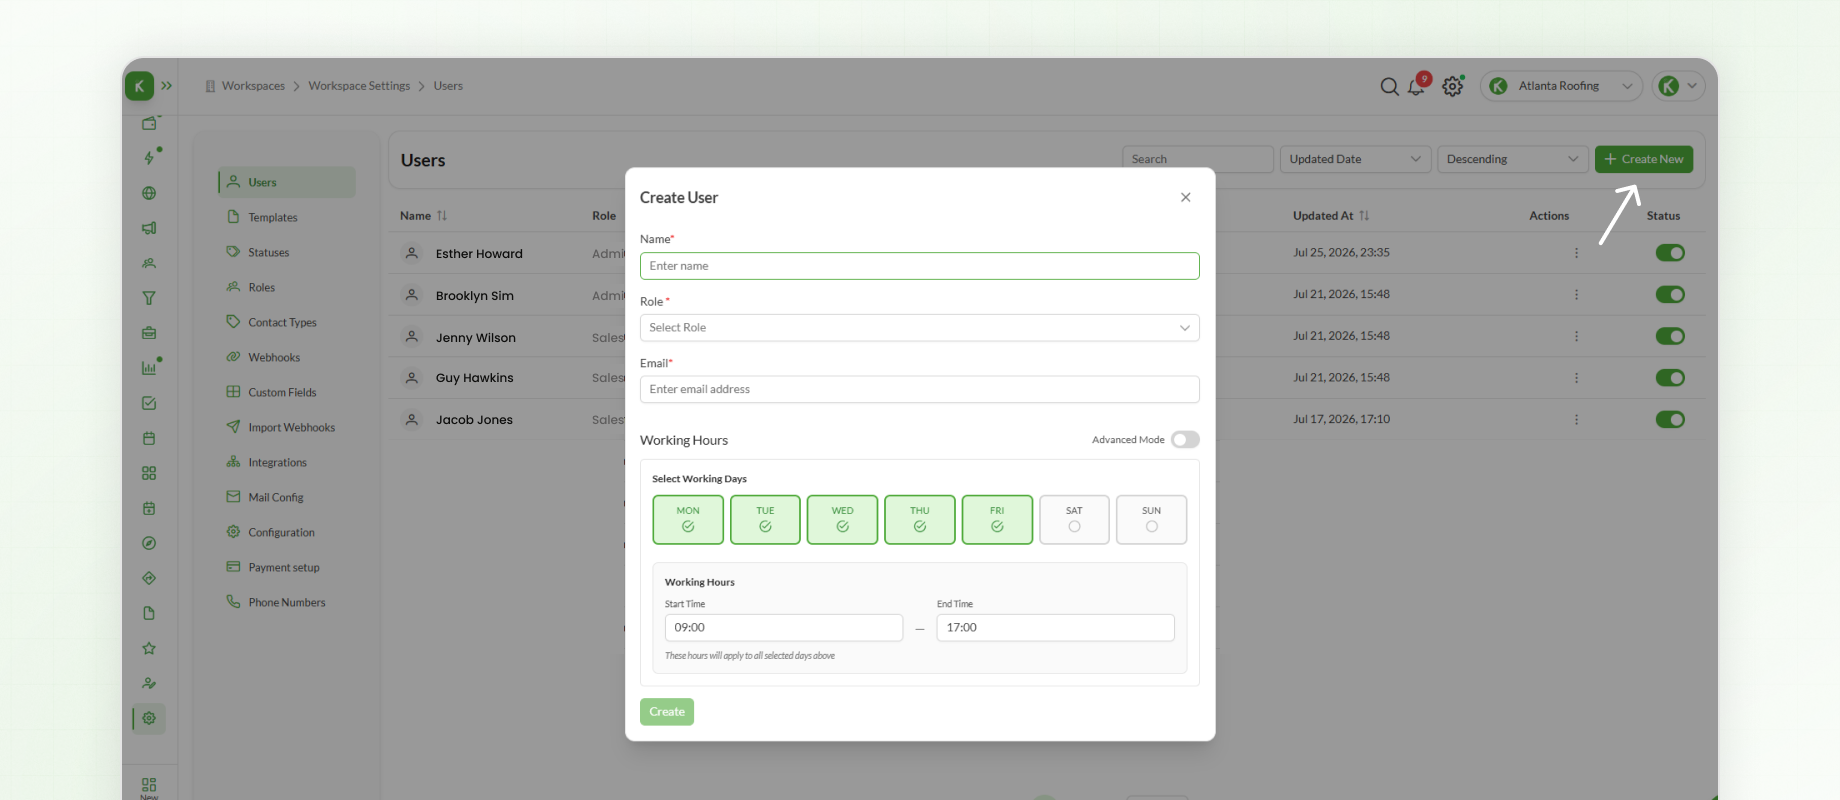
Click Create New to open the user creation window.
Enter the required information, including:
Name
Email Address
Working Hours
Next, assign a role to the user.
By default, every Knockio workspace includes two predefined roles:
Owner – Has full access to the workspace and all available features.
Agent – Designed for team members working in the field.
Knockio also supports custom roles with configurable permissions. These are covered in the next article.
After completing the remaining required fields, click Create.
The user will now be added to the workspace.
Assigning a User to a Campaign
Creating a user is only the first step. Before the user can begin working, they must be assigned to a campaign.
To assign a user:
Search for and open Campaigns from the left-hand menu.
Select the campaign you want the user to work in, then click Edit.
Scroll down to the Assign Users section and select the newly created user.
Click the Update Campaign at the top of the page to save your changes.
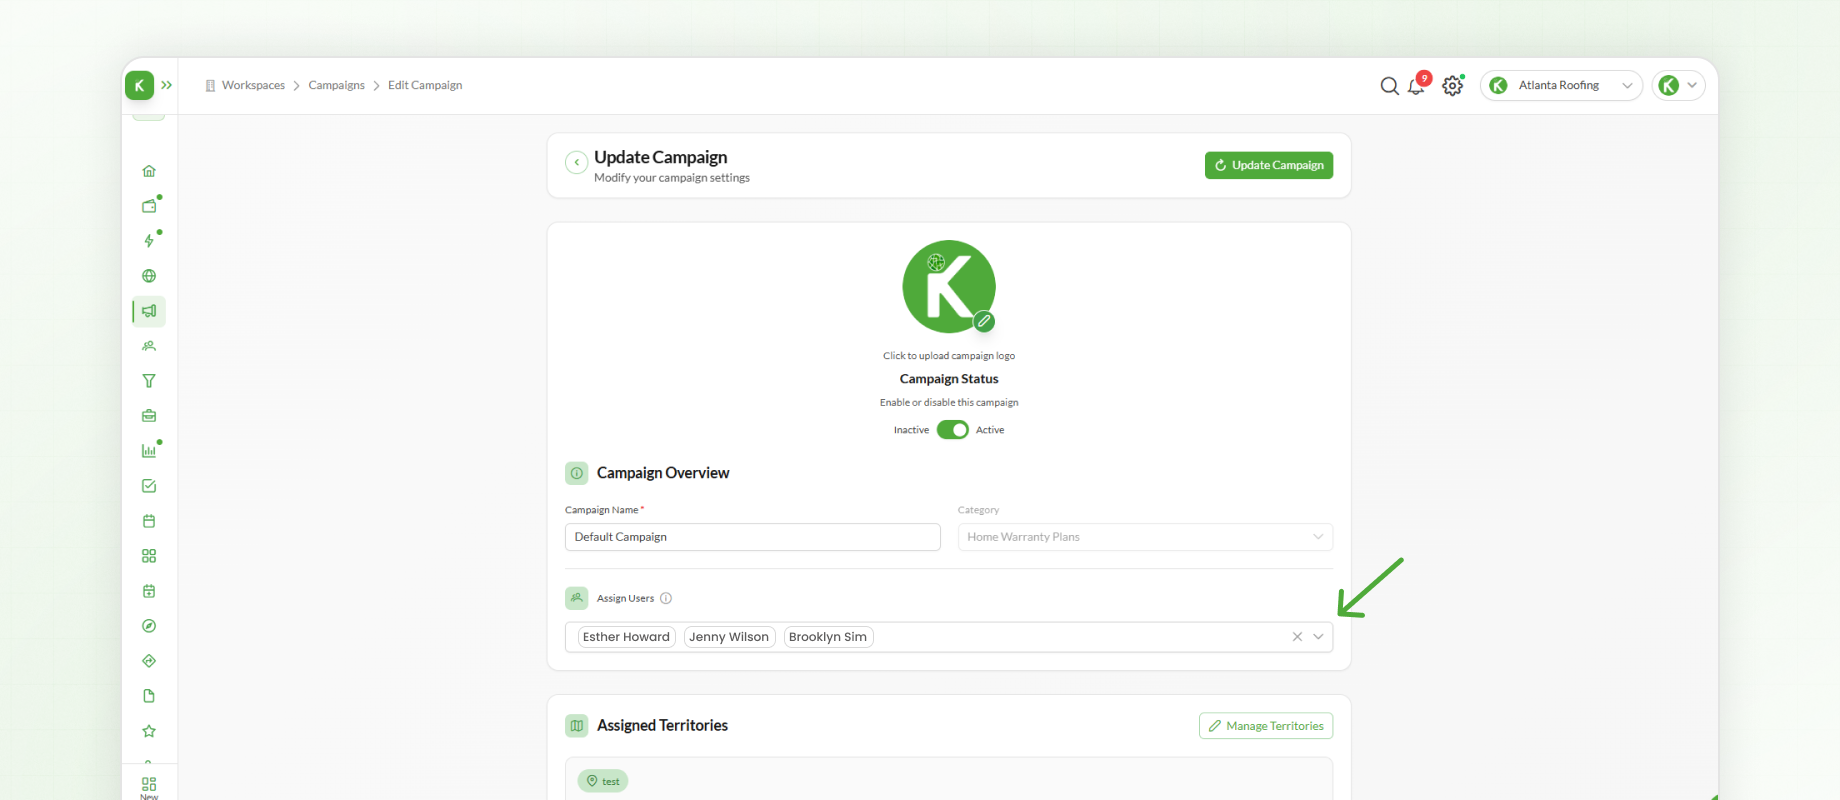
The user is now assigned to the selected campaign and is ready to begin working.
Note: Depending on how your roles and permissions are configured, users with Full data access to Campaigns may not require manual campaign assignments. This behaviour is explained in the Roles and Permissions article.
Next Steps
After creating users and assigning them to campaigns, the next step is configuring Roles and Permissions. This allows you to define exactly what each user can access and manage within the workspace.