
Creating Invoices
Learn how to create, customize, send, and manage invoices in Knockio.
Table of Contents
Overview
The Invoices module allows users to create, manage, send, and track customer invoices directly within Knockio. Invoices can be linked to a Lead or an Estimate, keeping billing information connected to the related customer or project.
This article explains how to create an invoice, add billing details and line items, review the invoice, and send it to the customer.
Accessing the Invoices Module
To create or manage invoices:
Select Financials from the left-hand navigation menu.
Select Invoices.
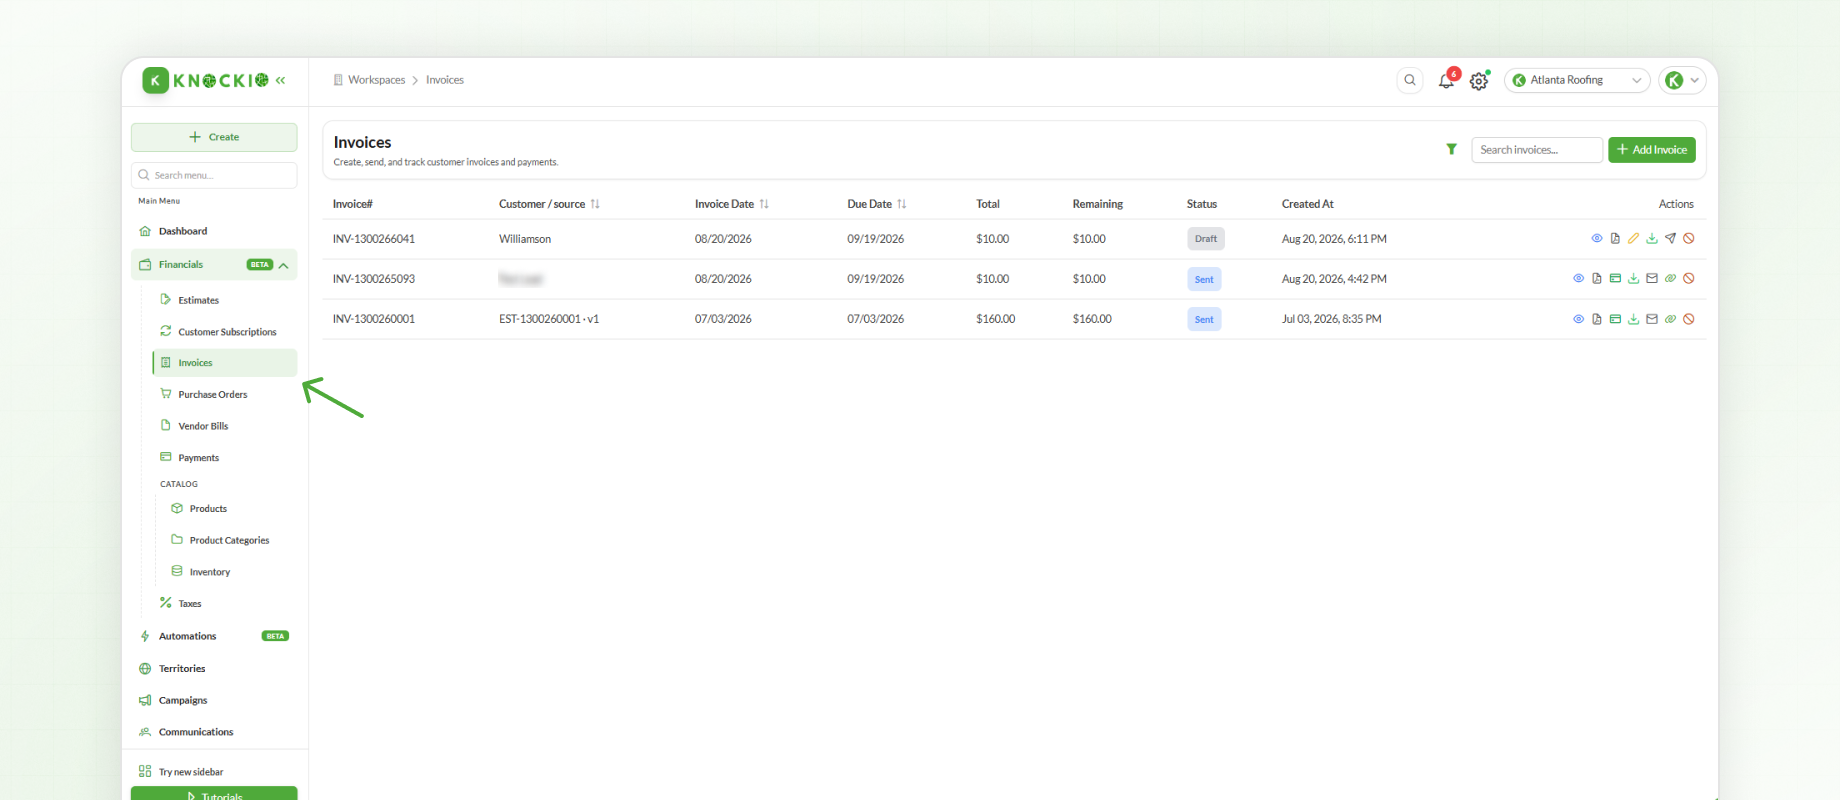
The Invoices module displays existing invoices and their current statuses. From this section, you can review existing invoices or create new ones.
Creating an Invoice
To create a new invoice:
Click Add Invoice.
Select whether the invoice should be created for a Lead or an accepted Estimate.
Select the required lead or estimate.
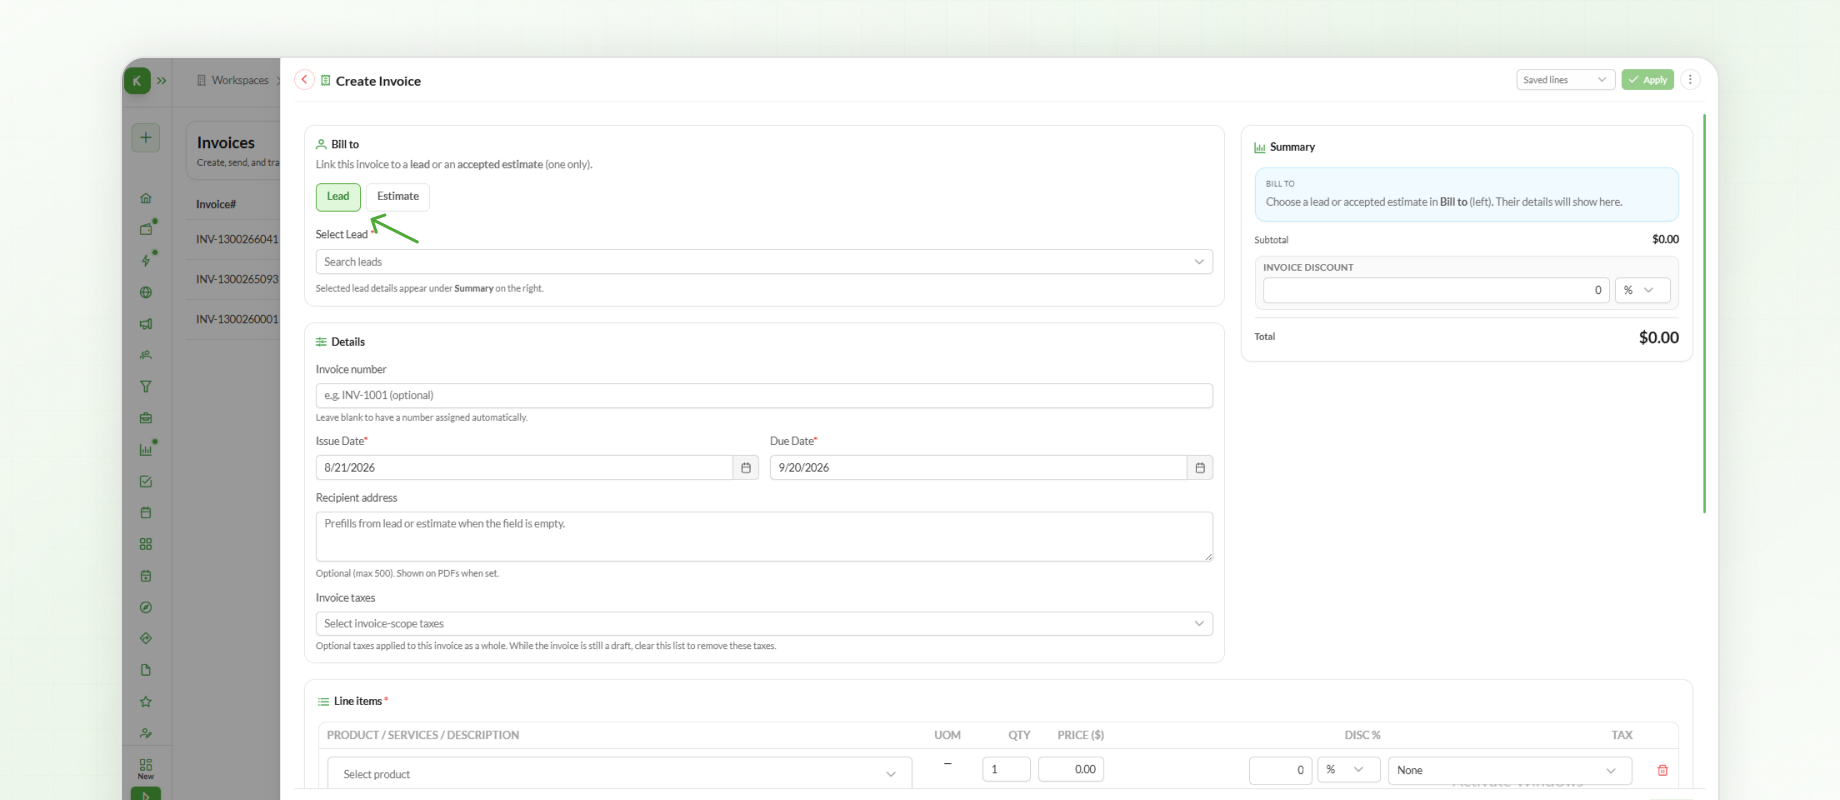
The selected customer information will appear in the invoice.
Adding Invoice Details
The Details section contains the basic information for the invoice.
Enter or review the following:
Invoice Number
Issue Date
Due Date
Recipient Address
Invoice Taxes
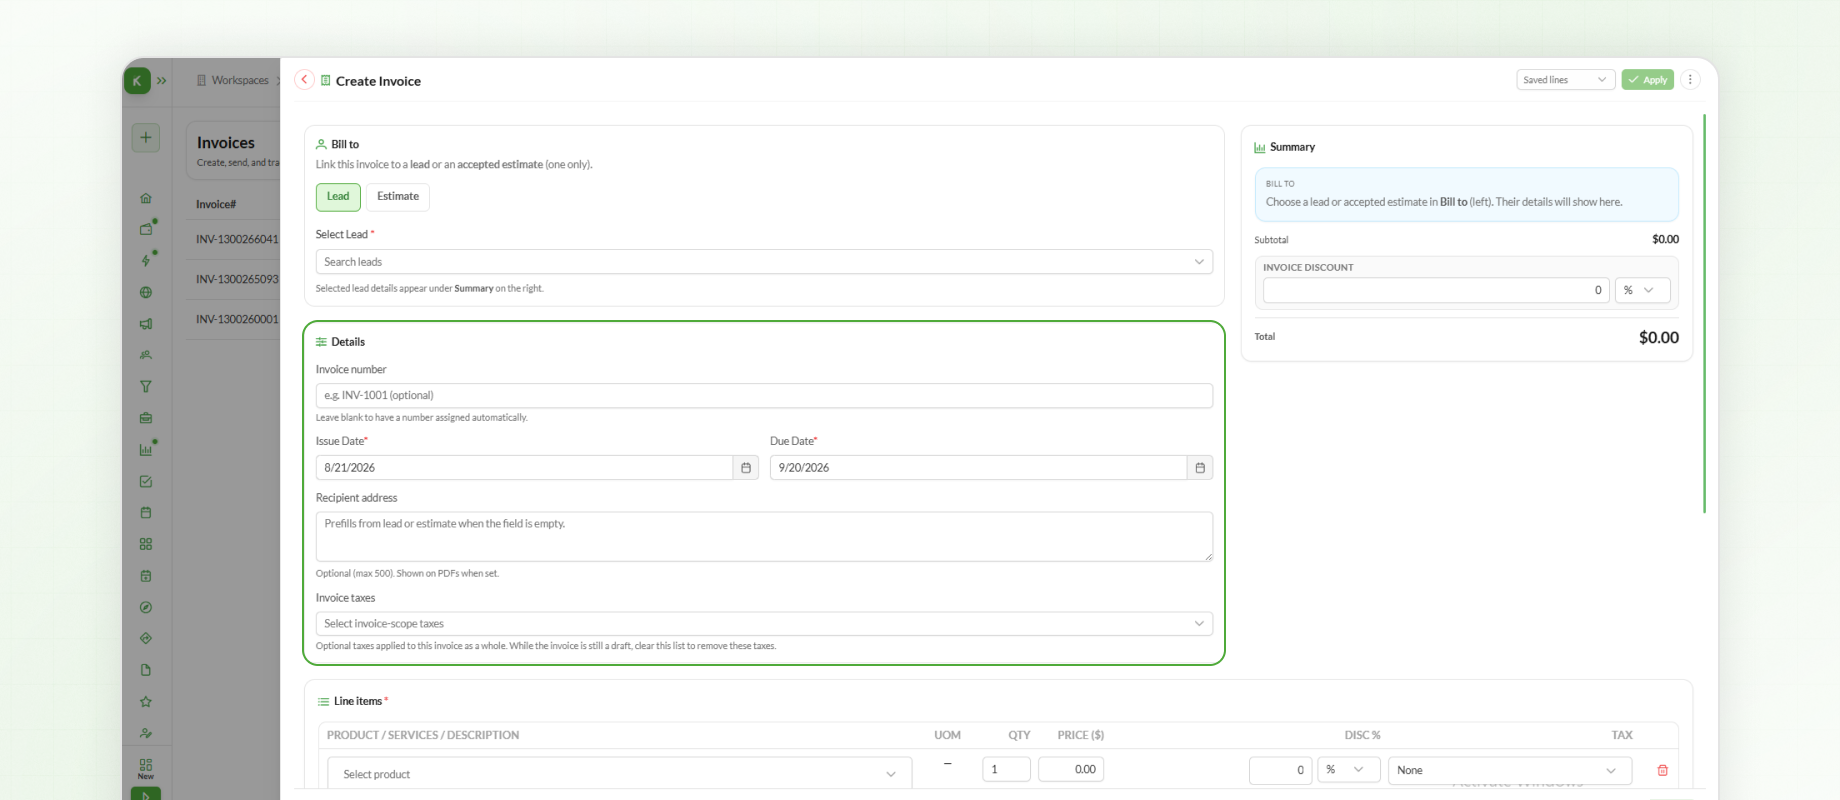
The invoice number can be entered manually or left empty to allow Knockio to assign a number automatically.
The Recipient Address can also be left empty. When no address is entered, Knockio can prefill it using information from the selected lead or estimate.
Adding Line Items
The Line Items section is used to add the products or services included in the invoice.
To add a line item:
Select a Product.
Enter the Quantity.
Enter the Price.
Add a Discount or Tax, if required.
Add a Description, if needed.
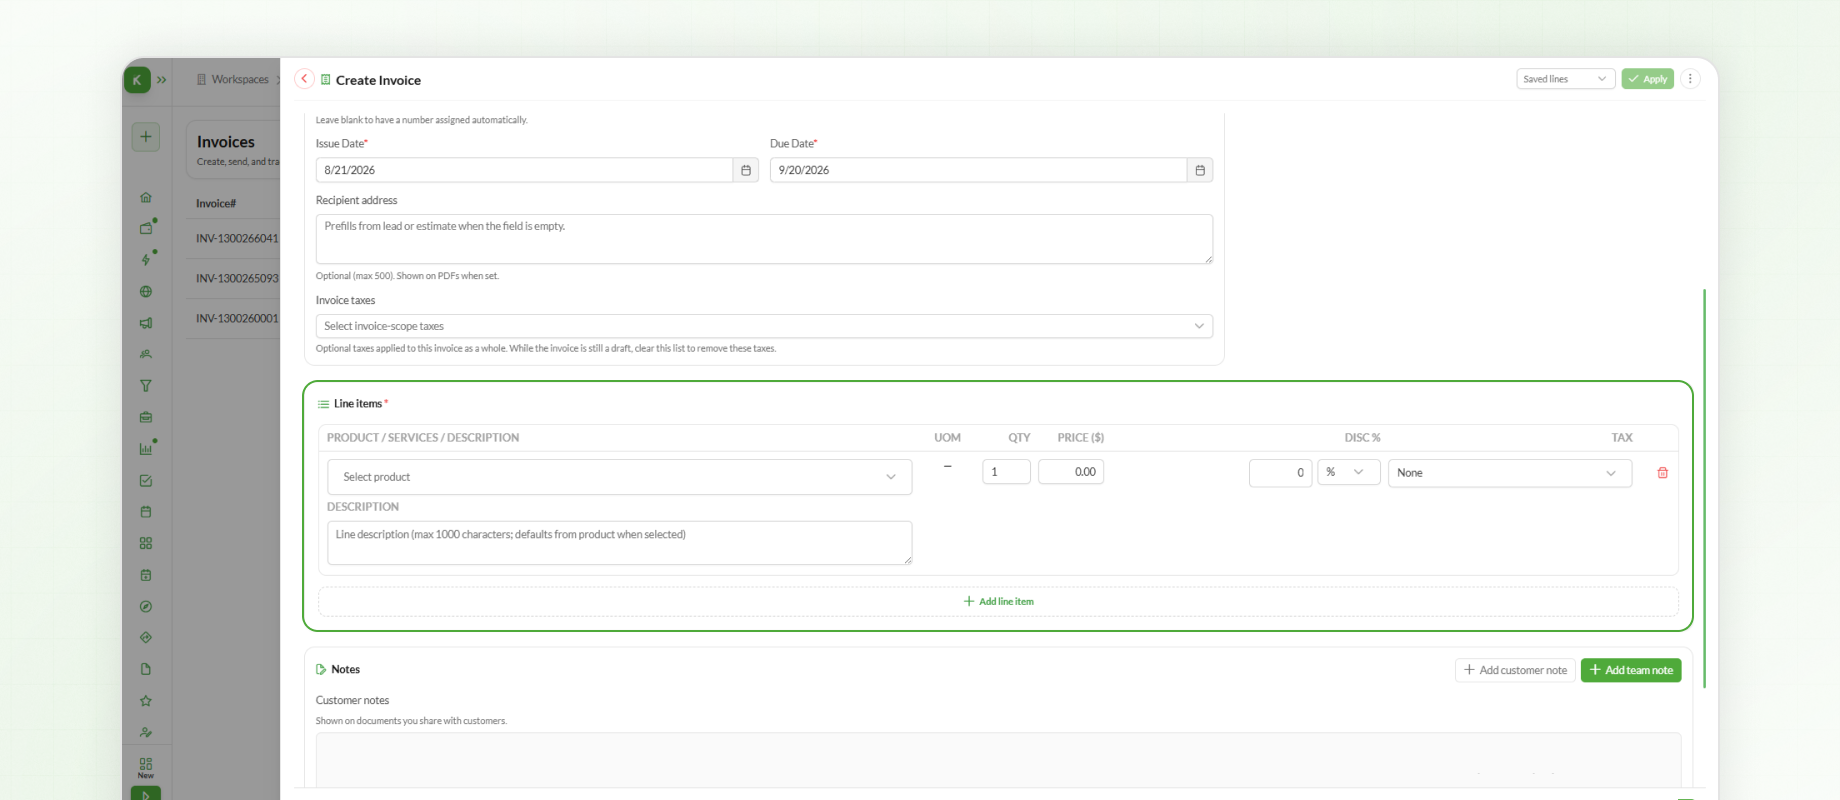
To add additional products or services, click Add Line Item and repeat the process.
The invoice summary updates automatically as line items are added.
Adding Notes
The Notes section allows you to add information for customers or internal team members.
Customer Notes are shown on documents that are shared with customers.
Team Notes are visible only to internal users and can be used for reminders, instructions, or other invoice-related information.
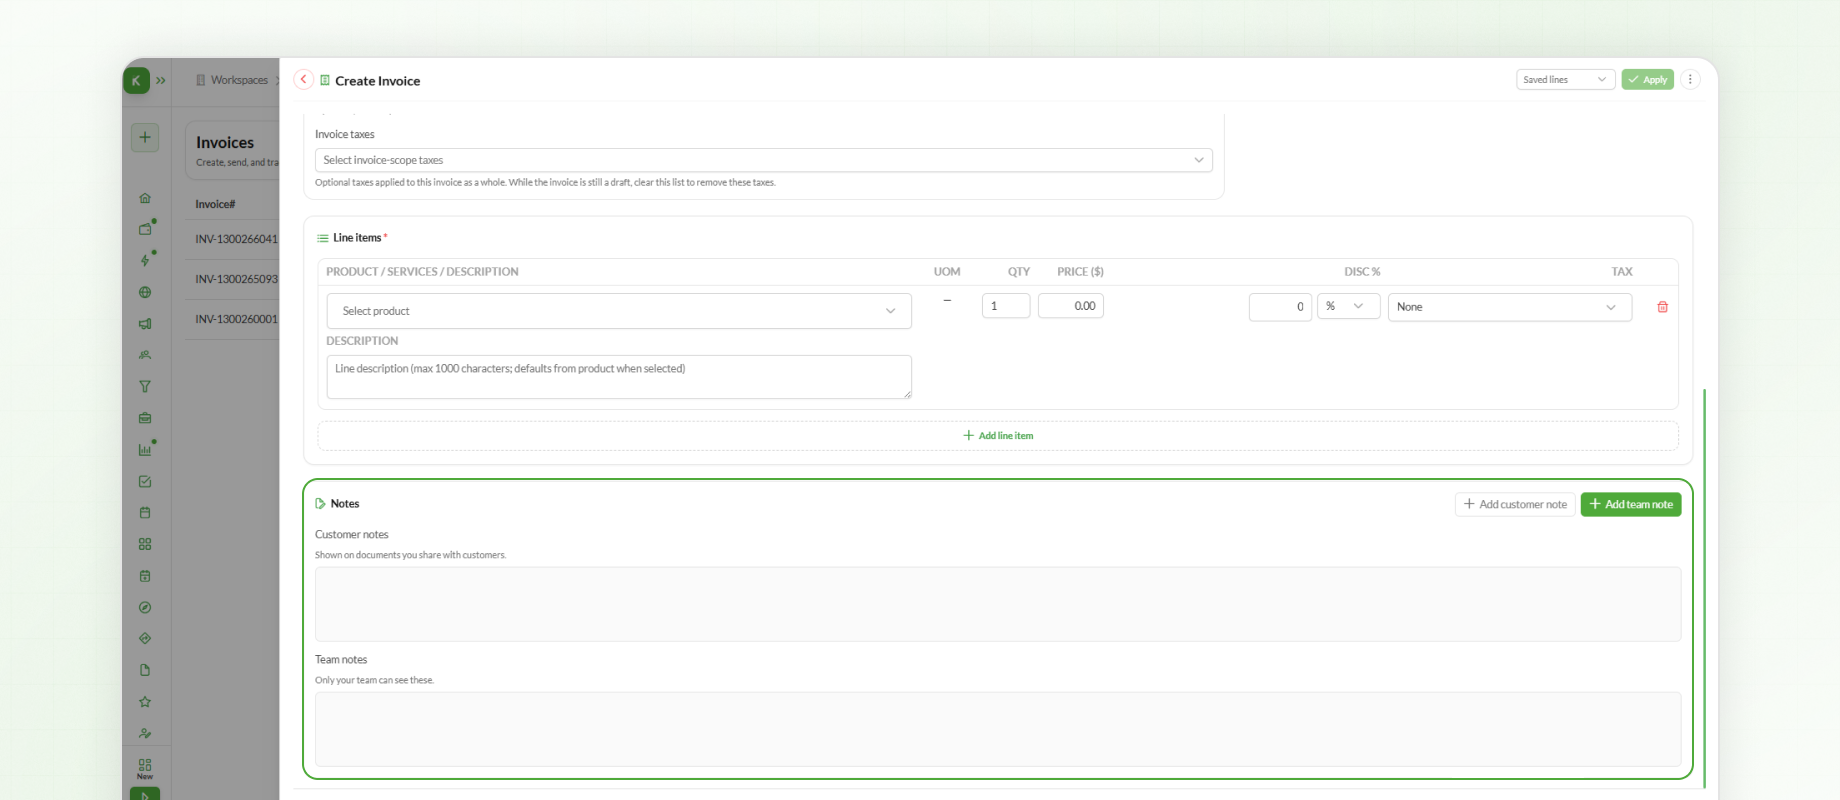
After entering all the required information, Click Save Invoice.
The invoice is added to the Invoices module with a Draft status.
While the invoice remains in Draft status, you can make changes and add or update information as needed. Once the invoice is changed to Sent, it becomes locked and no further changes can be made.
Previewing the Invoice
To preview an invoice:
Locate the invoice in the Invoices module.
Click the Eye icon under Actions.
It includes:
Overview
Payments
Notes
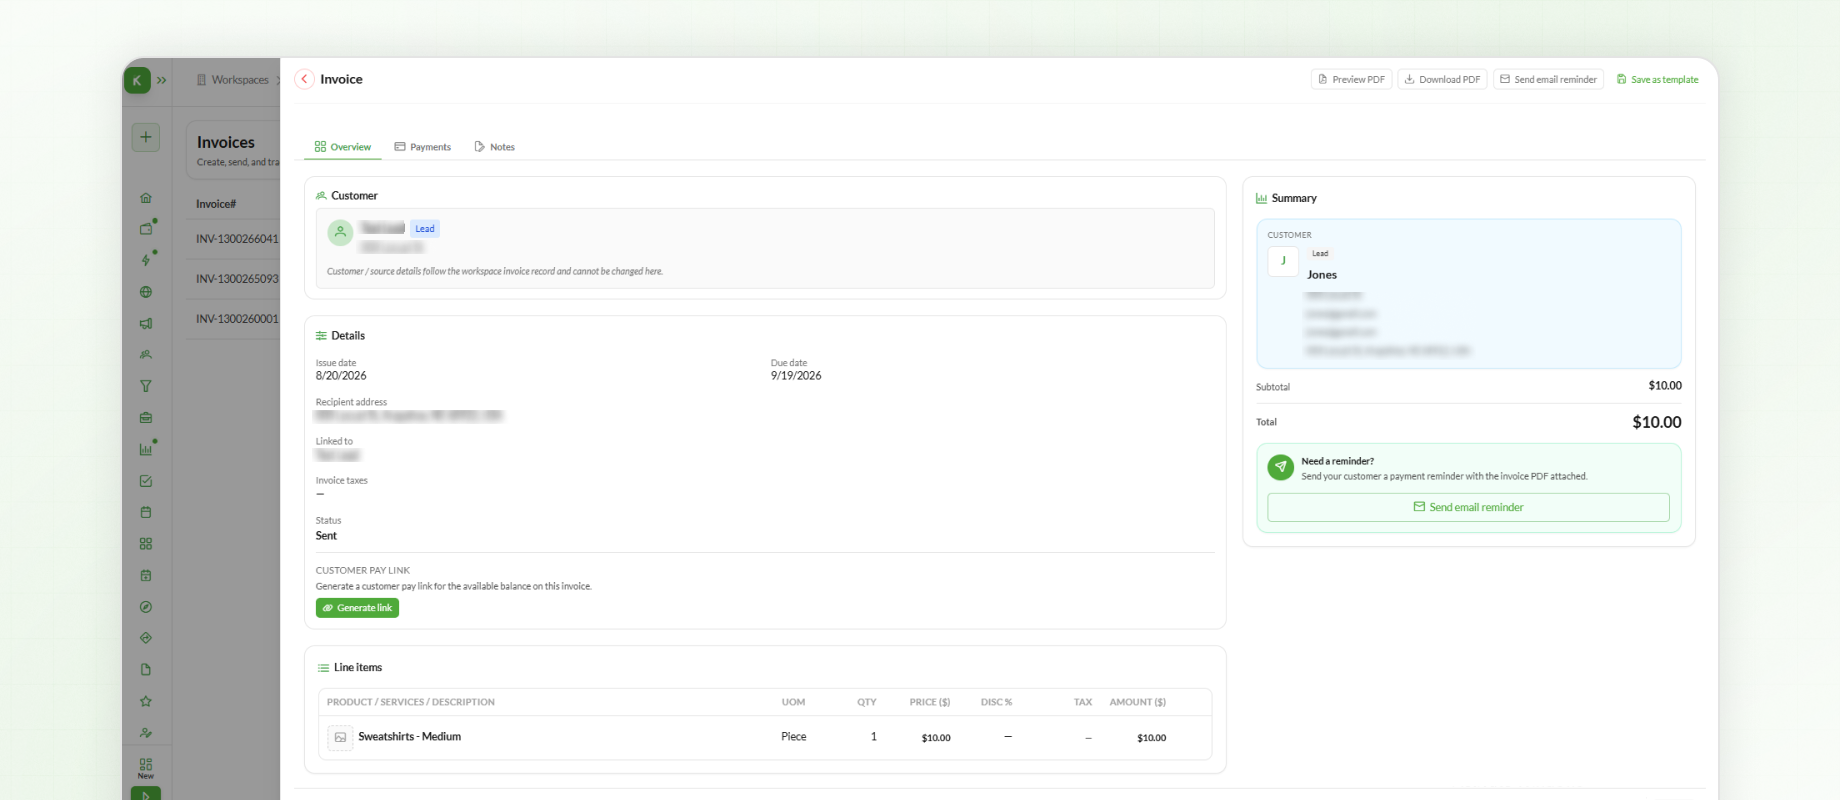
The invoice overview displays the customer details, invoice information, and line items. You can add payments and notes directly from this preview section as well.
You can also Preview PDF, Download PDF, Send Invoice, or Save as template from the top of the invoice.
Sending the Invoice
After opening the invoice preview, the Ready to send section appears on the right side with two options:
Mark as sent – Changes the invoice status to Sent without sending an email.
Send by email – Sends the invoice directly to the customer by email.
If your email mailbox is connected, click Send by email to open the email window. You can review the recipient, add members, write a custom message, and send the invoice with the PDF attached.
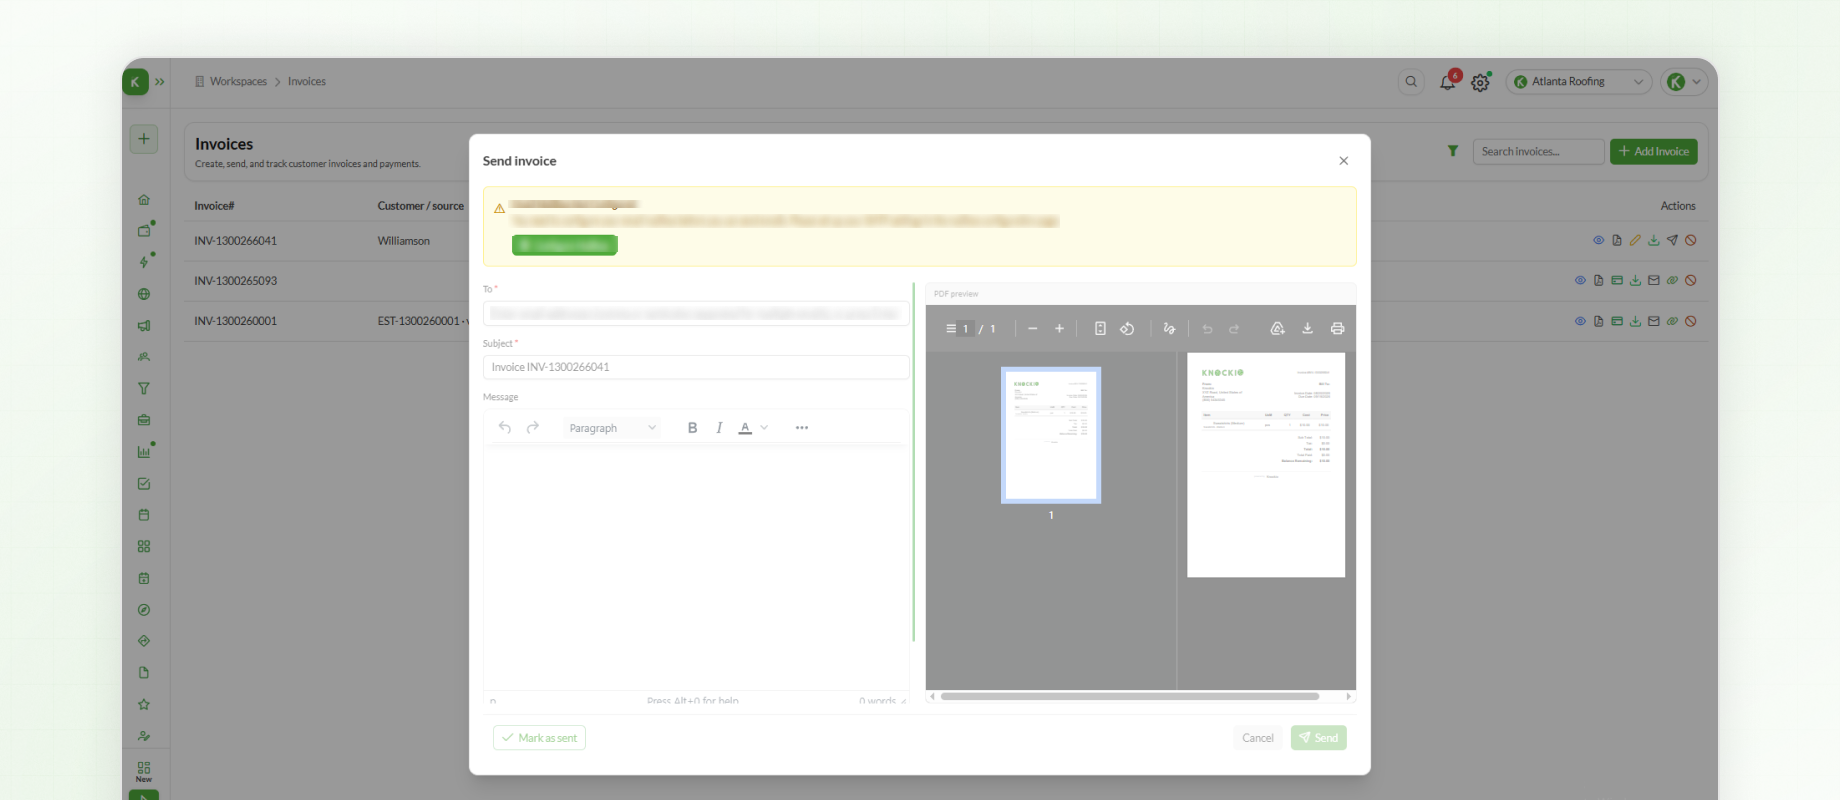
If you have already shared the invoice with the customer through another method, click Mark as sent to change the invoice status without sending an email.
Once the invoice is marked as Sent, it can no longer be edited.
Generating a Customer Payment Link
After an invoice is marked as Sent, a Customer Pay Link section appears below the invoice details.
To generate a payment link:
Open the sent invoice.
Go to the Overview tab.
Click Generate link under Customer Pay Link.
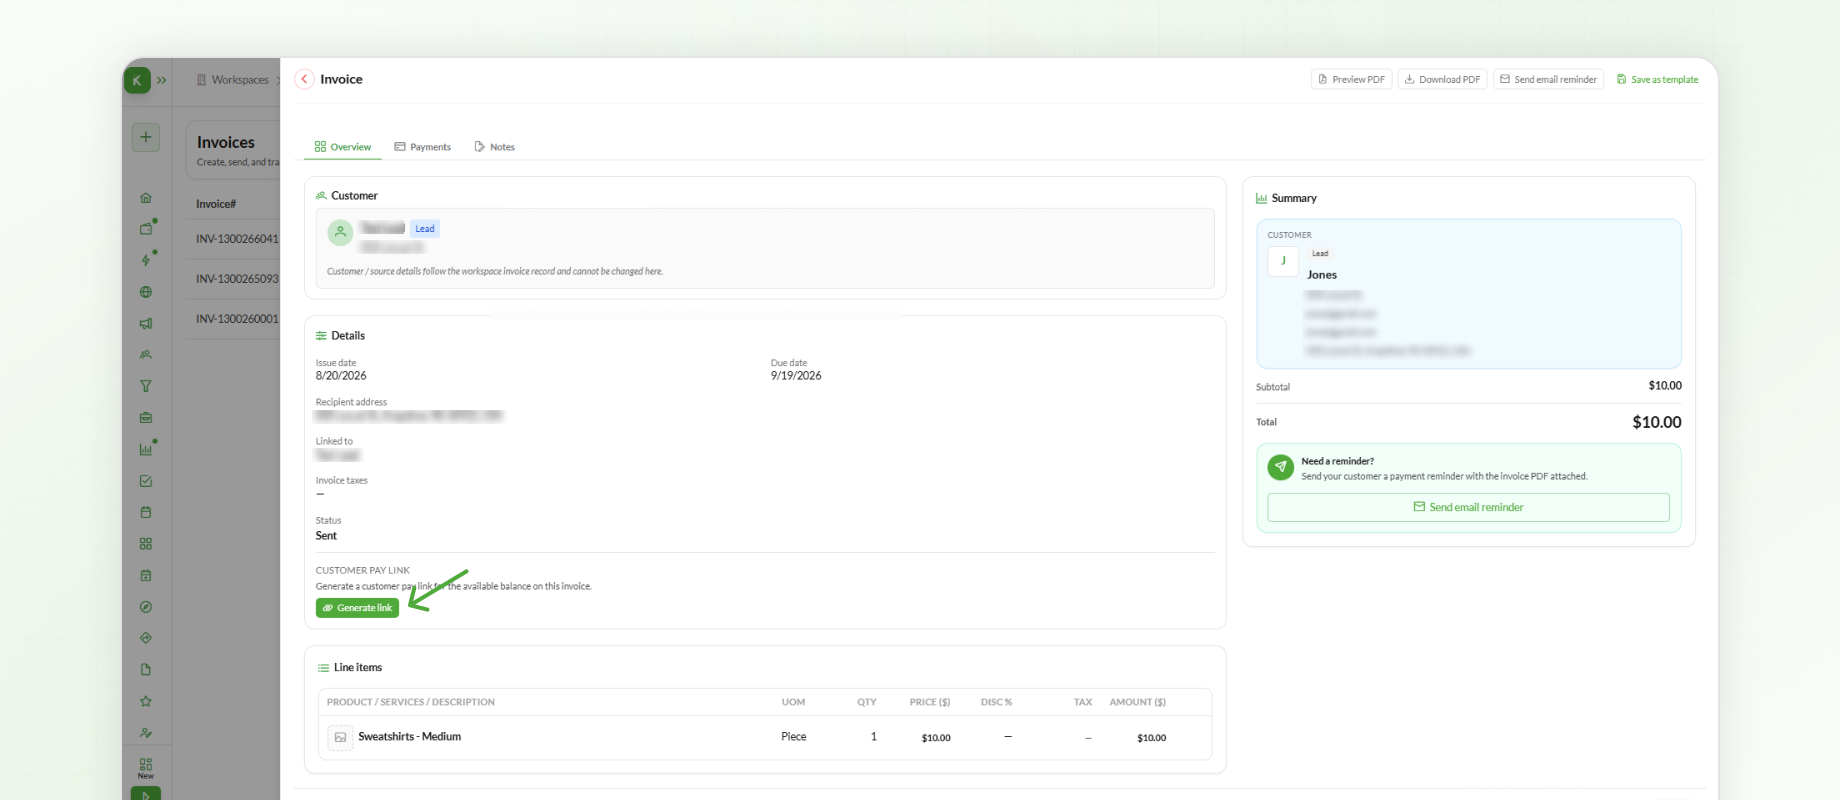
If your Knockio Merchant Account has payment processing enabled, the customer can use the payment link to pay the invoice directly.
If you do not have a Merchant Account, you can still track and manage invoice payments through the Payments module.
Next Steps
You have now set up and delivered your customer invoices in Knockio. With billing statements generated and sent, you can move on to Creating and Managing Payments to log incoming revenue, handle partial balances, and collect payments online via direct links.