
Creating and Managing Payments.
Record payments, track payment status, and collect customer payments online.
Table of Contents
Overview
The Payments module allows you to record and manage incoming and outgoing payments in one place. Payments can be linked to Invoices or Vendor Bills, making it easier to keep track of money received from customers and payments made to vendors.
If you have a Knockio Payments Merchant account, you can also generate payment links that customers can use to make payments online. This article explains how to create payments, record payments from different areas of Knockio, and generate payment links.
Accessing the Payments Module
To create or manage payments:
Select Payments from the left-hand navigation menu.
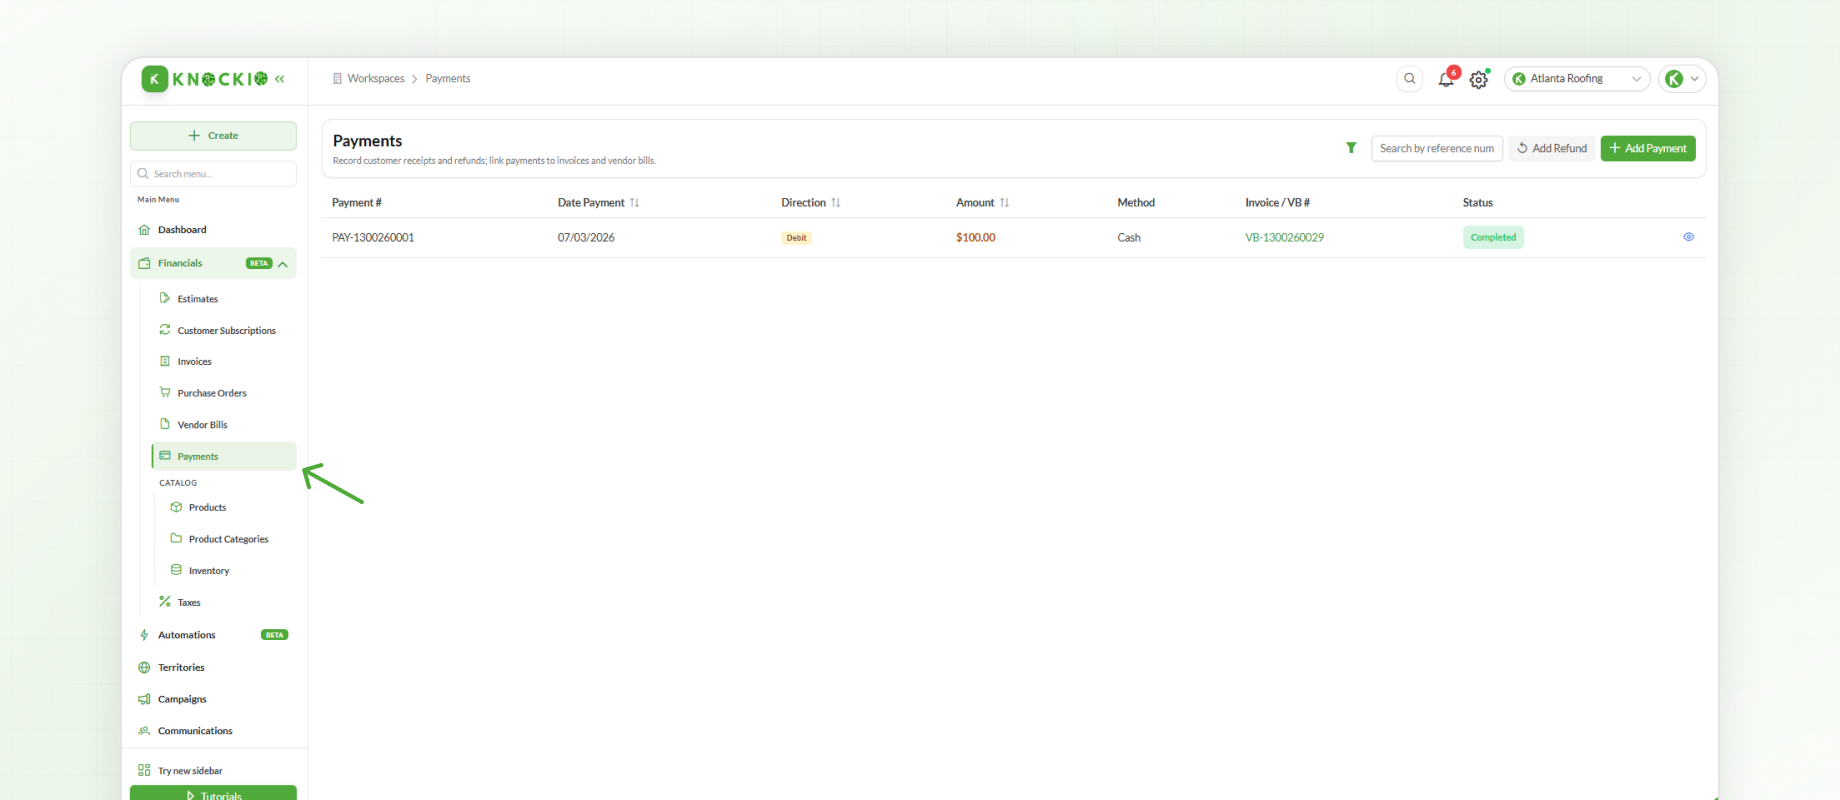
The Payments module displays all recorded payments and their current status, including:
Overdue
Paid
Pending
Cancelled
Payments can represent either money received from customers or money paid to vendors, depending on what the payment is linked to.
Creating a Payment
To create a new payment:
Click Add Payment.
Payments can be associated with either an Invoice or a Vendor Bill.
Invoice – Records money received from a customer.
Vendor Bill – Records money paid to a vendor.
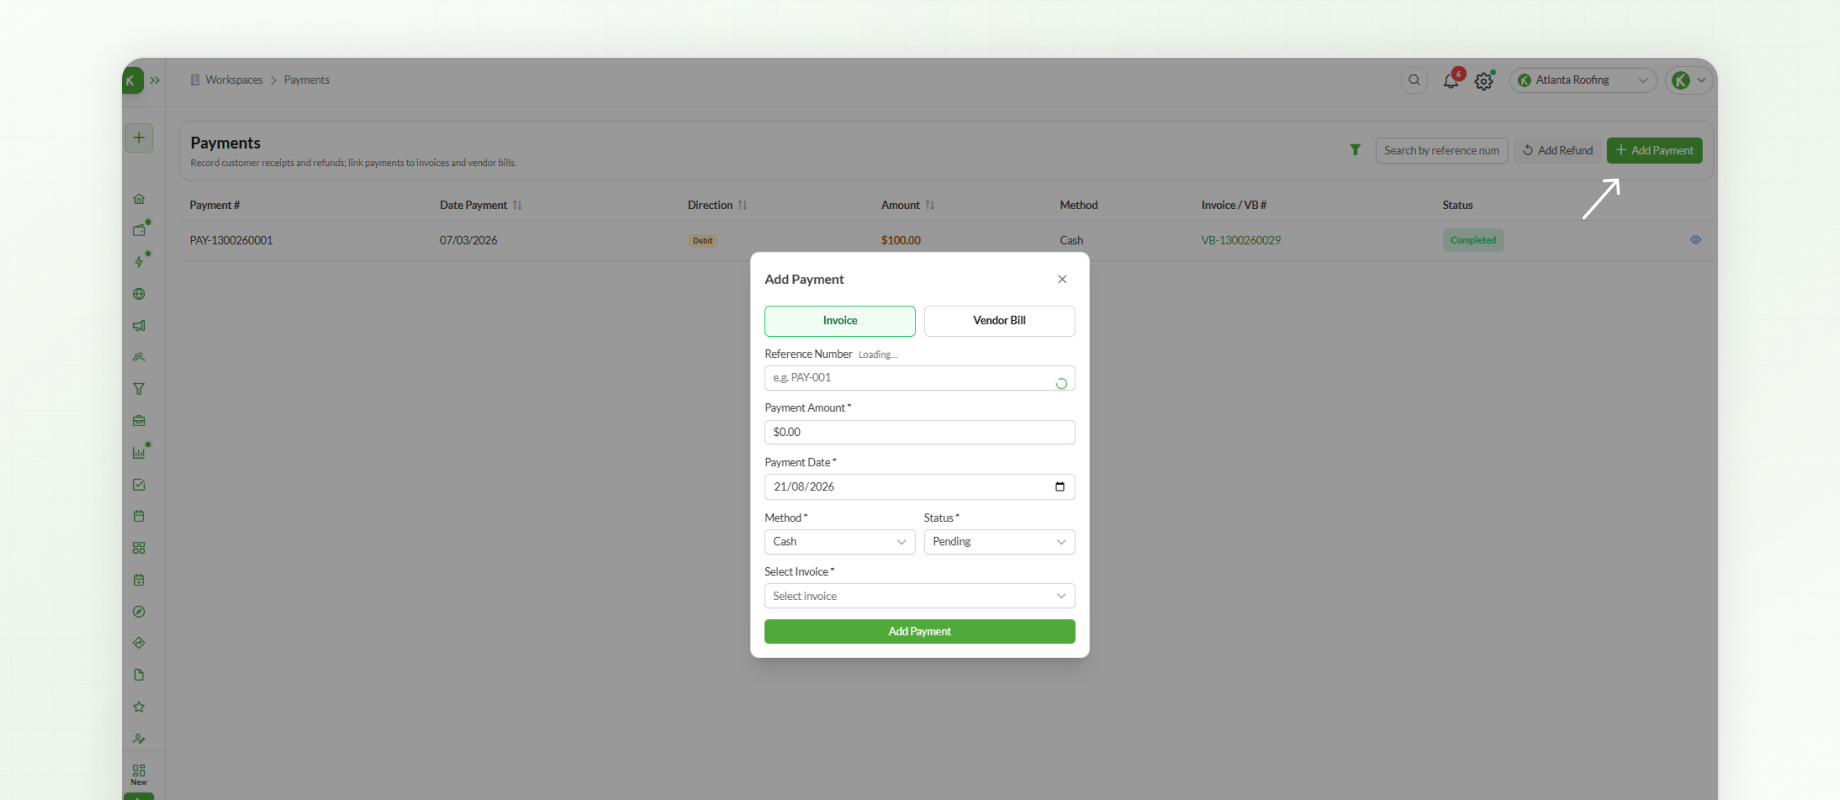
For example, a payment recorded against an invoice is treated as a customer payment and appears as a Credit.
Entering Payment Details
Enter the information required for the payment.
This includes:
Reference Number – Automatically generated when the payment is created. You can change the reference number if needed.
Amount – Enter the payment amount. When an invoice is selected, the amount is automatically populated from the invoice. The payment amount can be equal to or less than the invoice total.
Payment Date – Select the date when the payment was made or received.
Payment Method – Select the method used for the transaction, such as wire transfer, credit card, or check.
Payment Status – Select the current status of the payment, such as completed, pending, failed, or cancelled.
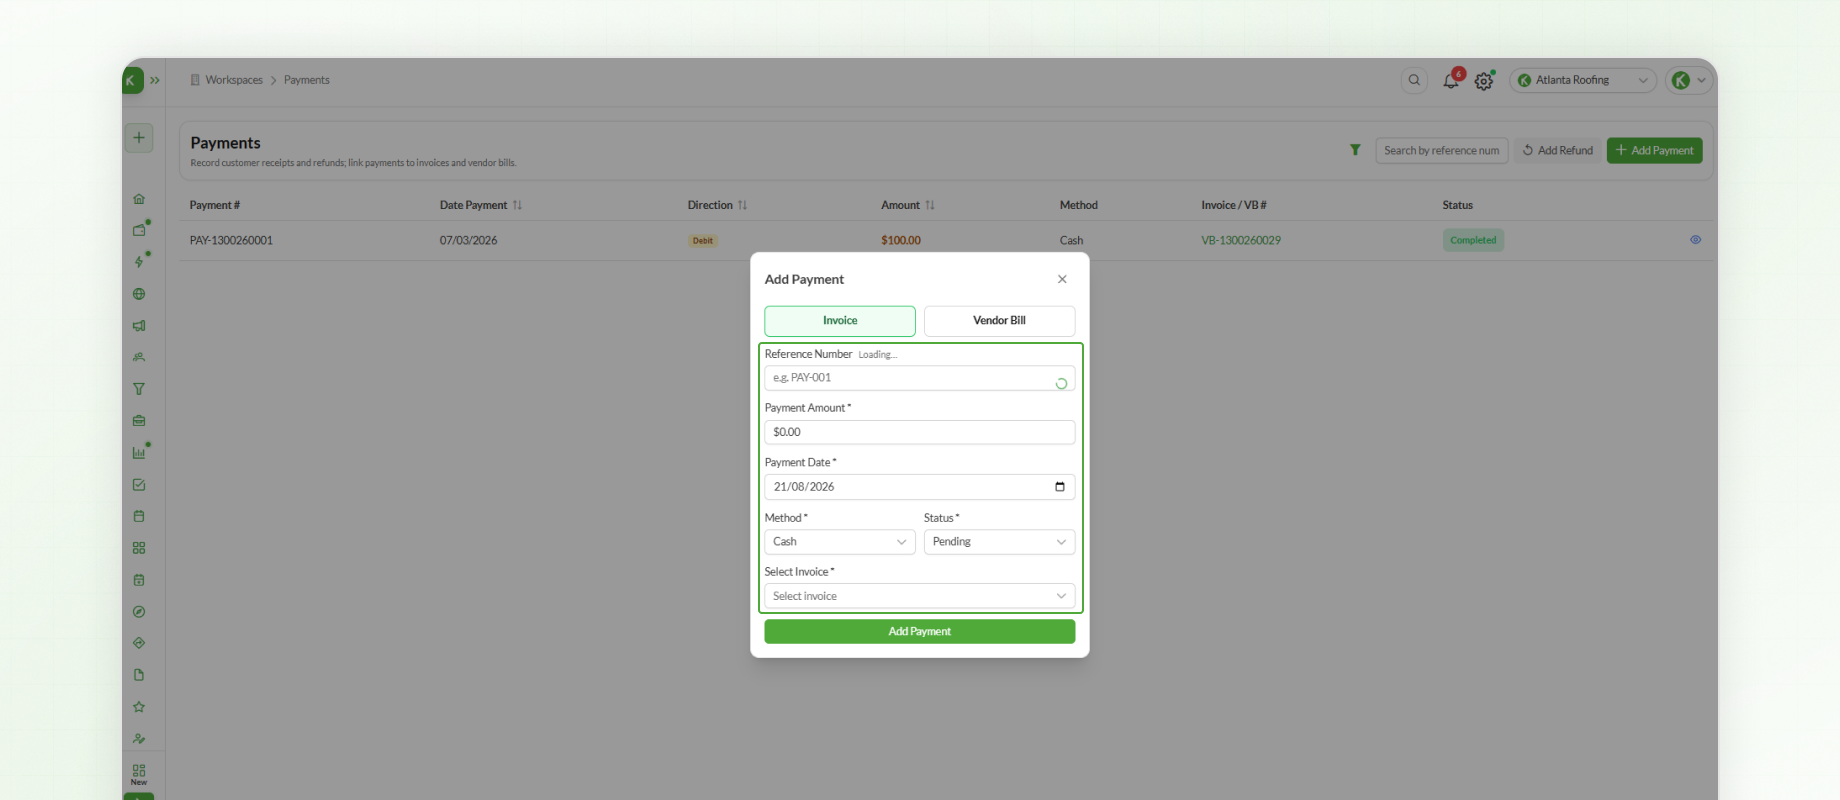
Payments can also be recorded as partial payments. For example, if an invoice is for $1,000, you can record a $500 payment and collect the remaining balance later.
Saving the Payment
After entering all the required payment details:
Review the payment information.
Click Add Payment.
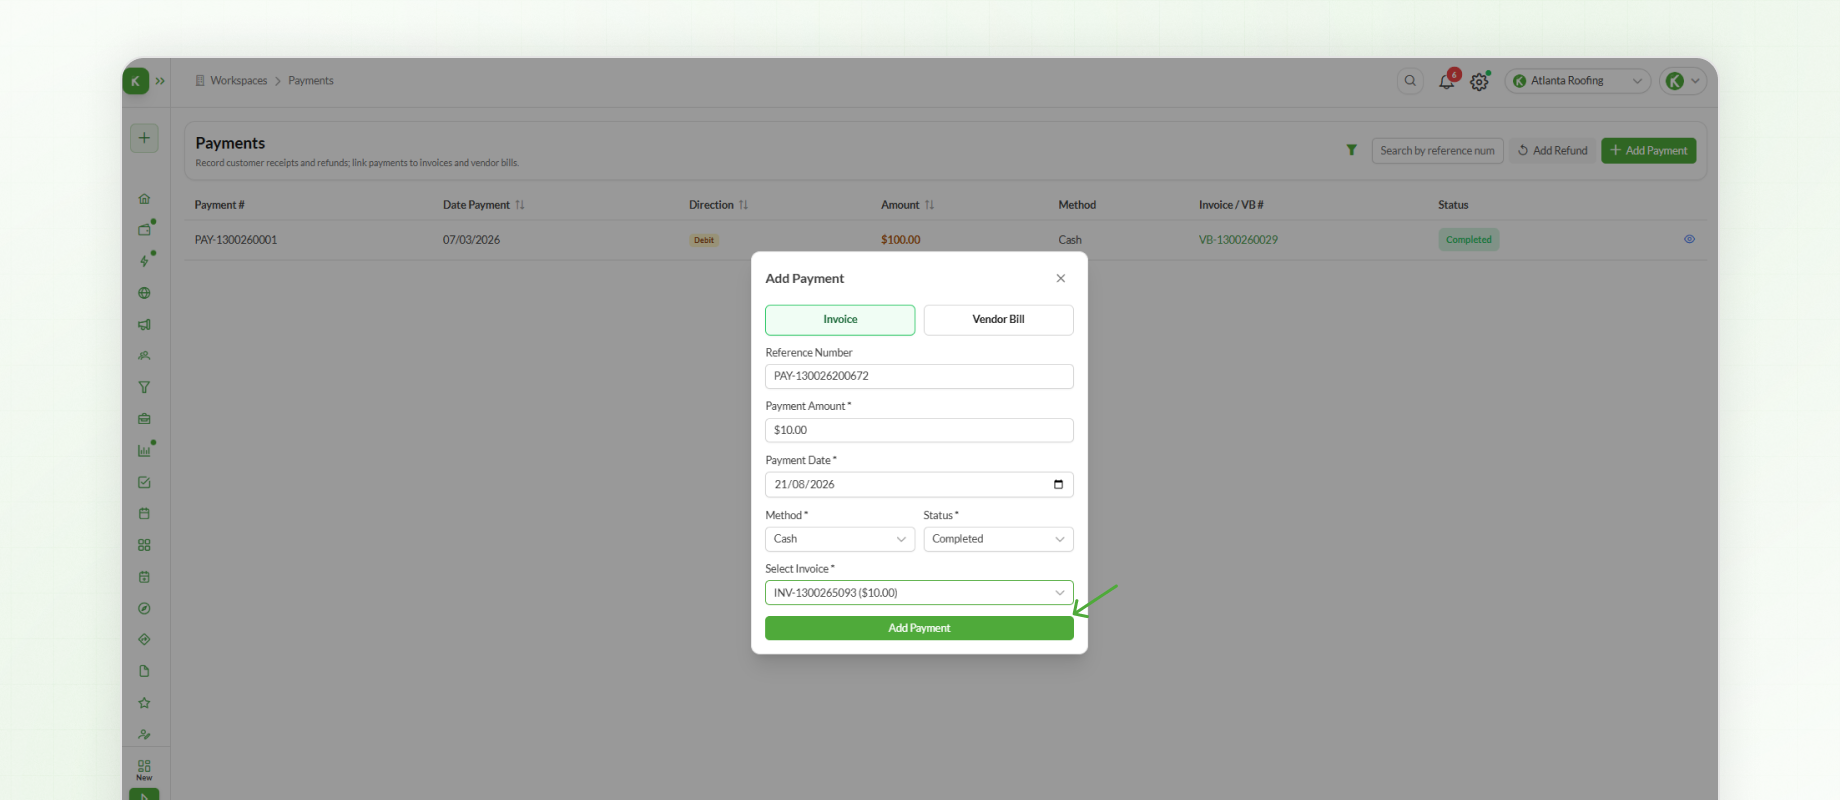
The payment is added to the Payments module and linked to the selected invoice or vendor bill.
Recording Payments from an Invoice
Payments can also be recorded directly from an invoice.
To record a payment from an invoice:
Select Invoices from the left-hand navigation menu.
Open the required invoice using the View icon.
Record the payment from the invoice.
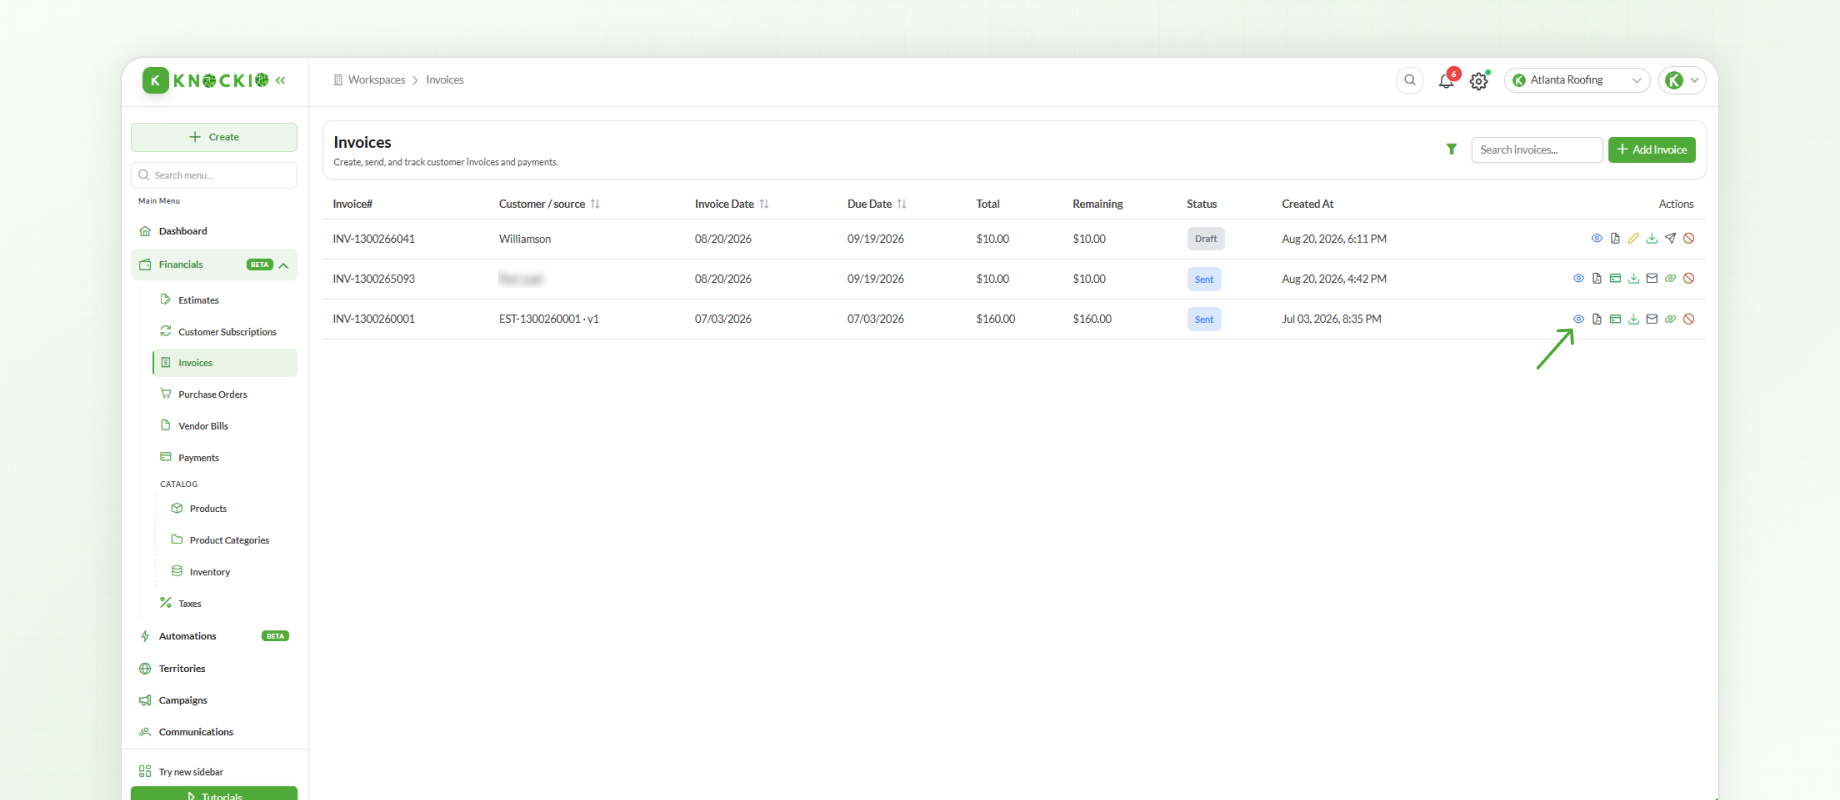
Payments recorded from an invoice are automatically linked to that invoice, allowing you to view the payment details alongside the invoice information.
Recording Payments from a Lead
Payments can also be recorded from a lead's financial information.
To record a payment from a lead:
Select Leads from the left-hand navigation menu.
Open the required lead and click Edit.
Navigate to the Financials section.
Select Payments.
Click Record Payment.
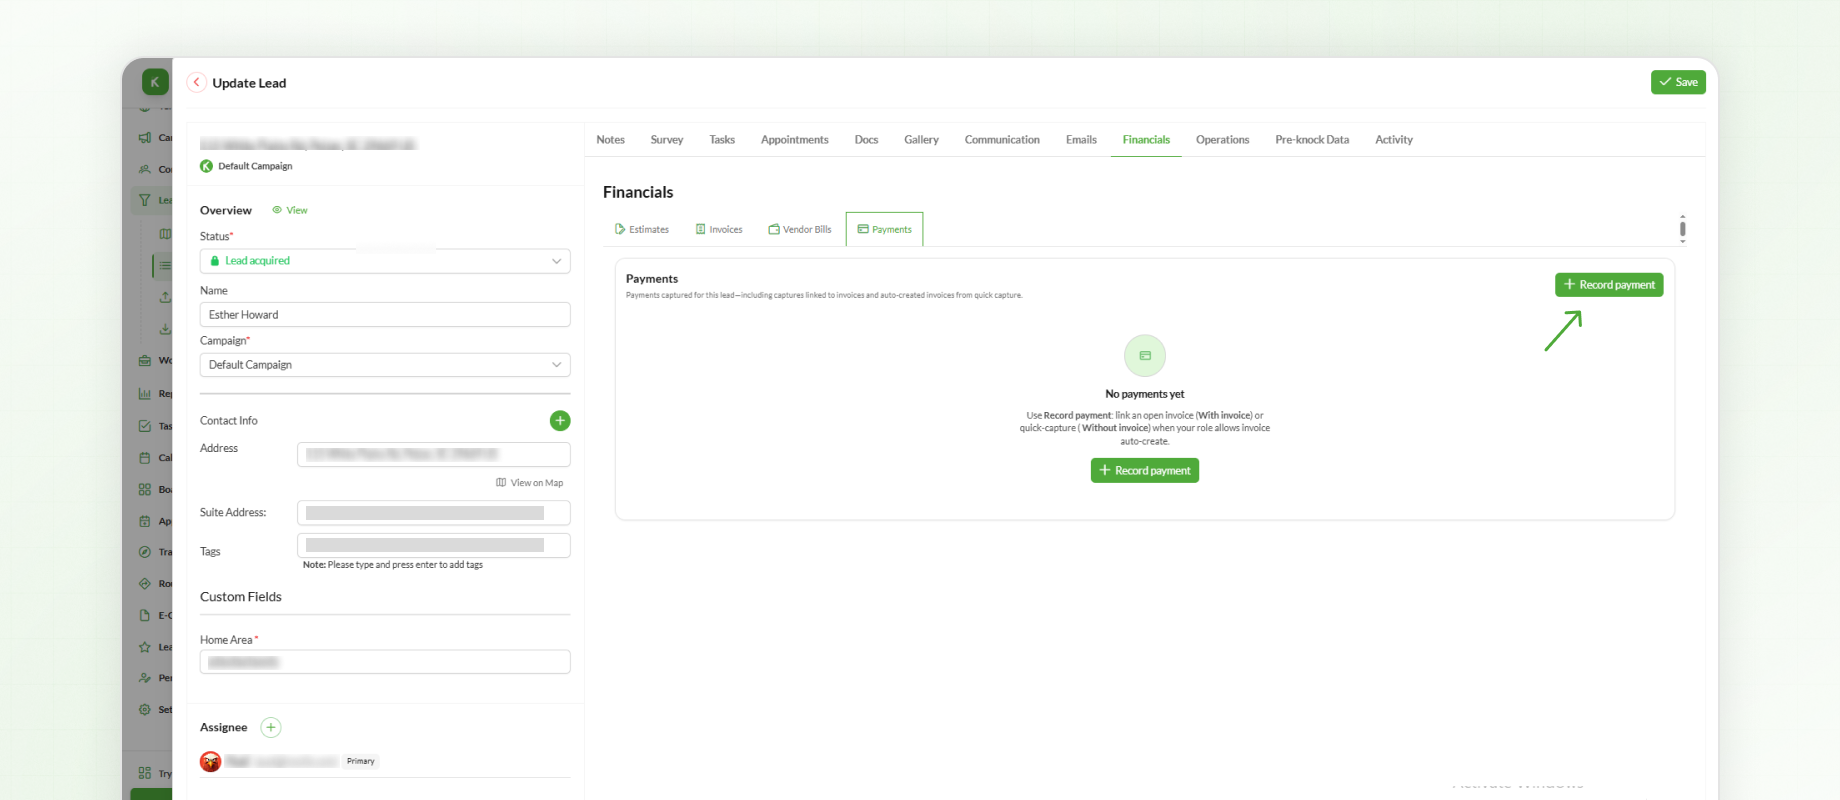
A payment can be recorded with or without linking it to an invoice. This is useful when you need to track a general payment associated with a lead.
After entering the payment details, click Record Payment.
Creating Payment Links
If you have a Knockio Payments Merchant account, you can generate payment links directly from invoices.
To create a payment link:
Select Invoices from the left-hand navigation menu.
Locate the required invoice.
Click the Payment Link icon.
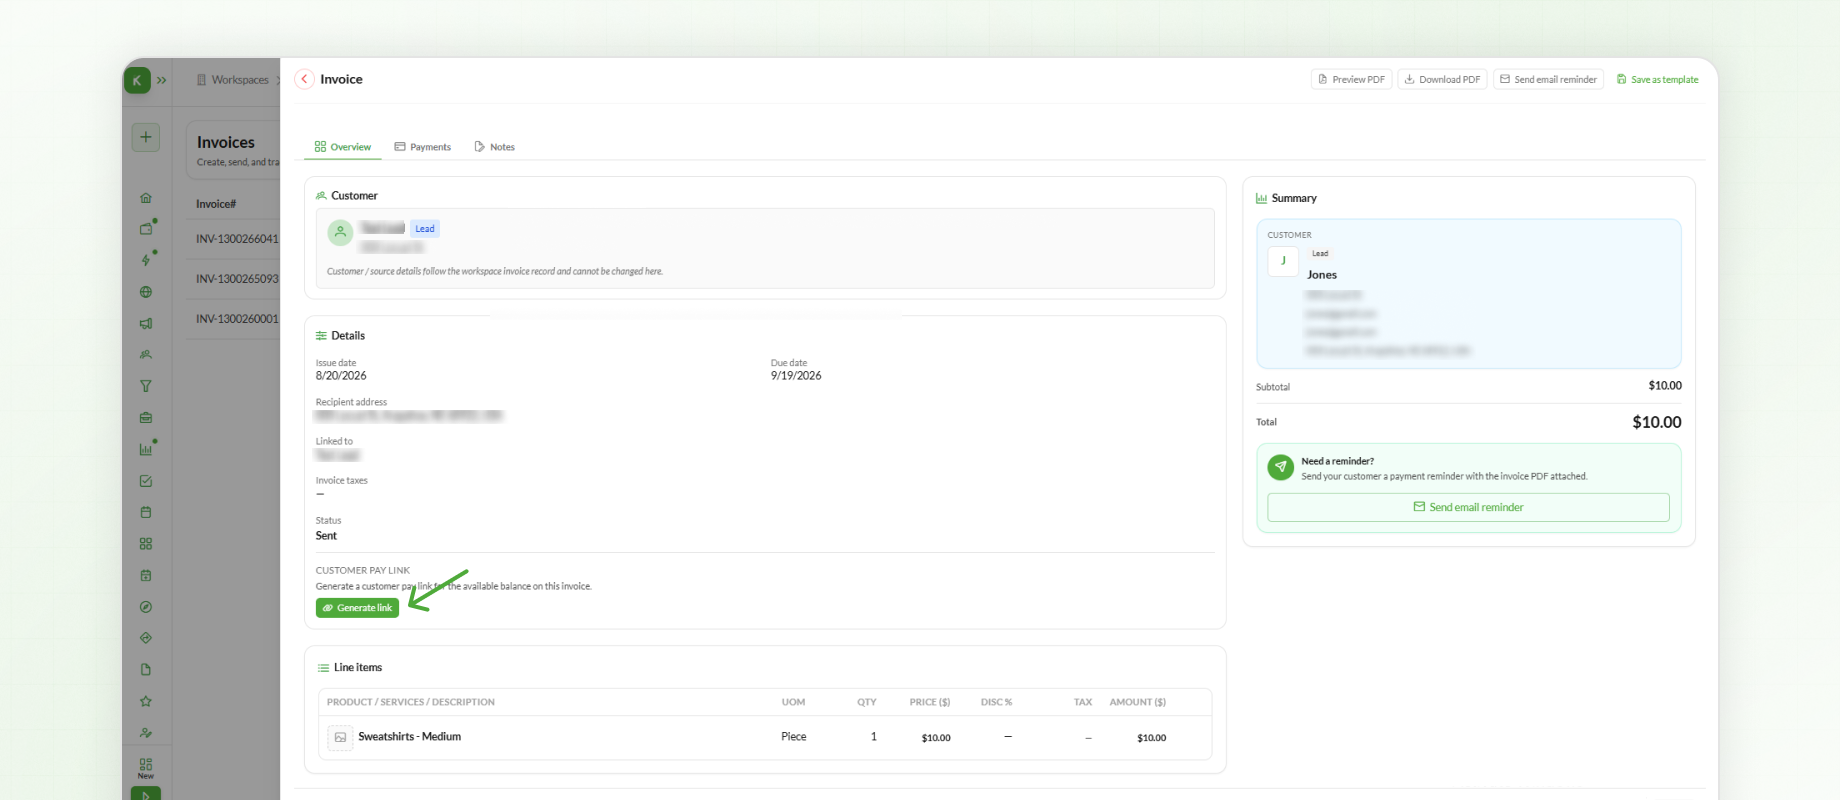
A payment link is generated for the invoice. You can then share the link with the customer through text, email, or another communication method.
The customer can open the link and complete the payment online.
Next Steps
With your payment tracking and invoicing process fully managed in Knockio, your incoming and outgoing finances are under control. You can now proceed to Creating Routes, where you will learn how to build sequenced stop lists, assign itineraries to field reps, and enable real-time mobile navigation.