
Custom Fields & Contact Types
Create custom fields and contact types to match your workflow.
Table of Contents
Overview
Custom Fields and Contact Types allow you to tailor Knockio to your business requirements by controlling the information your team collects and how contacts are categorized throughout the workspace.
This article explains how to create Custom Fields, assign them to statuses, create Contact Types, and understand how these features interact with role permissions.
Creating Custom Fields
To create a Custom Field:
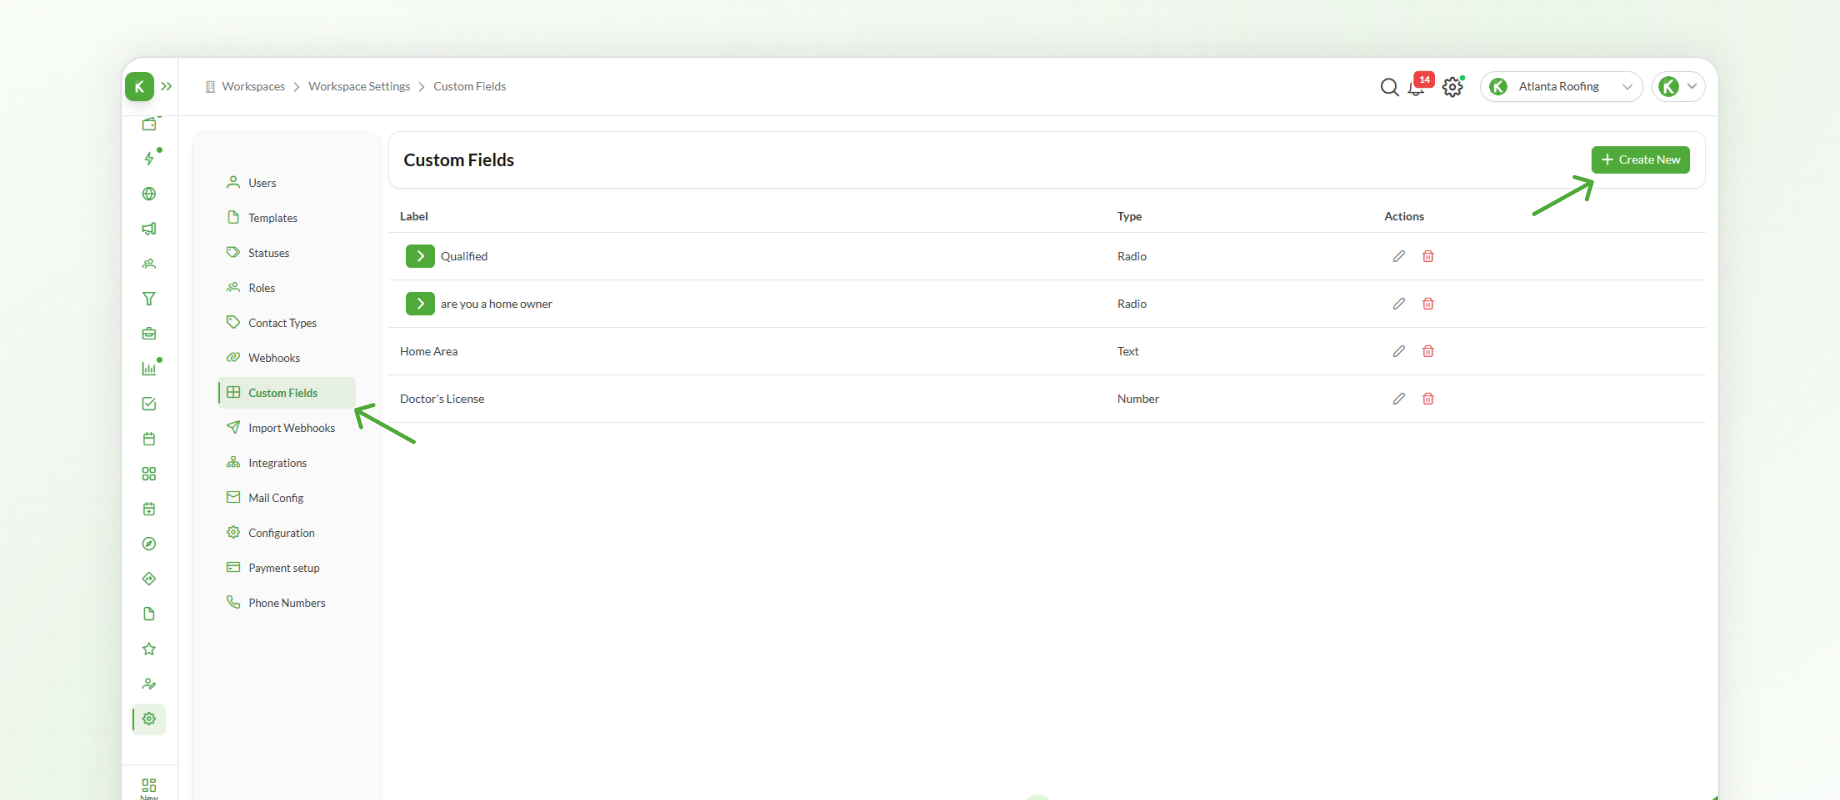
Click the Settings icon in the bottom-left corner of the screen.
Select Custom Fields from the left-hand menu.
The Custom Fields section displays all existing custom fields within your workspace. Existing fields can be edited whenever necessary, and new fields can be created to capture additional business-specific information.
To create a new Custom Field:
Click Create New.
Enter a Field Name. For example, Home Area.
Select the appropriate Field Type.
The available field types include:
Number – Accepts numeric values only.
Text – Suitable for short text entries.
Text Box – Designed for longer notes or descriptions.
Radio – Allows users to select from predefined options.
For example, you may create a radio field titled Are you the homeowner? with the options Yes and No.
Once the field has been configured, save your changes.
Assigning Custom Fields to Statuses
Creating a Custom Field does not automatically make it available when updating leads. The field must first be associated with one or more statuses.
There are two ways to assign a Custom Field to a status:
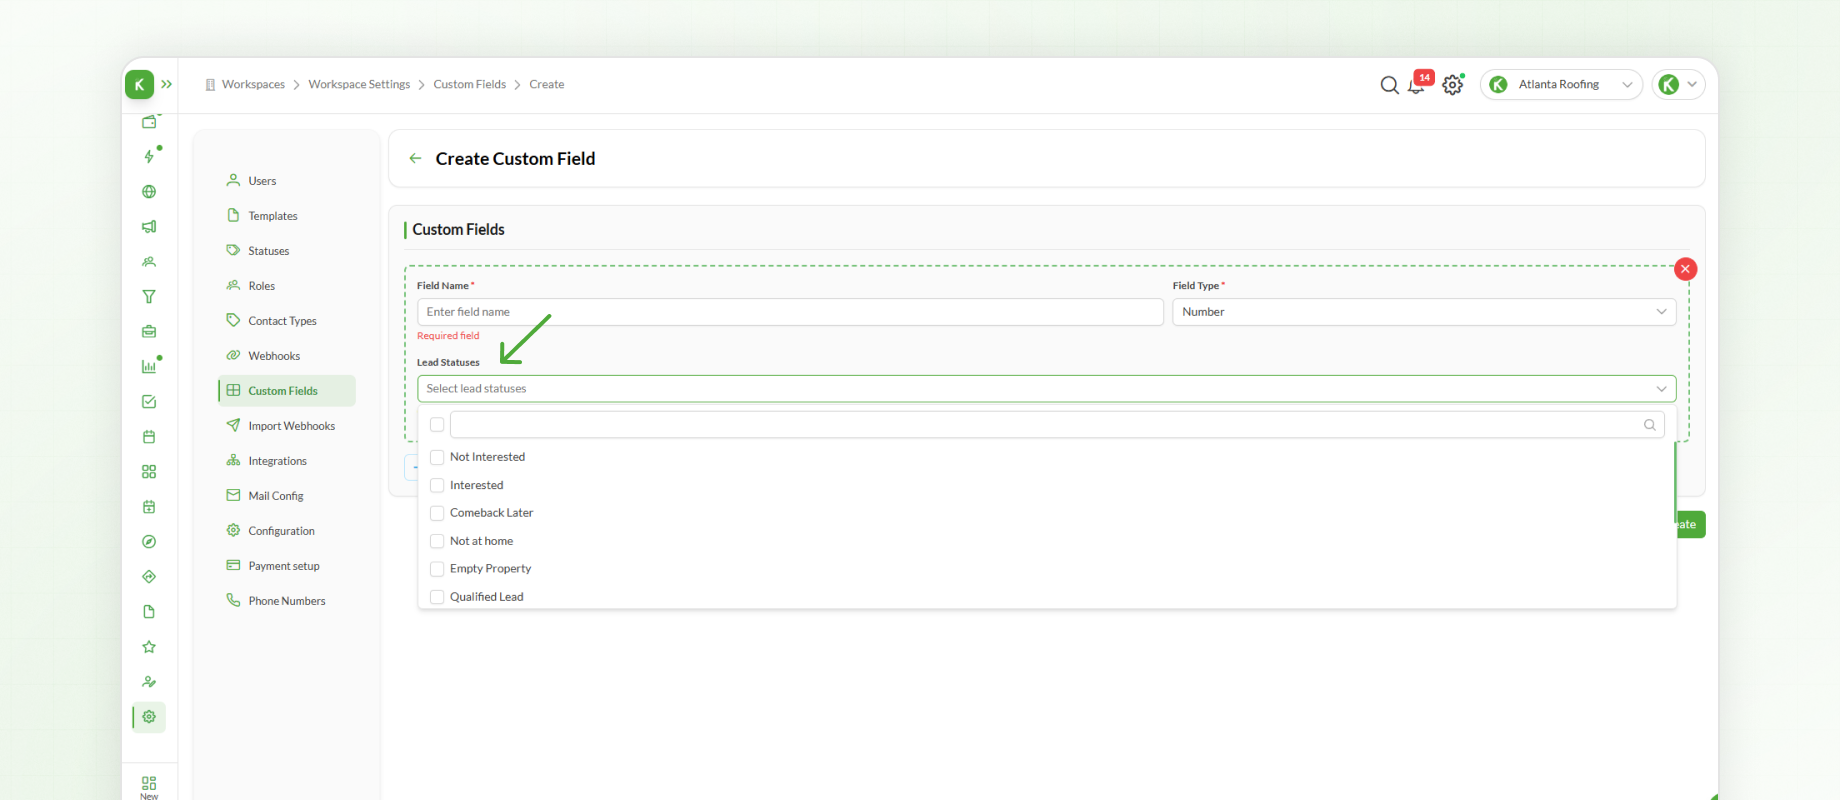
Method 1: From the Custom Fields Section
Select one or more statuses from the available dropdown.
Click Save.
Method 2: From the Status Configuration
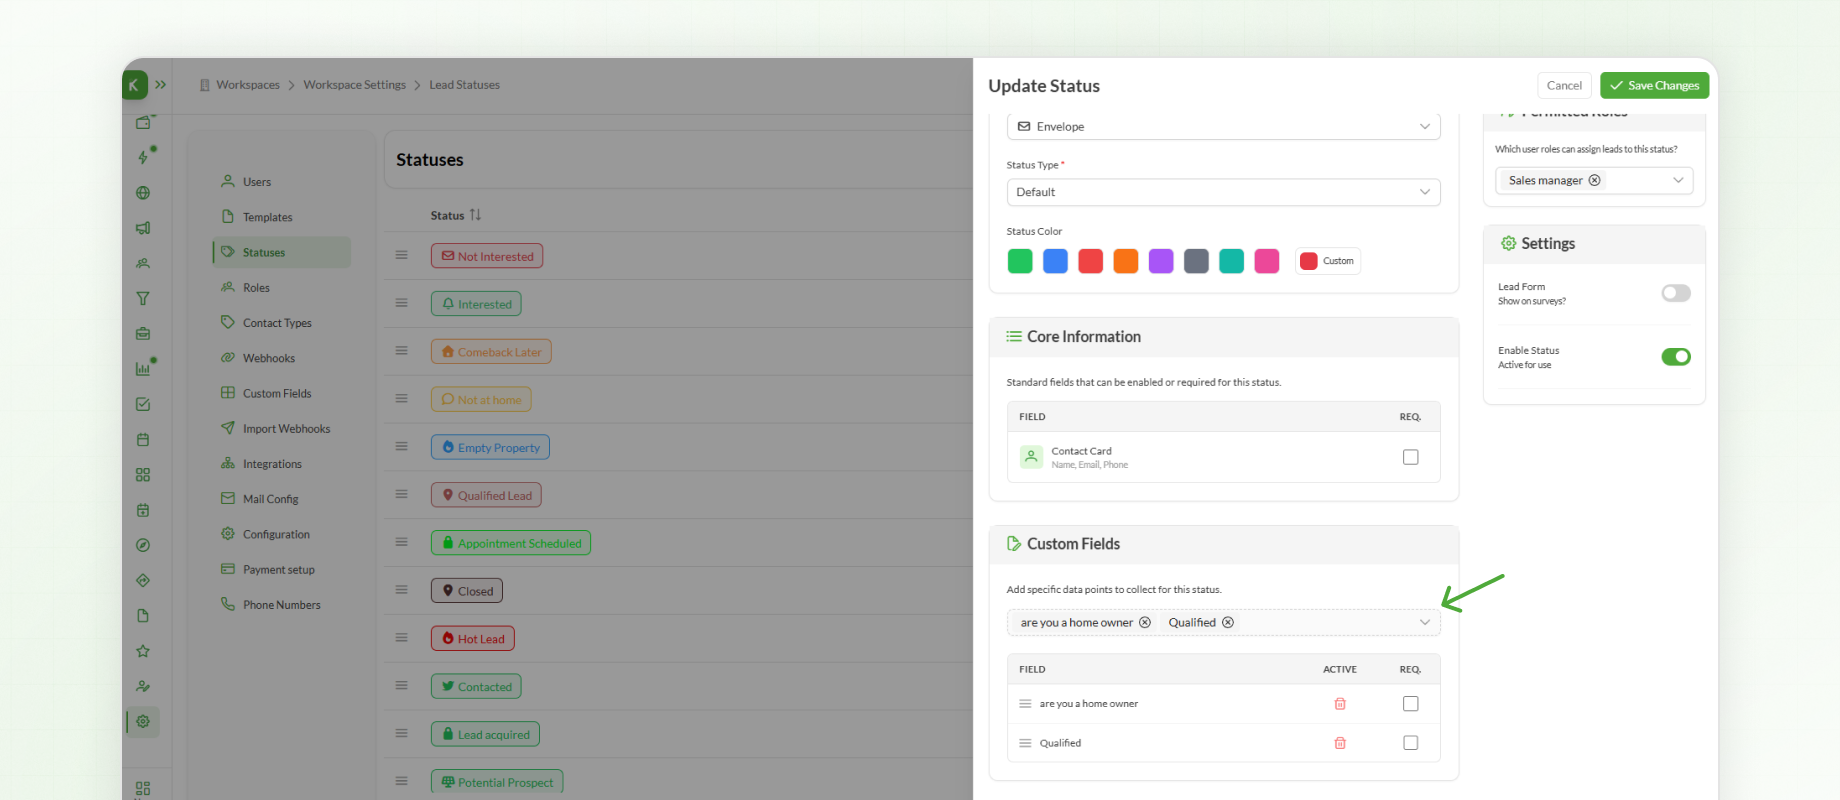
Open the Statuses section.
Edit the status where the field should appear.
Select the Custom Field from the available list.
Save the changes.
While assigning a Custom Field, you can also decide whether it should be Optional or Required before a lead can be saved.
For example, if the Home Area field should only appear when a lead has the Interested status, simply edit the Interested status and assign the Custom Field there.
This approach provides complete control over the information collected at different stages of your workflow.
Creating Contact Types
Contact Types help categorize the people your team interacts with while managing leads.
Depending on your business, Contact Types may include:
Homeowner
Tenant
Customer
Vendor
Property Manager
When creating or updating a lead, users can simply select the appropriate Contact Type from the list configured within the workspace.
To create a Contact Type:
Open Settings.
Select Contact Types.
Click Create New.
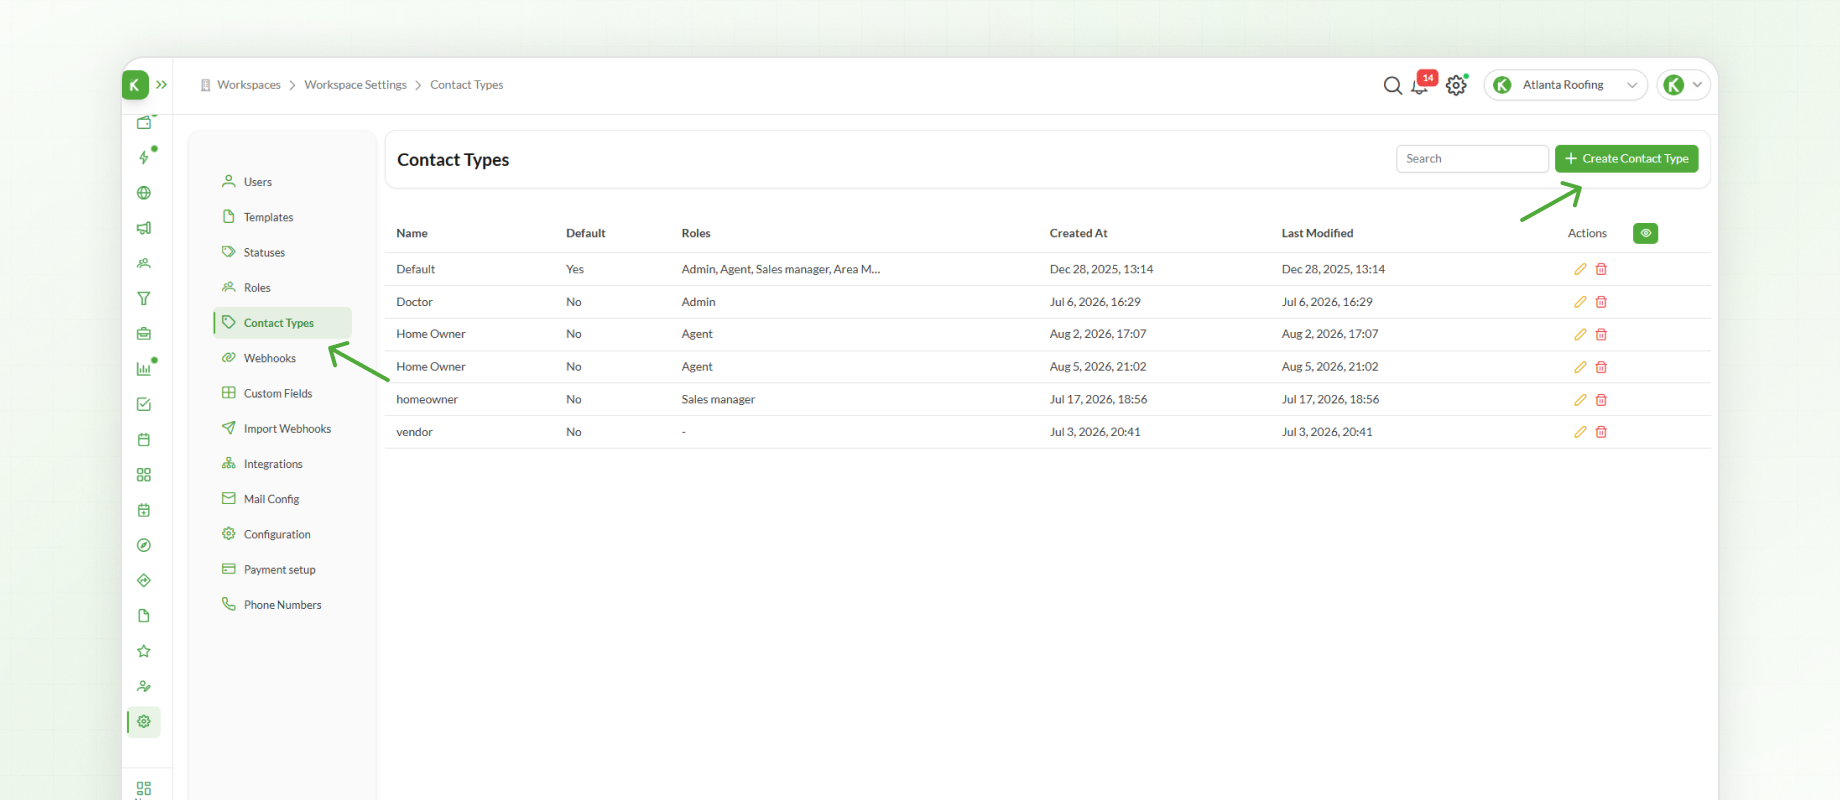
Enter a Contact Type Name. For example, Homeowner.
Select the roles that should have access to this Contact Type.
Click Save.
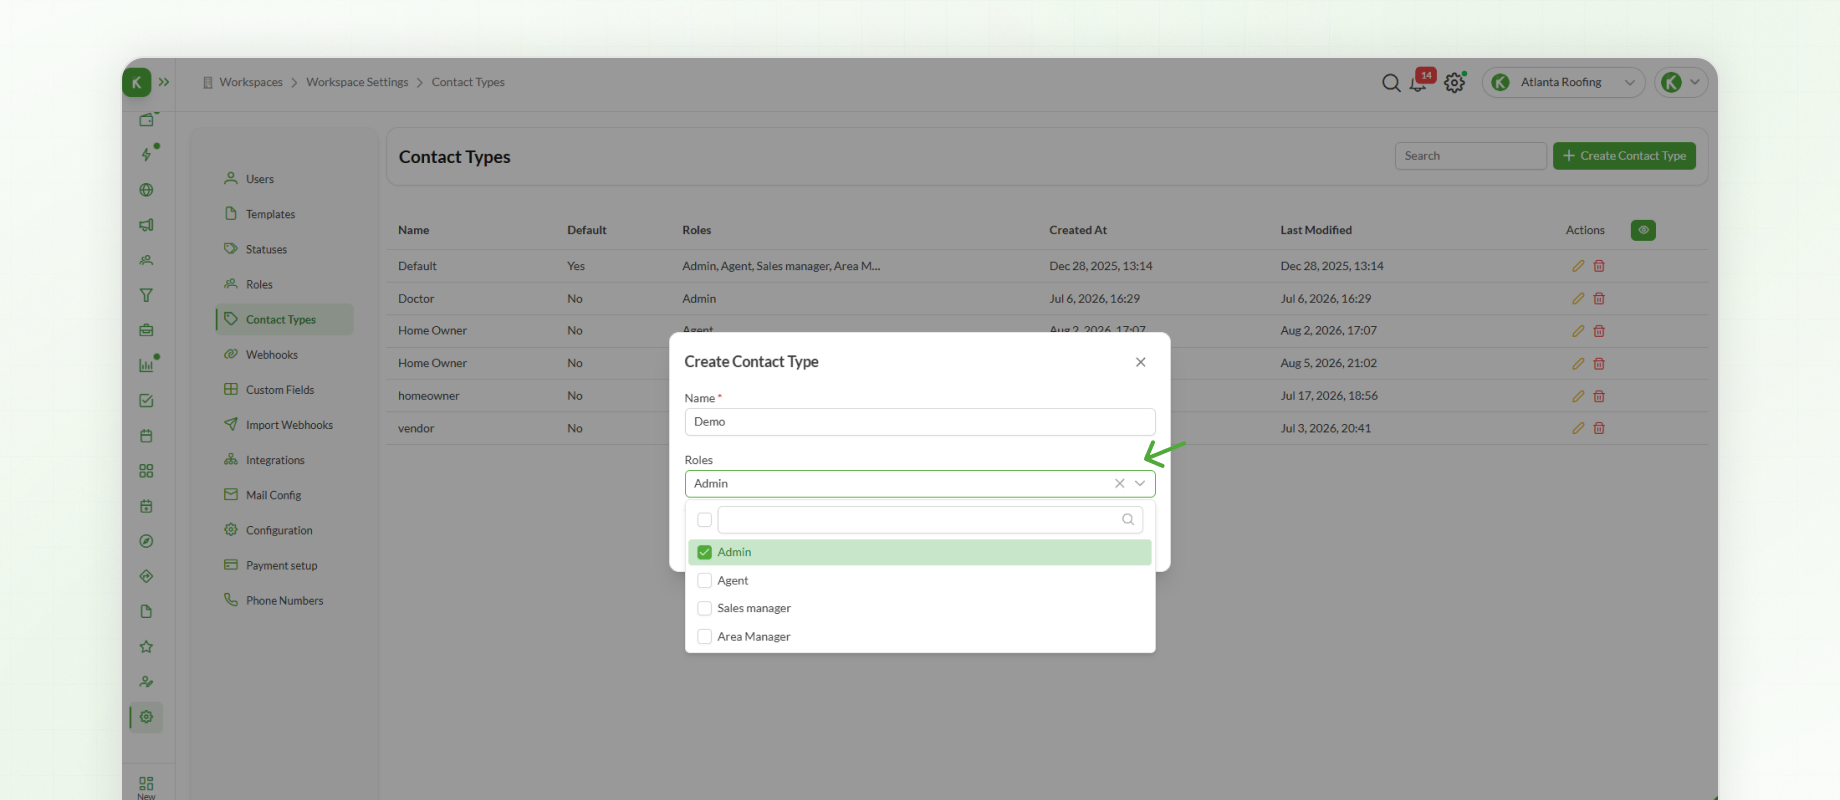
The Contact Type is now available for the selected roles.
Understanding Contact Type Permissions
Whether a role needs to be assigned to a Contact Type depends on how that role's permissions have been configured.
If a role has unrestricted access to Contact Types, it automatically has access to every Contact Type in the workspace, and no manual assignment is required. However, if the role has restricted access, it must be assigned when creating or editing the Contact Type.
For example, if a Homeowner Contact Type is intended only for field agents, assign it to the Agent role. Users with that role will then be able to select the Contact Type while creating or updating contacts.
Verifying Contact Type Permissions
You can verify a role's data access settings by reviewing its configuration. For example, open the General Manager role, navigate to Workspace Settings, and locate the contact type Permissions section.
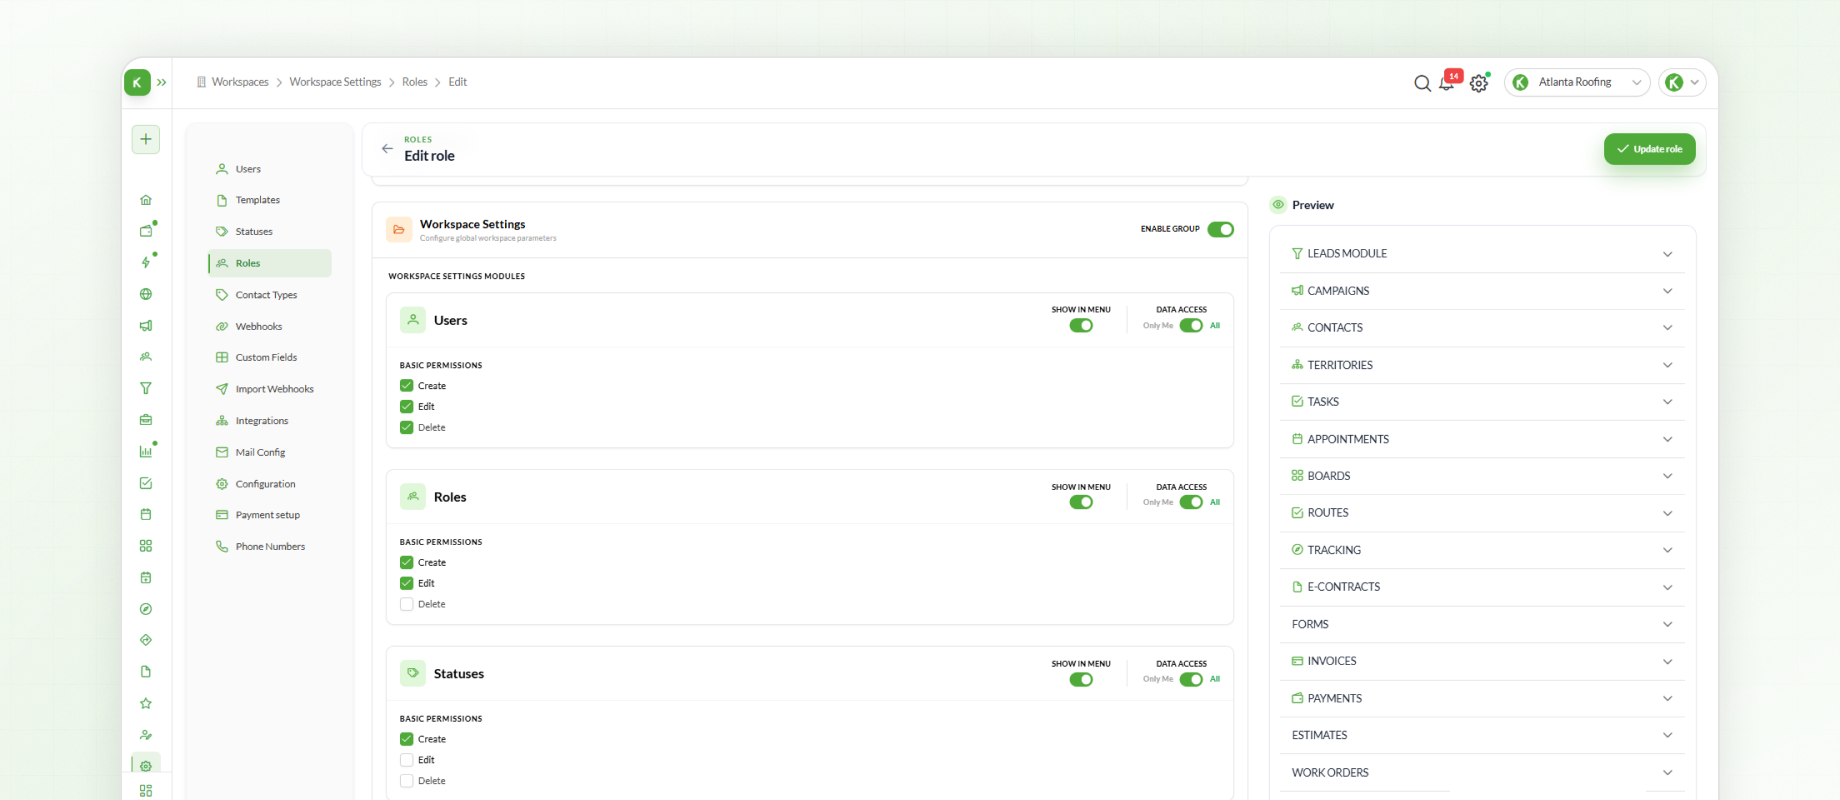
Here, you can configure the Data Access level for each module:
Leads
Assigned: Users can only access lead records assigned to them.
Full: Users can access all lead records.All Other Modules
Only Me: Users can only view their own records.
All: Users can view all records within the module.
The same permission model applies to Statuses and other configurable modules.
On the right side, you'll also find a Preview panel that displays the default permissions and access levels for the selected role, providing a quick overview of what users can and cannot do.
Next Steps
After configuring Custom Fields and Contact Types, the next step is setting up Phone Numbers and exploring Knockio's built-in communication features. This enables users to place calls and send messages directly from within the platform using assigned communication numbers.