
Managing Lead Statuses
Create and manage lead statuses to organize your sales workflow.
Table of Contents
Overview
Statuses help organize leads as they progress through your sales or operational workflow. Each status represents a stage in the lead lifecycle and can be customized to match your business processes.
This article explains how to create and manage statuses, configure status types, assign permissions, and understand how statuses work with roles and custom fields.
Accessing the Statuses Section
To manage statuses:
Click the Settings icon in the bottom-left corner of the screen.
Select Statuses from the left-hand menu.
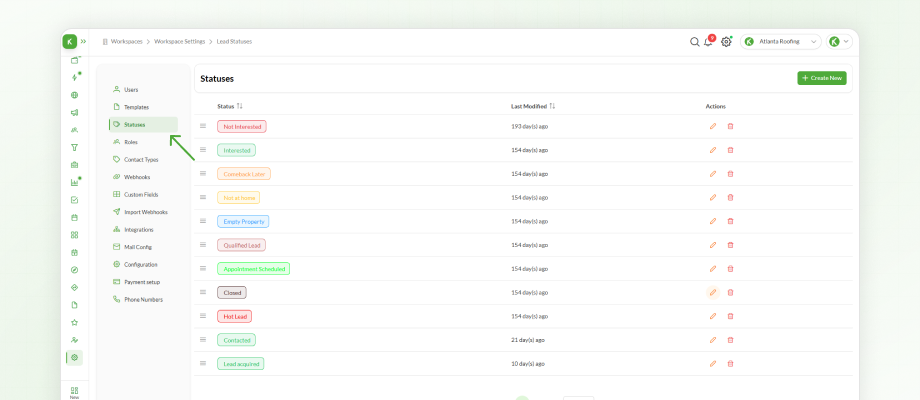
The Statuses section displays all statuses currently available in your workspace. Existing statuses can be edited or deleted at any time, and new statuses can be created whenever your workflow requires them.
Creating a New Status
To create a new status:
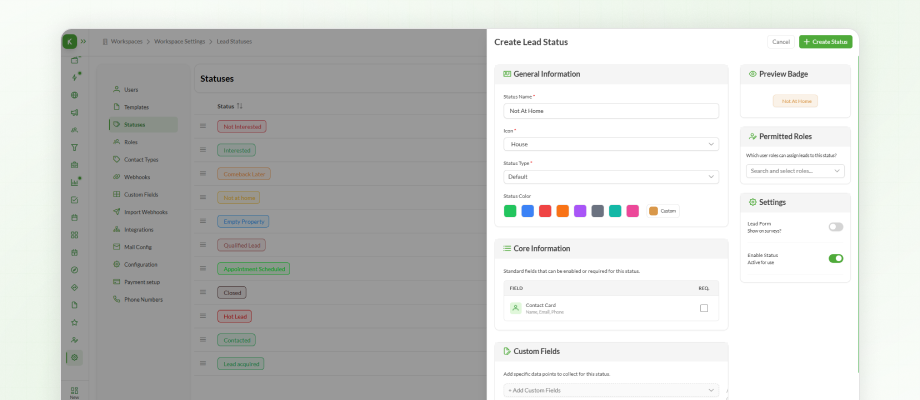
Click Create New.
Enter a Status Name. For example, Not at Home.
Select an Icon that best represents the status. You can browse the available icons or search for a specific one.
Choose a Colour to make the status easily identifiable throughout the platform.
Understanding Status Types
Every status includes a Status Type, which determines how the status and its associated leads are accessed within the workspace.
The available options are:
Default – Leads remain visible to all users who already have access to them.
Limited – Leads are visible only to the users assigned to them.
Hidden – Both the status and its associated leads are accessible only to the workspace owner.
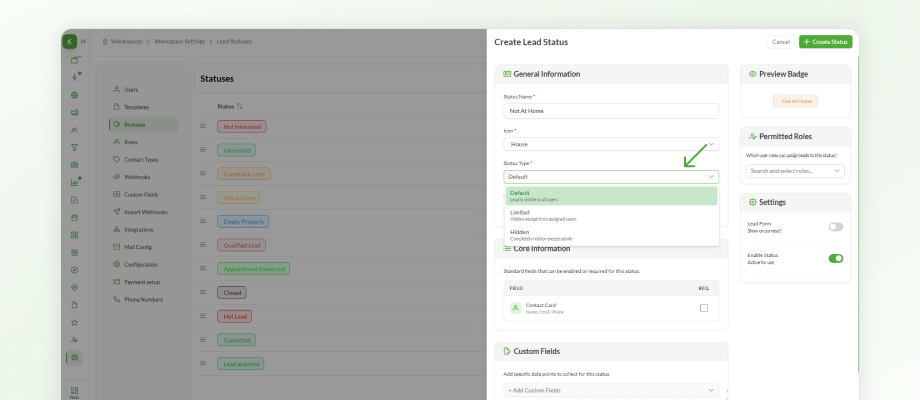
Choose the option that best aligns with your workflow and visibility requirements.
Requiring Contact Information
Statuses can be configured to require contact information before they can be applied to a lead.
When Contact Required is enabled, users cannot save a lead with that status until the required contact information has been added.
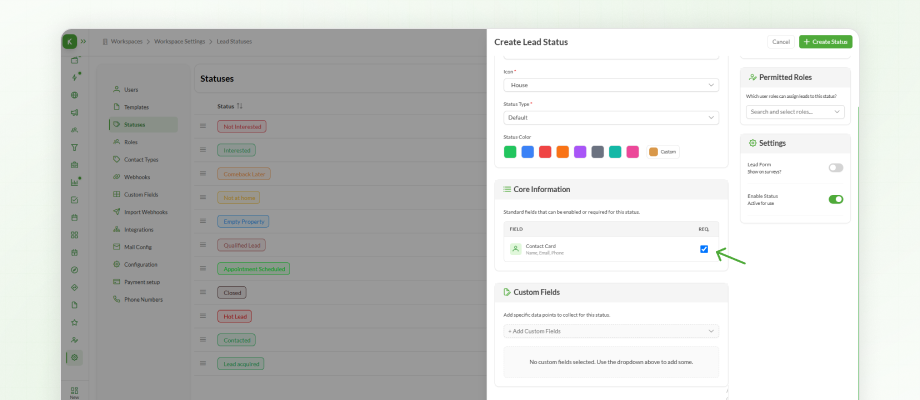
This is particularly useful for workflow stages where customer details must be collected before moving forward.
Assigning Custom Fields
Custom Fields can be associated with individual statuses to collect additional information during different stages of your workflow.
For example, you may want users to capture information such as:
Homeowner Name
Roof Size
Inspection Date
Or any other business-specific information
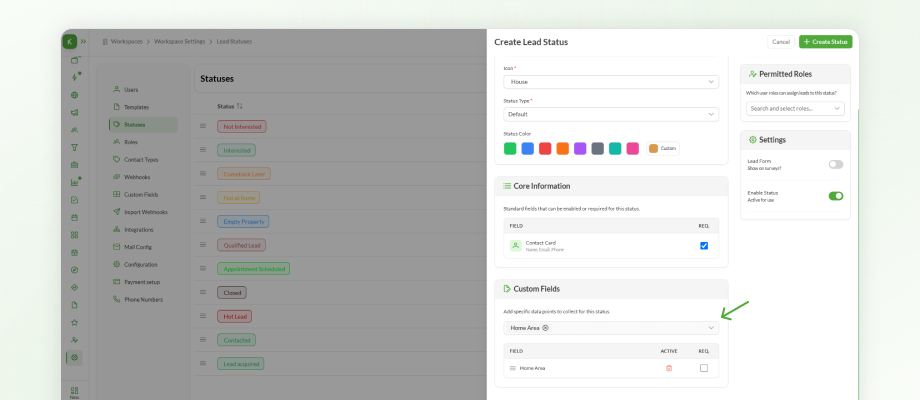
Each status can display its own set of Custom Fields, and those fields can also be marked as required.
Custom Fields are covered in detail in the next article.
Assigning Roles to a Status
On the right-hand side of the status configuration page, you'll find the Permitted Roles section.
This determines which roles are allowed to use the status.
For example, a workspace may include roles such as:
Owner
Agent
General Manager
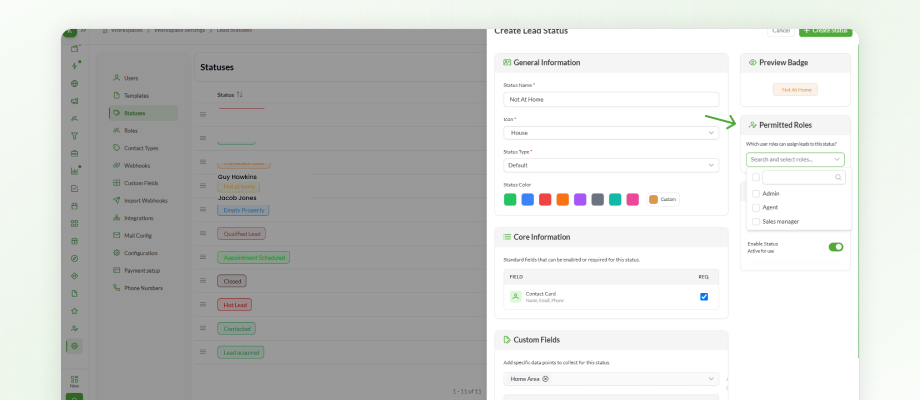
Only the selected roles will be able to use the status, depending on their permission settings.
Important Note
The Owner role generally does not need to be assigned manually because it already has full access throughout the workspace.
Whether the Agent, General Manager, or any custom role needs to be assigned depends entirely on that role's configured permissions. Roles with full access to a module automatically have access to all associated records and typically do not require manual assignment. If a role has restricted access, the appropriate role must be assigned where applicable.
This provides complete control over which teams can access specific records and features across the workspace.
Lead Forms
Statuses can also be connected to Lead Forms.
When a Lead Form is enabled for a status, users must complete the required survey before the status can be assigned to a lead.
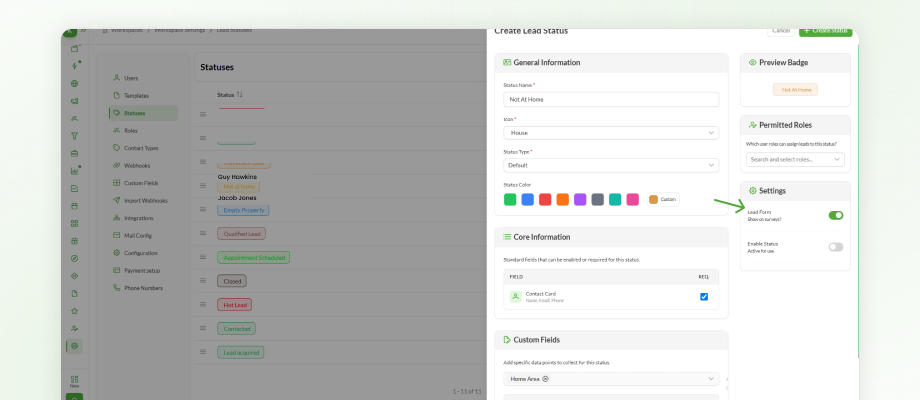
The Surveys feature is covered in a later article, but it is useful to understand that surveys can be linked directly to individual statuses.
Active and Inactive Statuses
Each status can be marked as either Active or Inactive.
Active statuses are available for users throughout the workspace.
Inactive statuses remain saved within the workspace but cannot be selected when updating or creating leads.
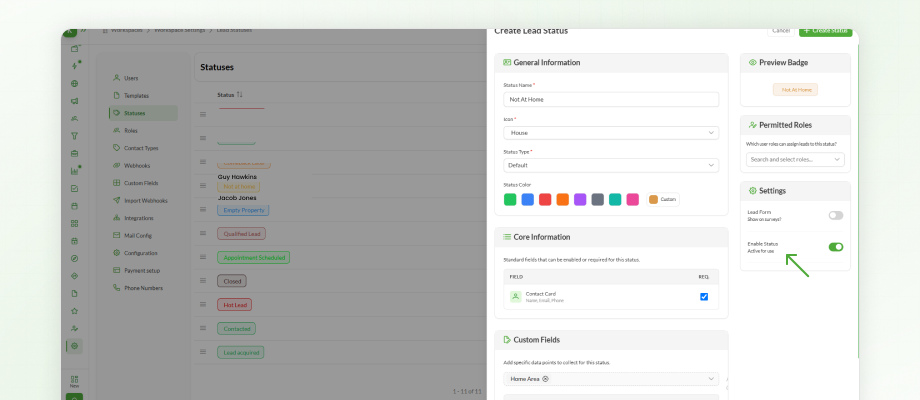
This allows organizations to retire outdated workflow stages without permanently deleting them.
Next Steps
Once your statuses have been configured, the next step is customizing the information your team collects by creating Contact Types and Custom Fields. Together, these features allow you to tailor lead information to match your organization's workflow.