
Phone Numbers & Communication
Set up phone numbers to call, message, and manage customer conversations.
Table of Contents
Overview
Knockio's built-in communication features allow users to make calls, send messages, and manage conversations without leaving the platform. Before these features can be used, phone numbers must be purchased, assigned to a workspace, and then allocated to individual users.
This article explains how to purchase phone numbers, assign them, and use the communication tools available within Knockio.
Purchasing Phone Numbers
Phone numbers are available through Knockio's Engage add-on.
To purchase phone numbers:
Click your Profile icon in the top-right corner of the screen.
Click on Settings.
Select Subscriptions, from the menu on the left.
Locate the Engage add-on.
Purchase the add-on and select the number of phone numbers required for your organization.
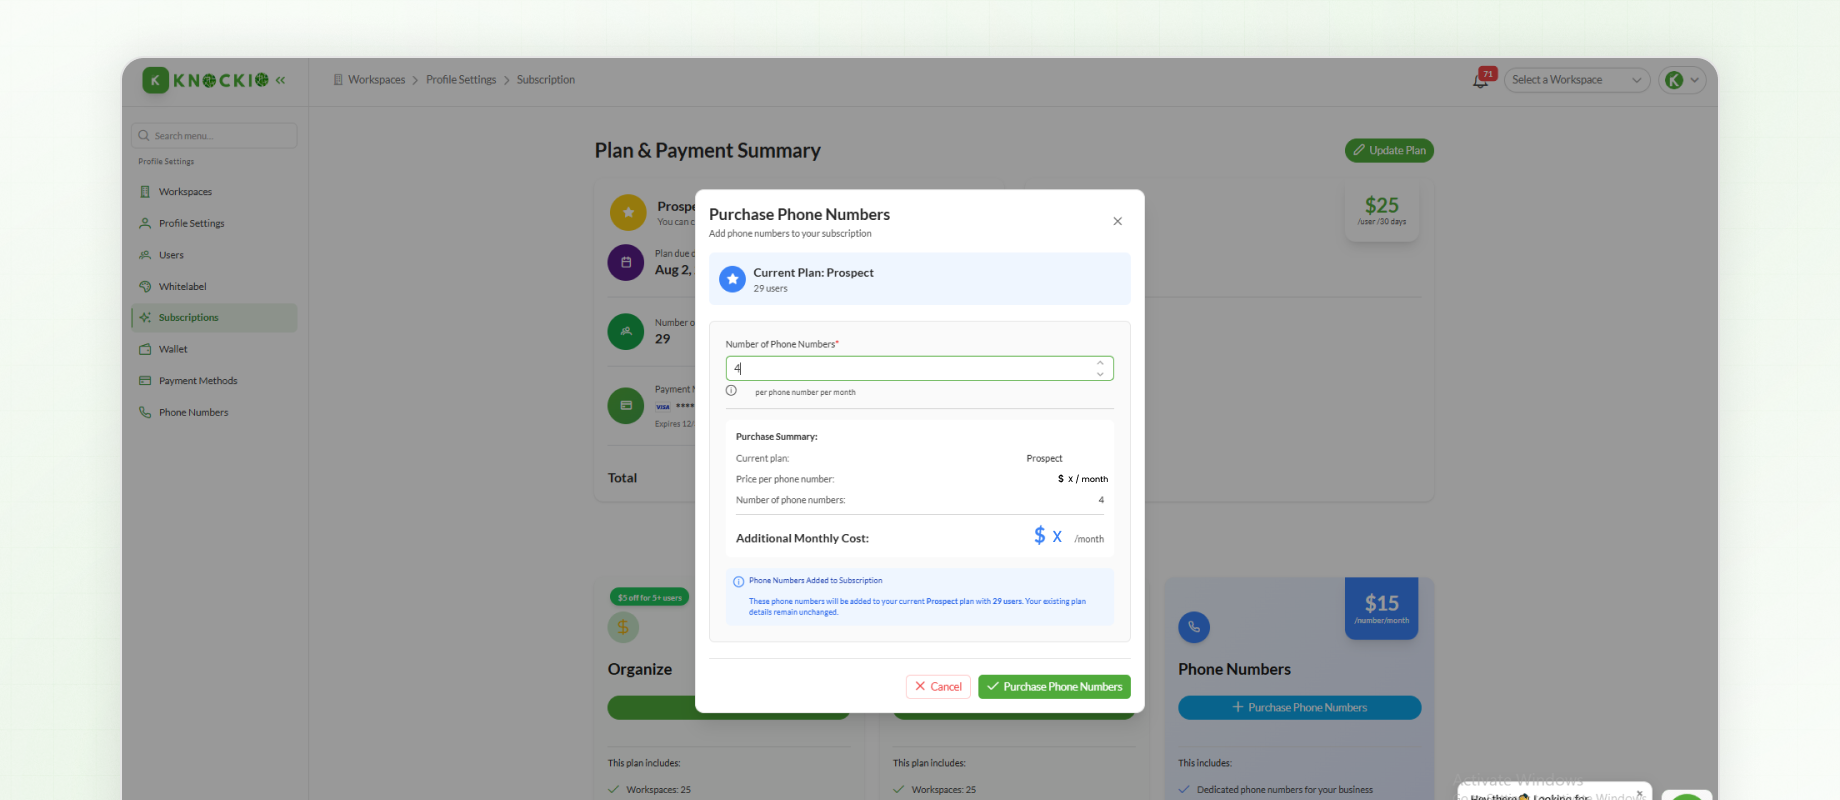
Depending on your location, you may also be required to register your address to comply with local telecommunications regulations.
Once the purchase is complete, your phone numbers will be available for assignment.
Assigning Phone Numbers
After purchasing phone numbers, they must first be assigned to a workspace before being allocated to individual users.
To assign phone numbers:
Open the Phone Numbers section from the left-hand menu.
Assign each phone number to the appropriate workspace.
Assign individual phone numbers to the users who will use them.
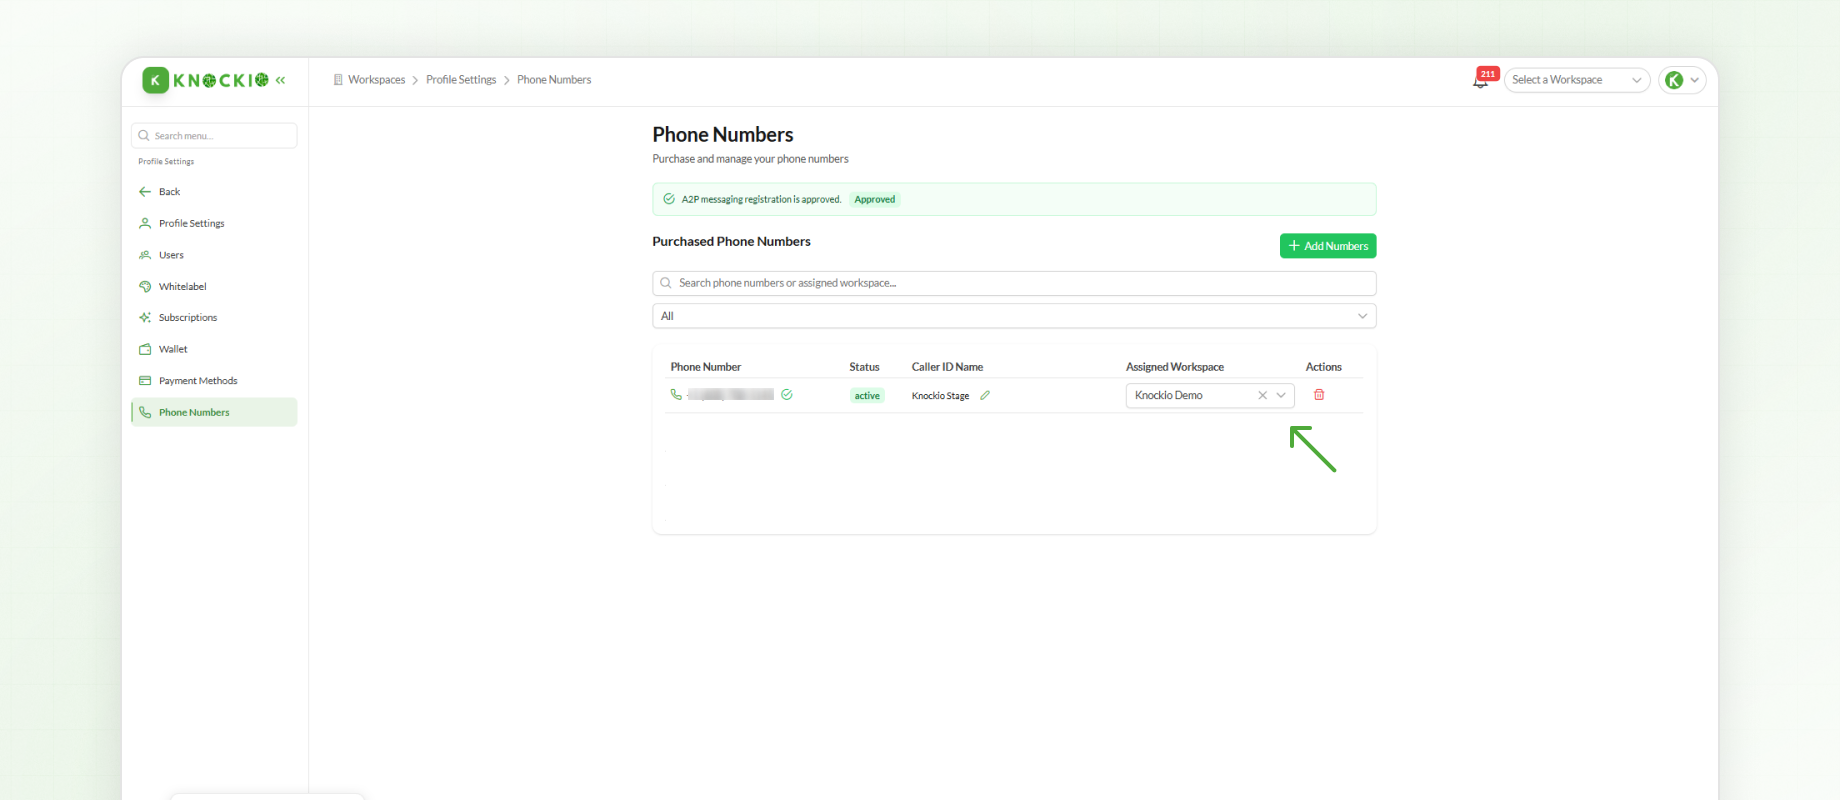
This ensures each team member has the correct number available for calling and messaging prospects.
Managing Phone Numbers
Phone number assignments can be reviewed or updated at any time.
To manage existing assignments:
Go back to your Workspace
Open Settings.
Select Phone Numbers.
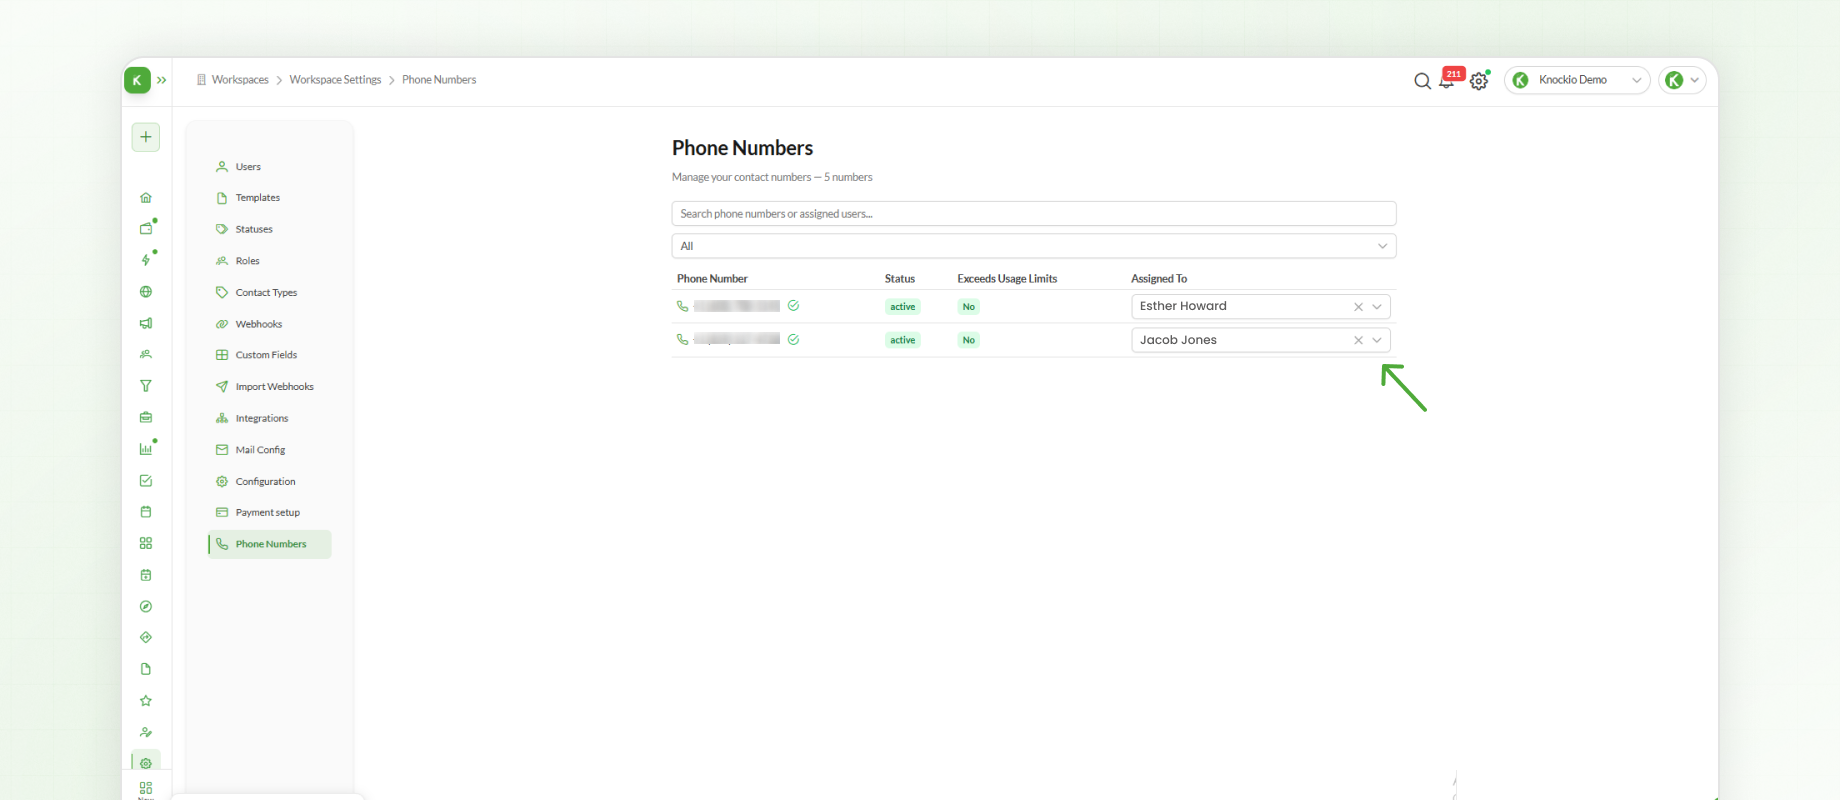
This section displays all phone numbers assigned to the workspace, along with the users currently associated with each number.
If a number needs to be reassigned:
Edit the existing assignment.
Select the appropriate user.
Save the changes.
Communicating with Prospects
Once phone numbers have been assigned, users can begin communicating with prospects directly from within Knockio.
One of the quickest ways to access communication features is through the green communication button located in the bottom-right corner of the screen.
From this menu, users can:
Start a new conversation.
Add a new contact.
View chat history.
Access communication logs.
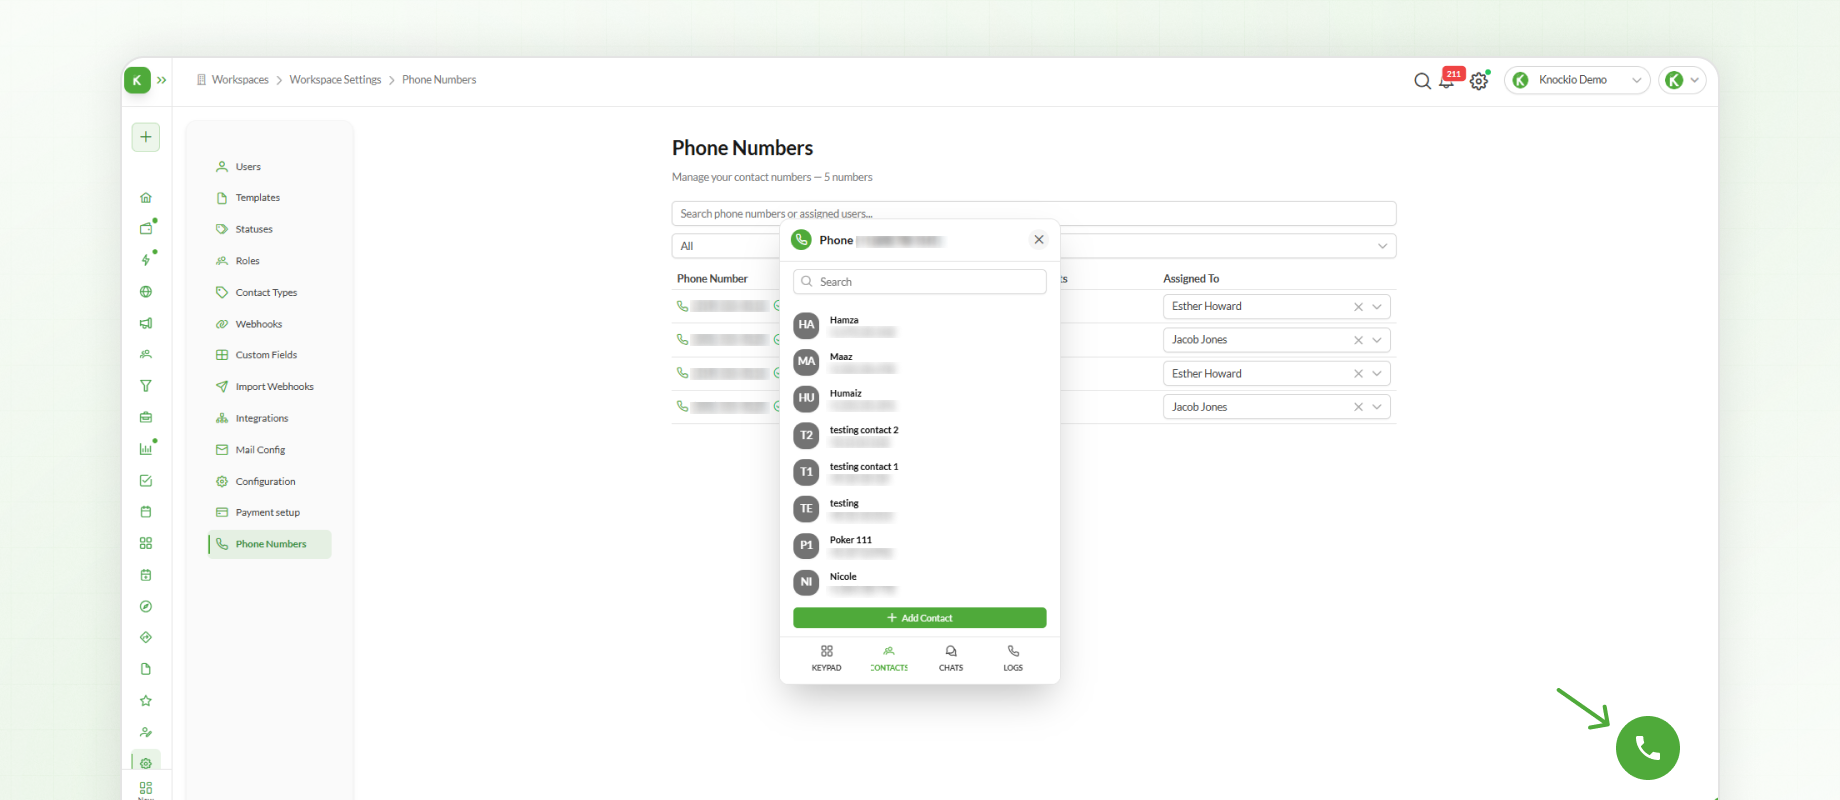
Keeping all communication in one location makes it easier to track conversations and maintain a complete communication history.
Using the Communication Module
The same communication tools are also available through the Communication section in the left-hand navigation menu.
This module provides a centralized view of:
Conversations
Contacts
Calls
Message history
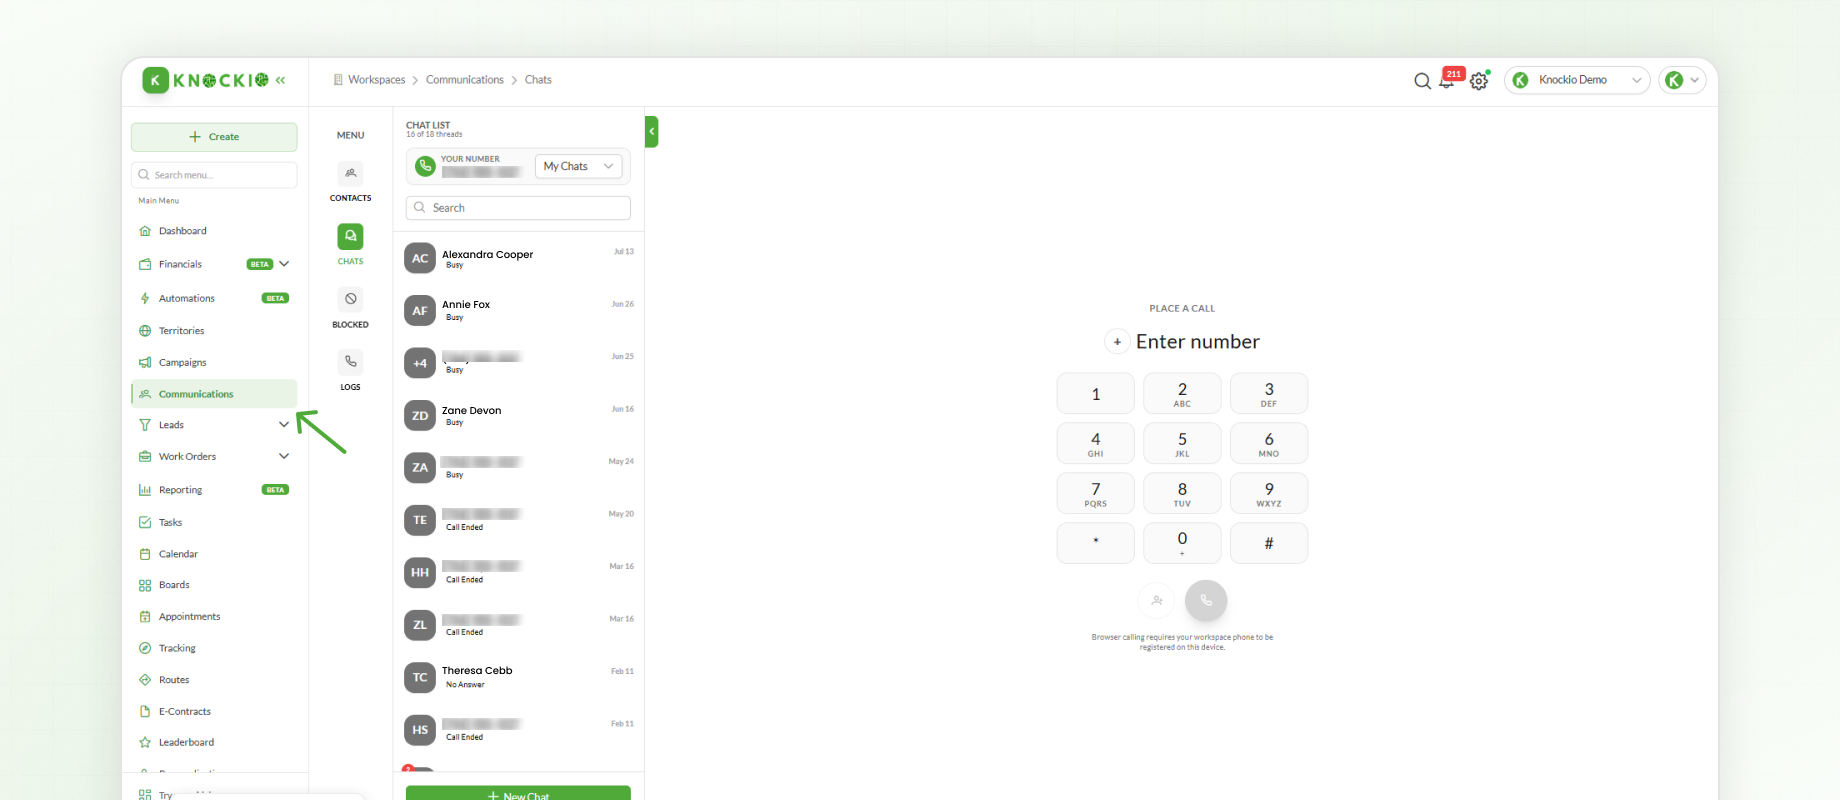
Users can review previous interactions, continue existing conversations, and manage customer communication from a single location.
Workspace Owners also have visibility into communication activity across the entire workspace, allowing them to monitor interactions and support their teams whenever necessary.
Next Steps
Once phone numbers and communication features have been configured, the next step is setting up Mail Configuration. Connecting an email account allows users to send and receive emails directly within Knockio, keeping phone calls, messages, and emails together in a single communication platform.