
Managing Work Order
Create and manage work orders to organize jobs and track project progress.
Table of Contents
Overview
The Work Orders module helps organize projects by assigning work, managing schedules, tracking progress, and keeping teams aligned throughout the lifecycle of a job. Work orders can be created from either a lead or an existing estimate and managed using both List View and Board View.
This article explains how to create work orders, configure their details, and monitor progress from planning through completion.
Accessing the Work Orders Module
To create or manage work orders:
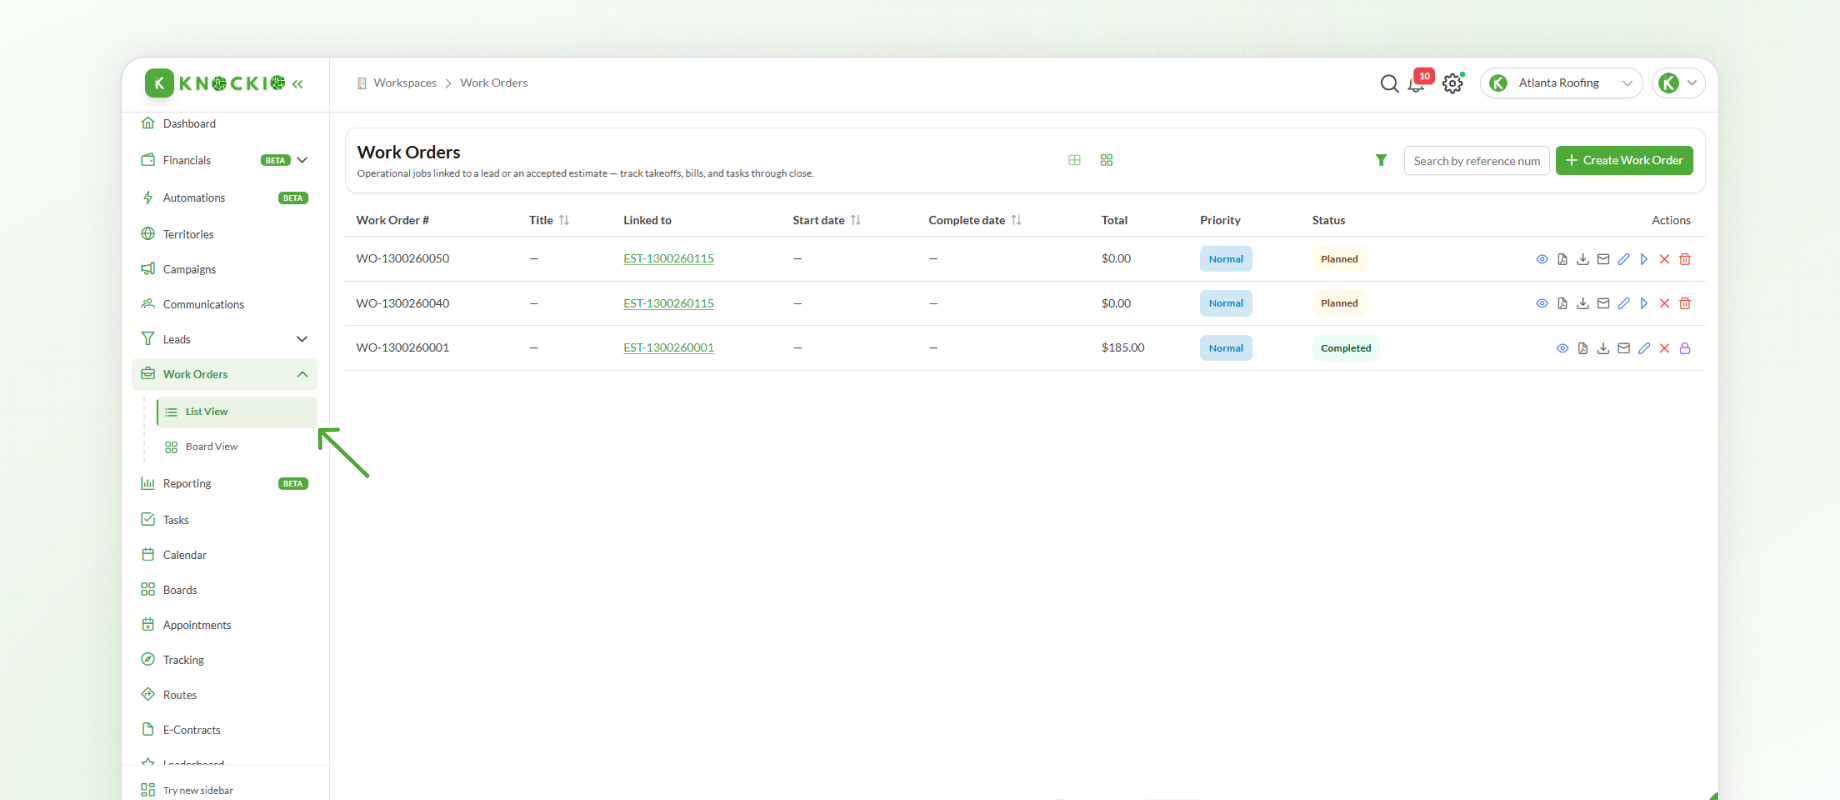
Select Work Orders from the left-hand navigation menu.
The Work Orders module provides two different views:
List View – Used for creating, editing, and managing work orders in a detailed list.
Board View – Provides a visual workflow where work orders can be tracked as they move through different stages.
Creating a Work Order
To create a new work order:
Open List View.
Click Create Work Order.
The first step is selecting what the work order will be associated with.
Available options include:
Lead
Existing Estimate
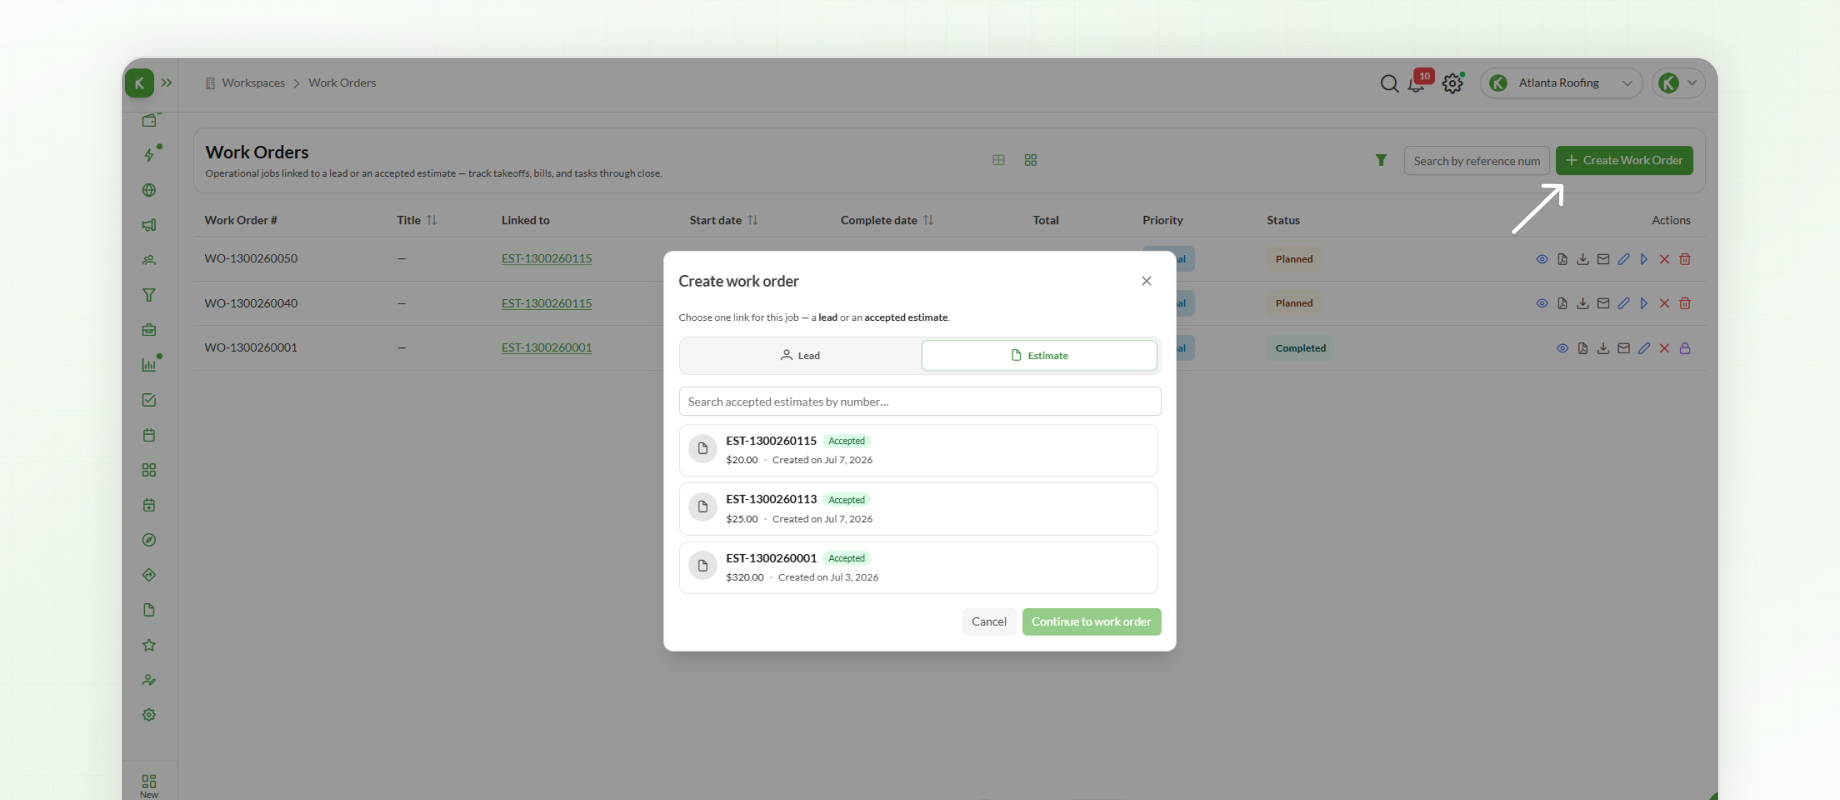
If a customer has already approved an estimate, creating the work order from that estimate helps keep the entire project connected from start to finish.
After making your selection, click Continue.
Assigning Team Members
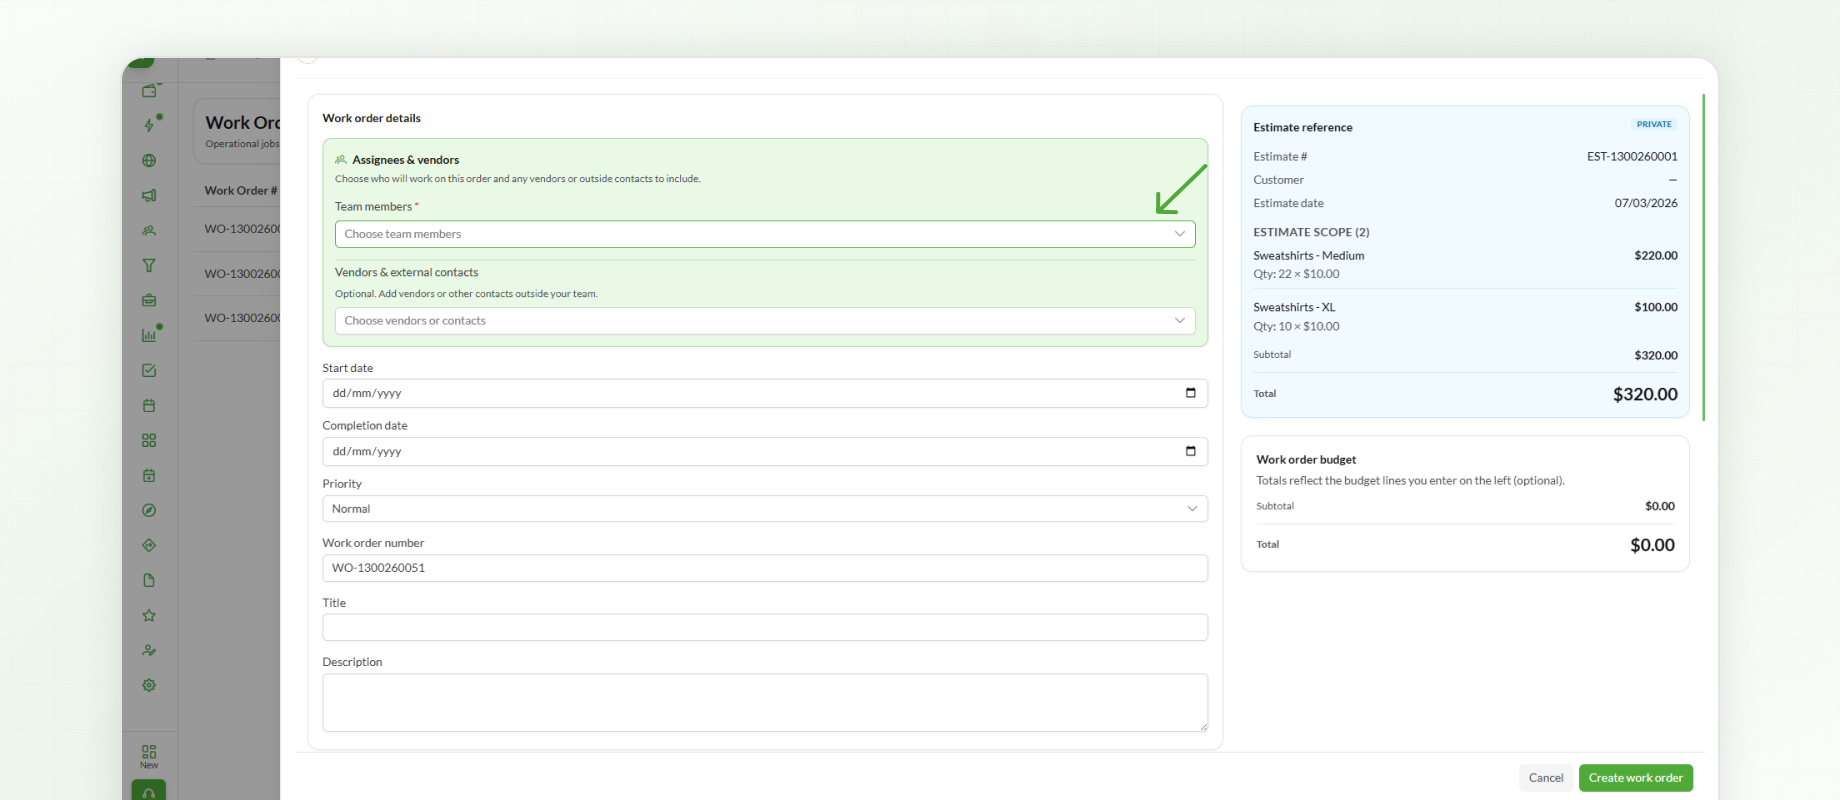
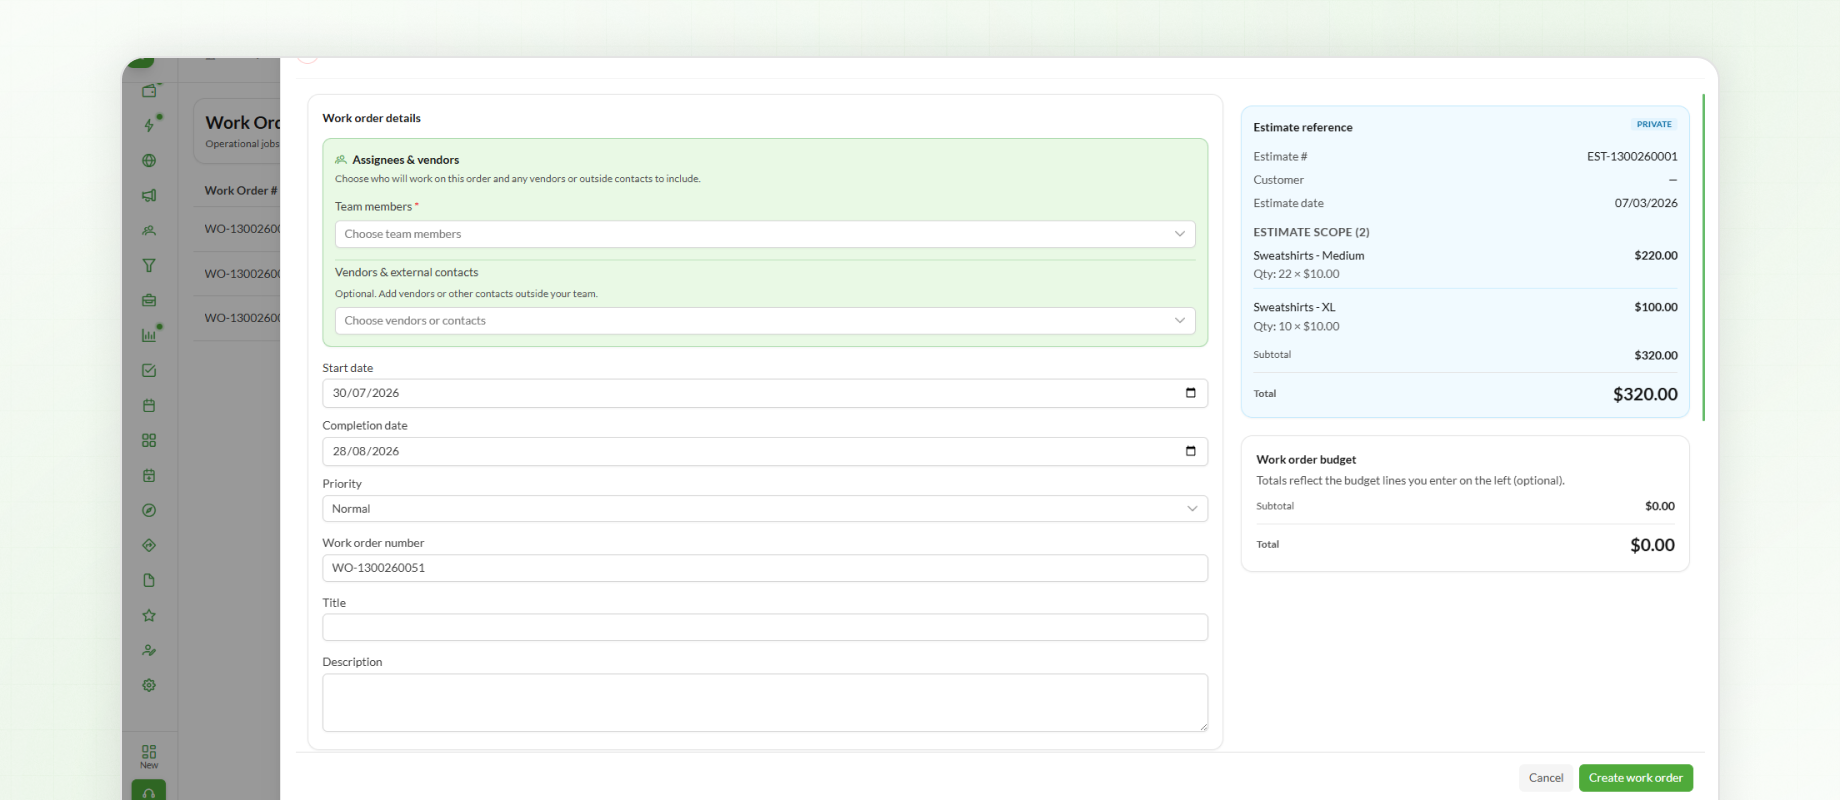
Assign the users responsible for completing the work.
Depending on the project requirements, you can assign:
One or more team members
Vendors
Contacts
For example, an external electrician can be added as a vendor for a specific work order.
Scheduling the Work
Define the project timeline by selecting:
Start Date
End Date
These dates help communicate when work begins and when it is expected to be completed.
You can also assign a Priority level to indicate the urgency of the work.
Available priority levels include:
Low – Routine maintenance.
Medium – Standard customer request.
High – Priority installation.
Urgent – Emergency repair requiring immediate attention.
Completing Work Order Details
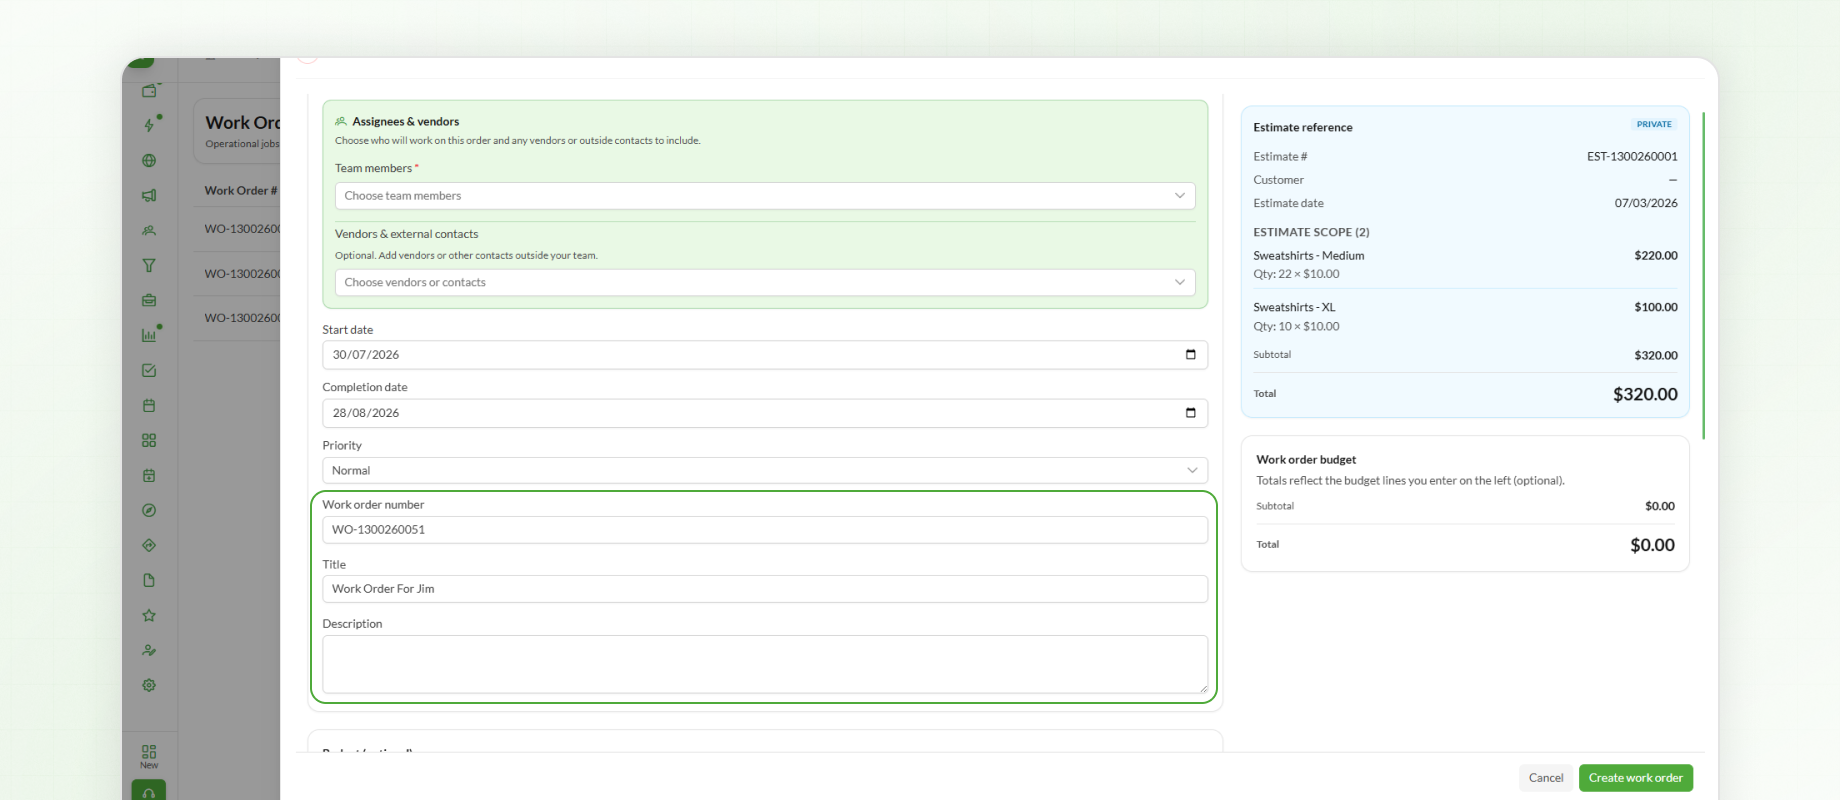
Provide the general information required for the work order.
This includes:
Order Number
Title
Description
The description should clearly explain the work that needs to be completed.
Budget & Line Items
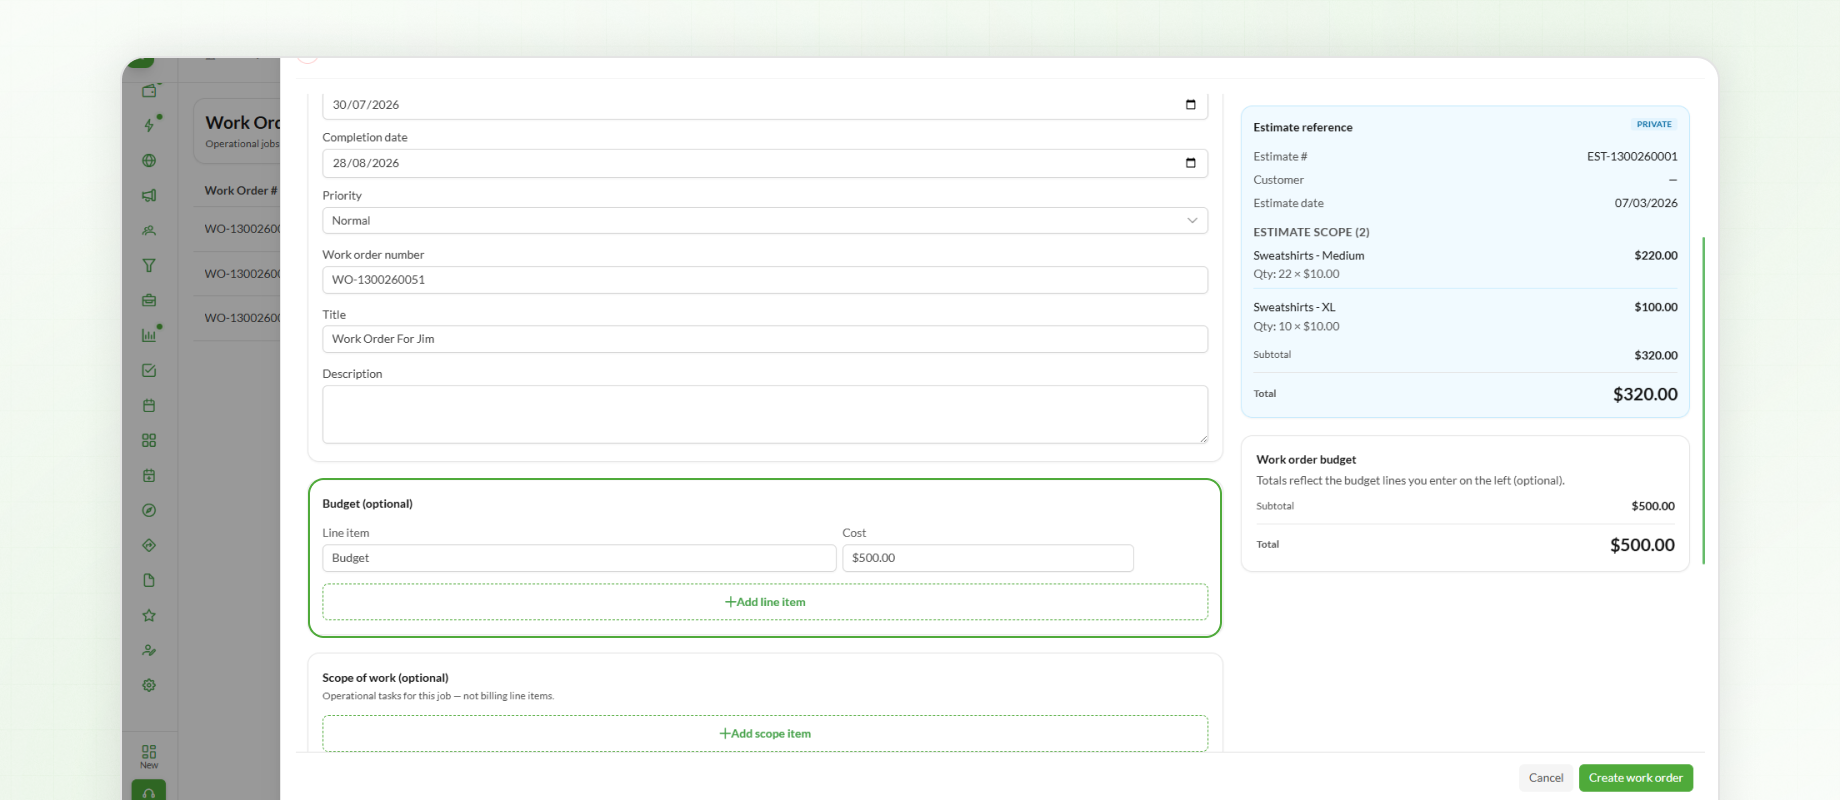
If required, a budget can be added to estimate project costs.
This section is optional.
Individual line items and their estimated costs can be entered to provide an overview of the expected project expenses before work begins.
Scope of Work
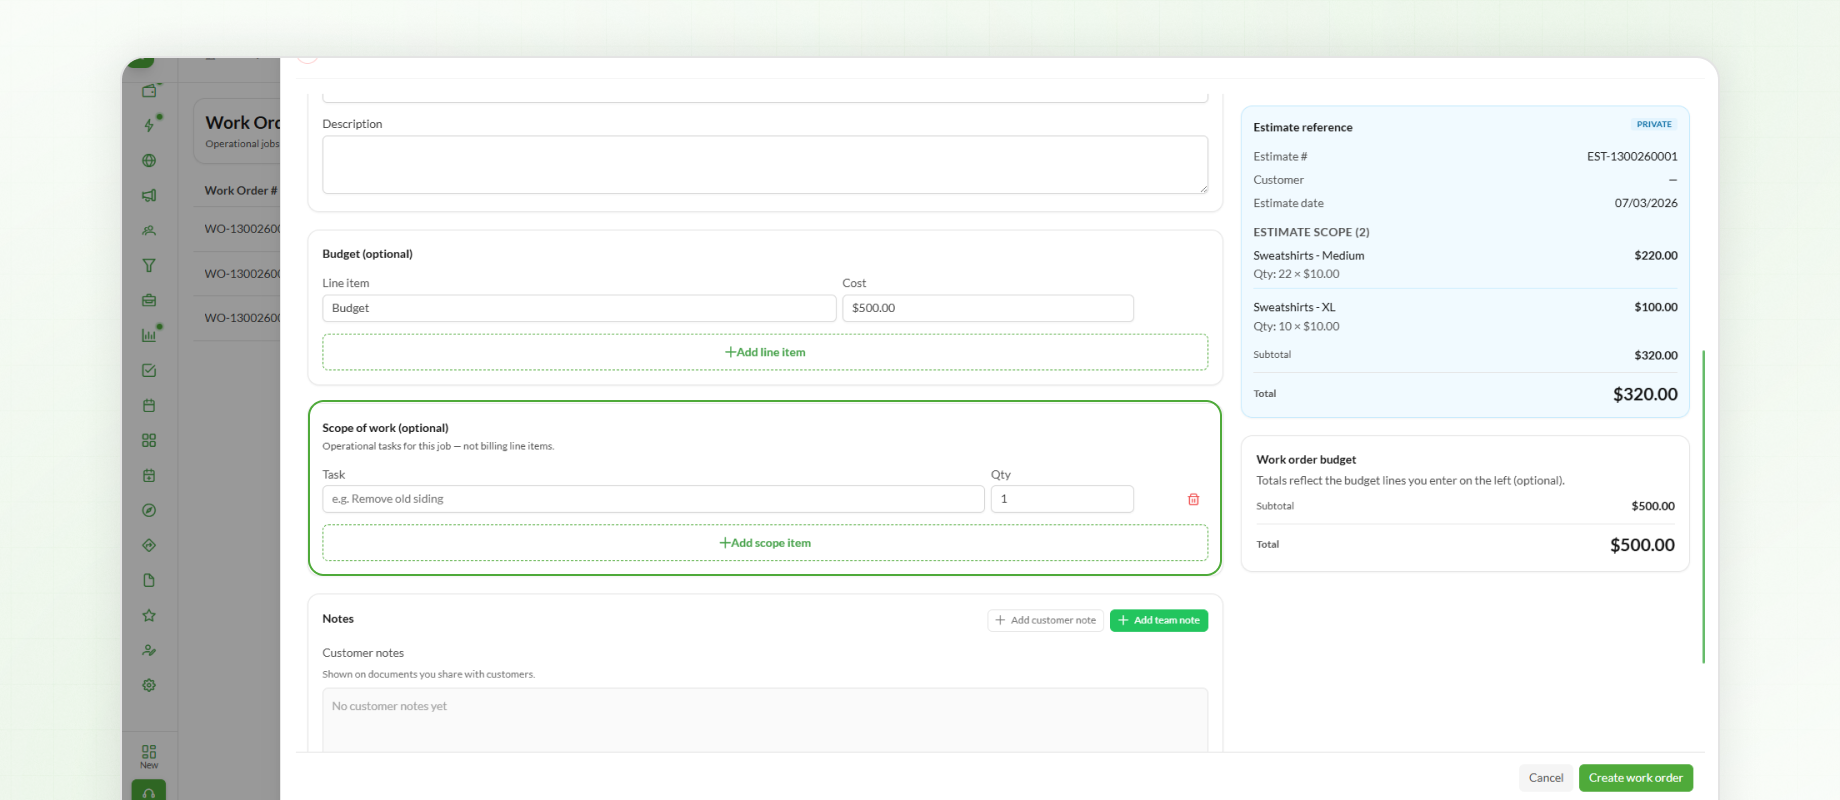
The Scope of Work defines the operational tasks that must be completed during the project.
Unlike the Budget section, which focuses on financial estimates, the Scope of Work describes the actual work that needs to be performed.
Notes
Work orders include two separate notes sections.
Customer Notes
Customer Notes can be included on documents that are shared with the customer.
Team Notes
Team Notes remain visible only to internal users and can be used for reminders, instructions, or additional project information.
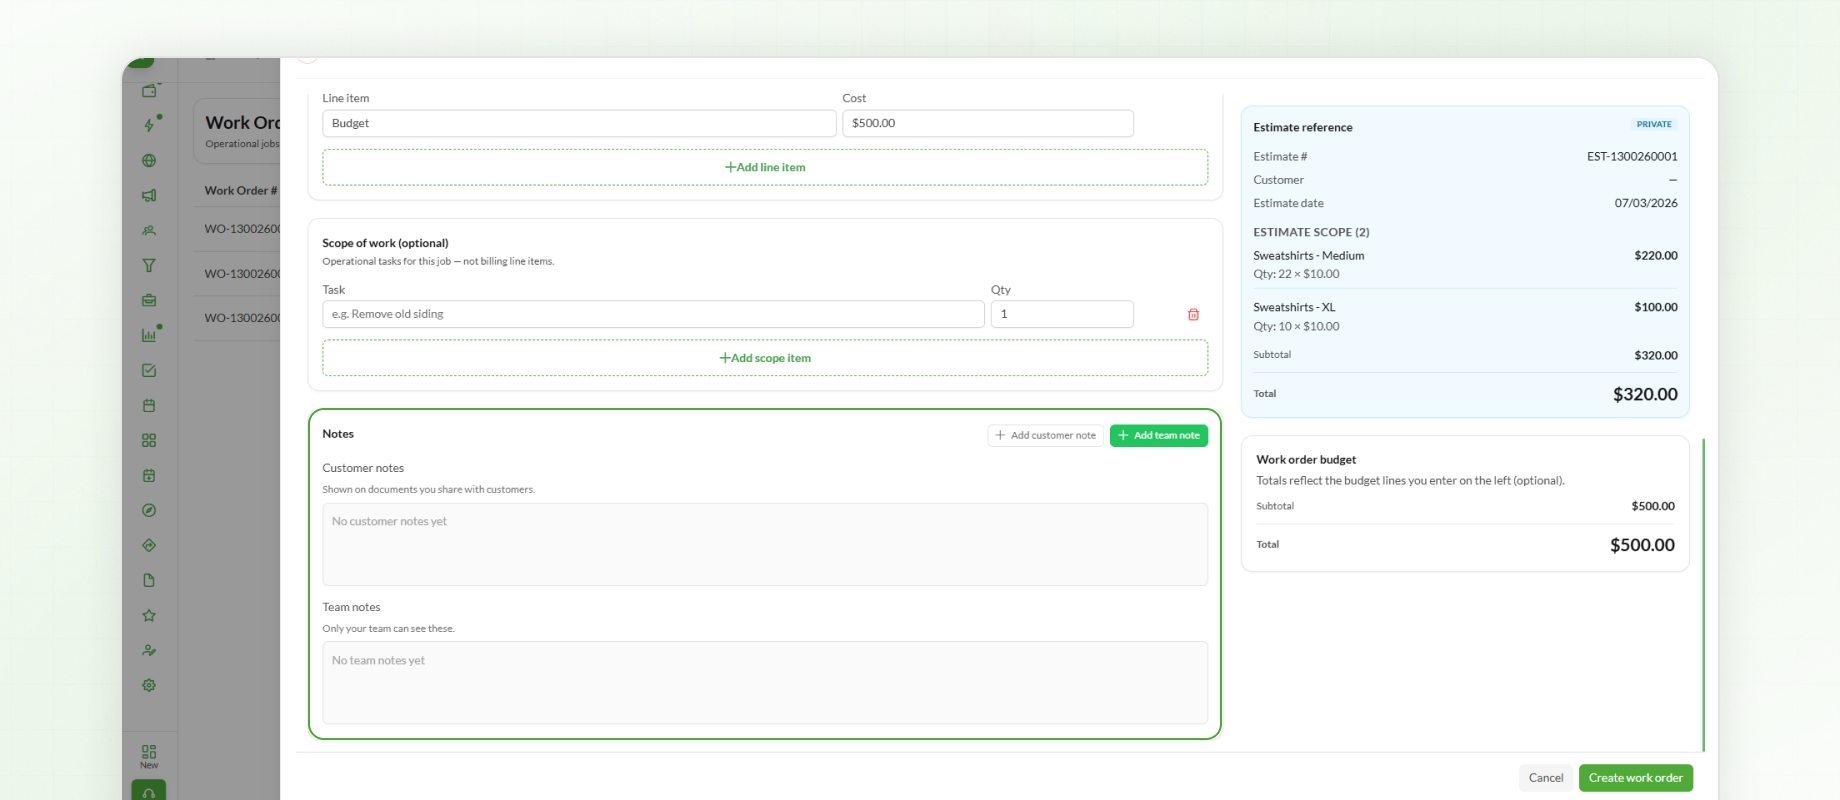
Creating the Work Order
After reviewing all the work order details, click Create Work Order.
Once the work order has been created, open the Actions menu and click View to access the work order details. Here, you can navigate through the Overview, Take Offs, Purchase Orders, Vendor Bills, Schedule, Files, and Notes tabs. From the Overview tab, you can also update the work order's Status and Priority whenever needed.
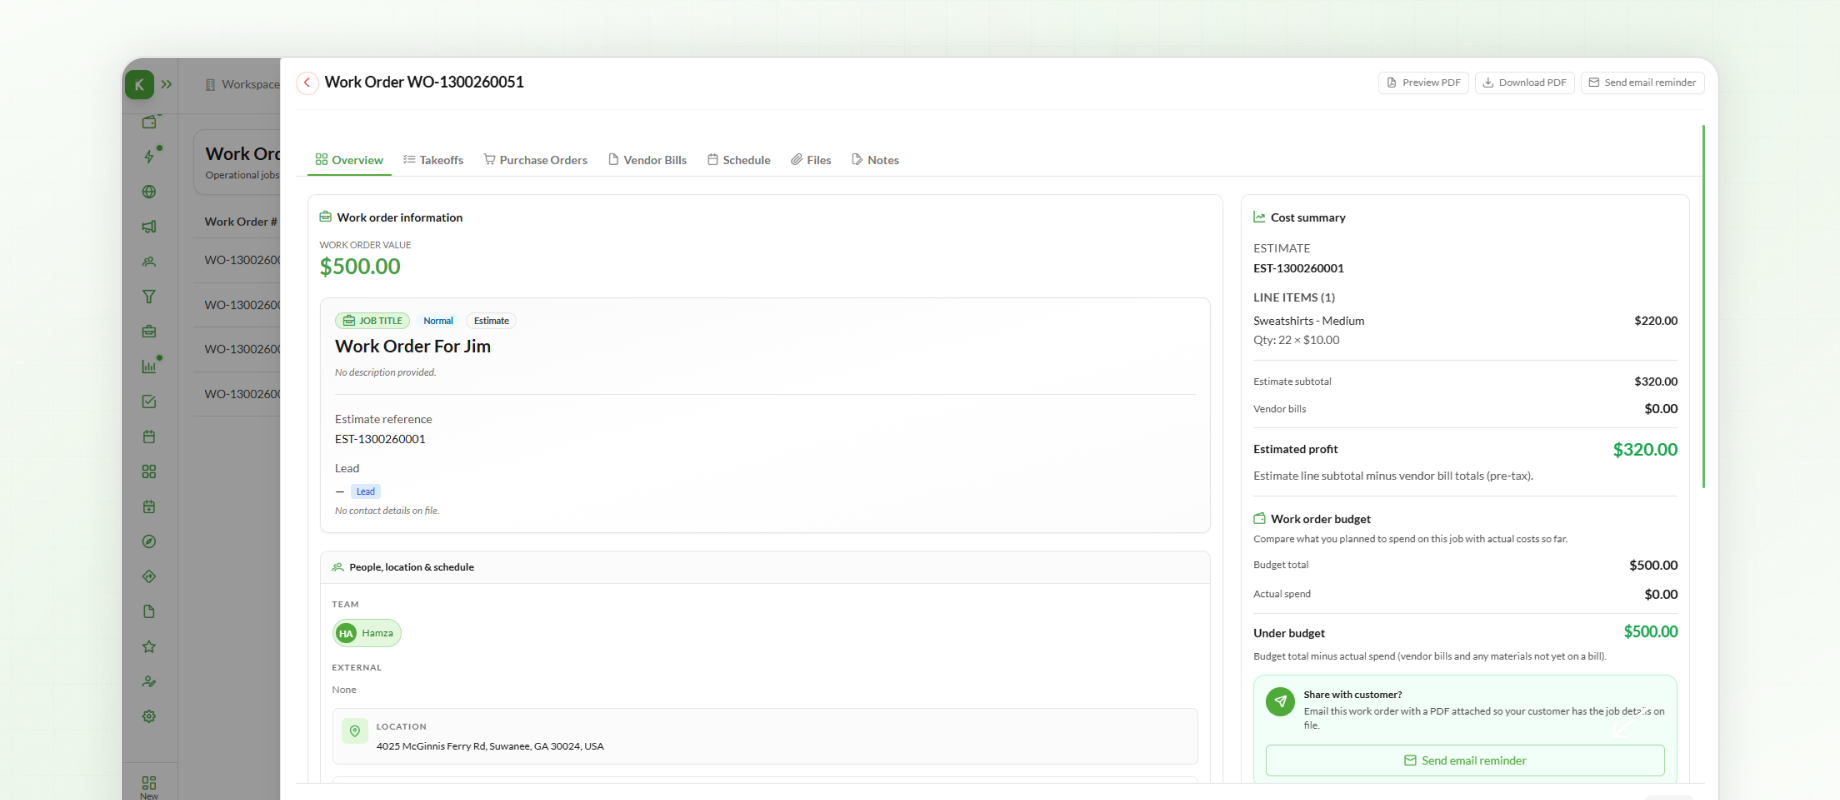
The work order is added to the Work Orders list, where it can be reopened at any time to:
Update project information.
Modify assignments.
Edit schedules.
Revise project details as work progresses.
Tracking Progress with Board View
Board View provides a visual workflow for monitoring work orders throughout their lifecycle.
Work orders are displayed as cards organized into status columns such as:
Draft
Planned
Scheduled
In Progress
Completed
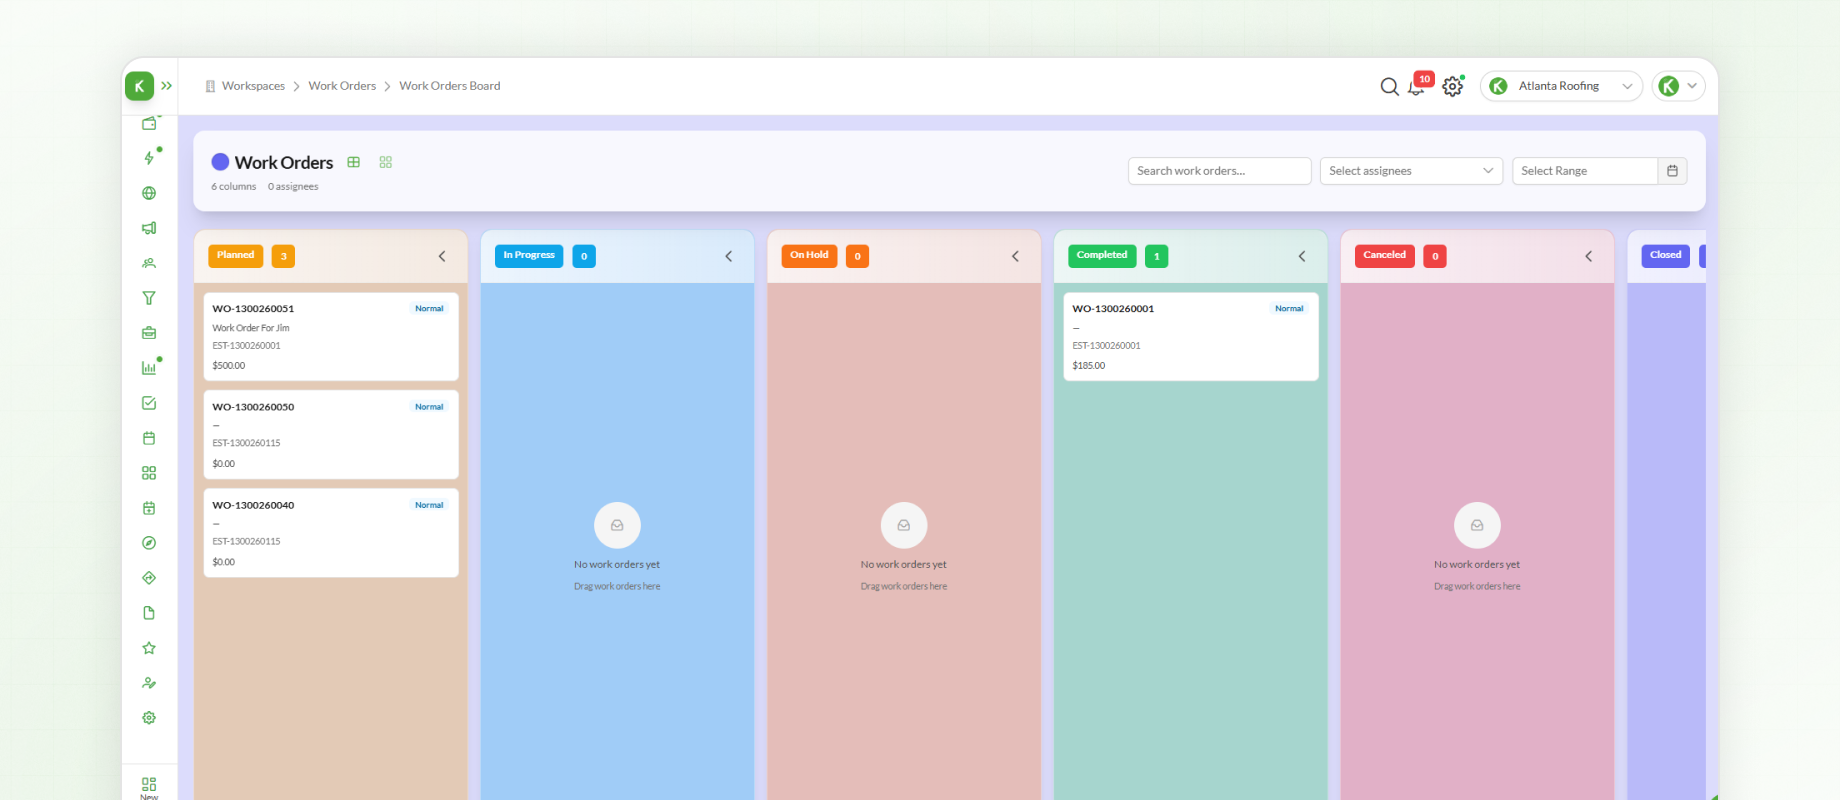
As work progresses, simply drag and drop a work order into its new status.
For example:
Move a work order from Planned to Scheduled once planning has been completed.
Move it to In Progress when work begins.
Move it to Completed after the project has been successfully finished.
This visual workflow makes it easy to monitor the progress of every project at a glance.
Finding Work Orders
As the number of work orders increases, Knockio provides several filtering options to help locate specific projects quickly.
Work orders can be searched or filtered by:
Assigned team member
Date
Current status
Other available filtering criteria
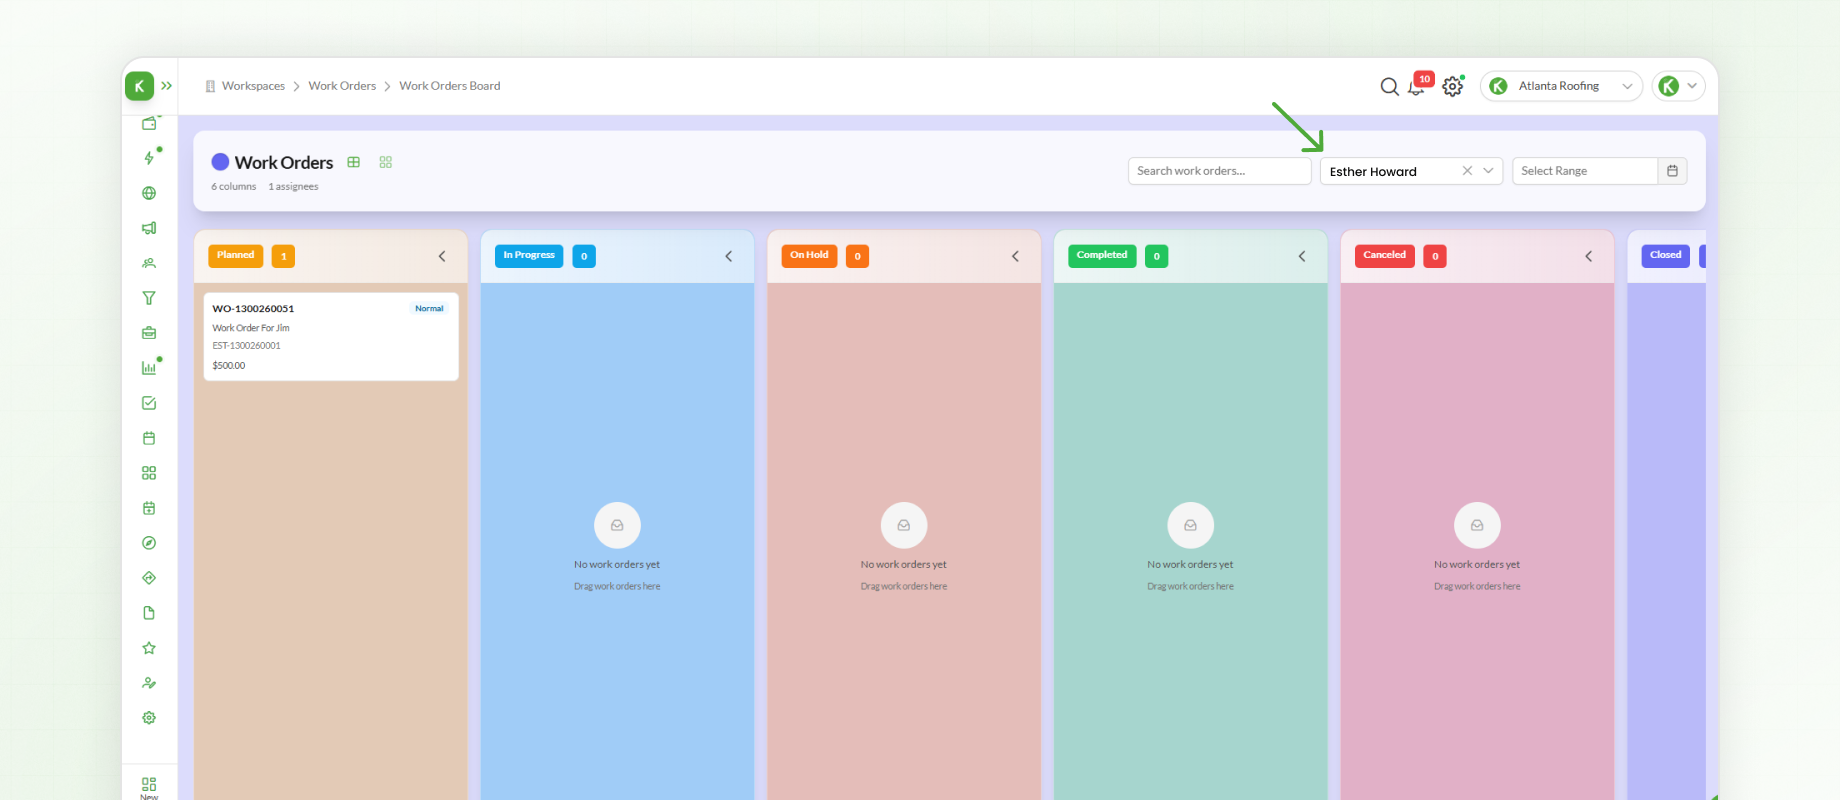
These tools make it easier to locate the required work order without manually searching through the entire list.
Next Steps
You have now completed the Knockio onboarding documentation.
From setting up your workspace and users to managing leads, communication, permissions, workflows, appointments, and work orders, you now have the foundation needed to begin using Knockio effectively.
As your organization grows, these features can be further customized to match your business processes and operational requirements. If additional assistance is required, the Knockio support team is available to help.