
Creating and Managing Leads
Create, organize, and manage leads from the web and mobile app.
Table of Contents
- Overview
- Creating Leads on the Web
- Creating a Lead from Map View
- Contact Information
- Managing a Lead
- Notes
- Tasks
- Appointments
- Communication
- Financials
- Operations
- Pre Knock Data
- Activity
- Creating a Lead from List View
- Creating & Managing Leads on the Mobile App
- Creating a Lead
- Updating an Existing Lead
- Mobile Lead Actions
- Directions
- Switching Between Map & List Views
- Switching Campaigns
- Switching Territories
- Map Types
- Notifications
- Next Steps
Overview
The Leads module is the core of Knockio, enabling users to create, manage, and track leads from both the web platform and the mobile application. Once a lead has been created, users can perform additional actions such as creating tasks, scheduling appointments, sending messages, and maintaining activity records.
This article explains how to create leads, manage lead information, and use the available lead management features on both web and mobile.
Creating Leads on the Web
Open the Leads section from the left-hand navigation menu.
Two views are available:
Map View
List View
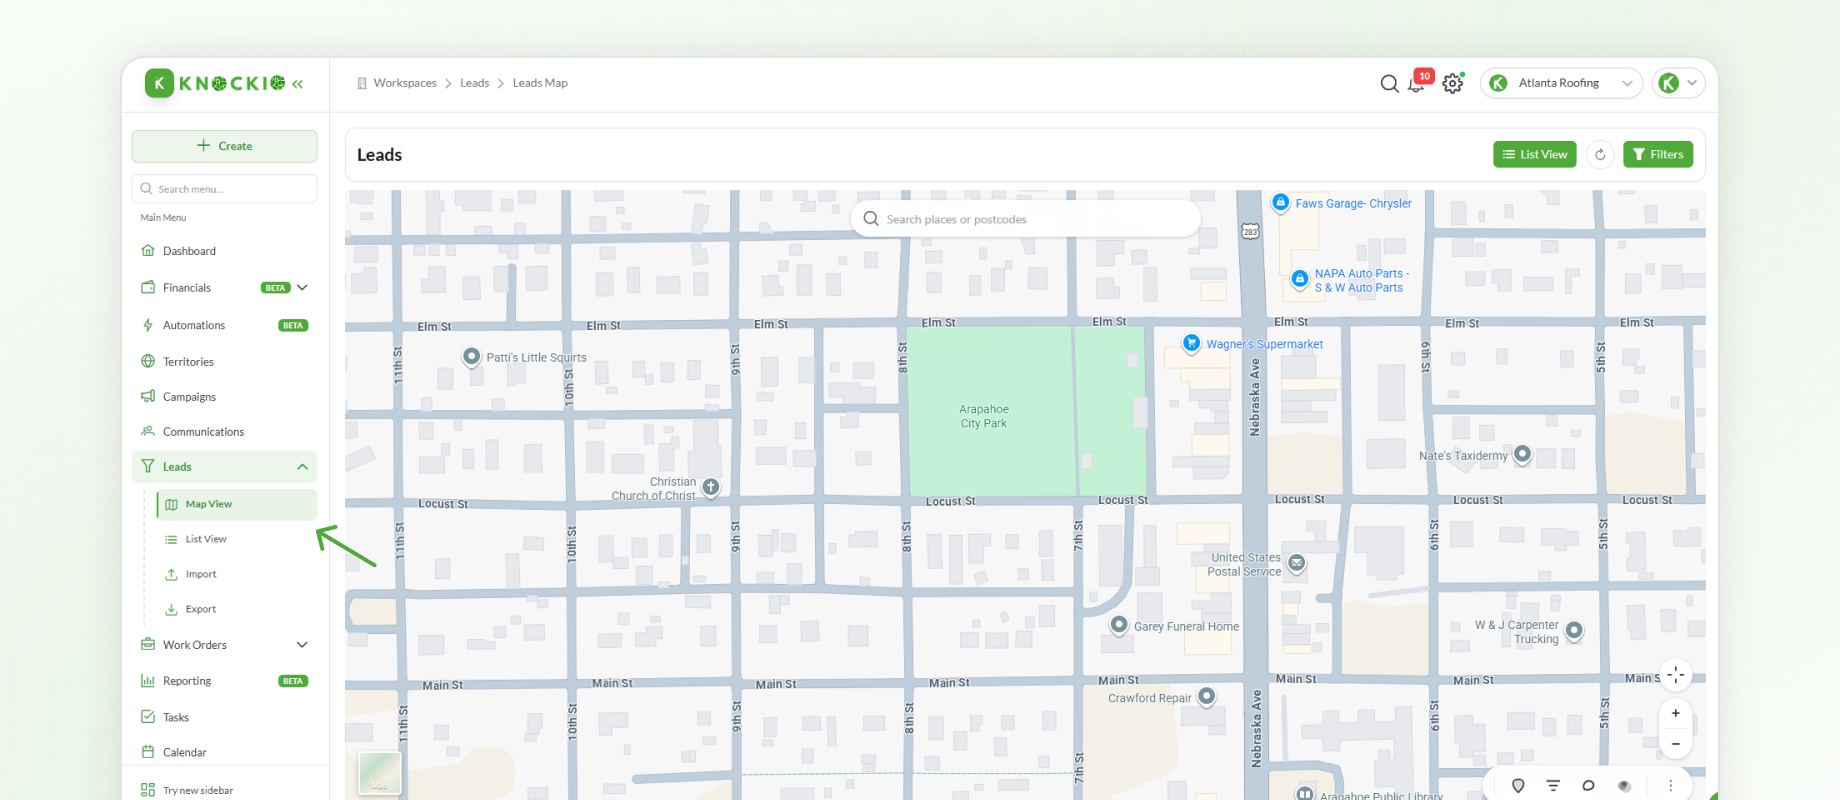
Both views create the same type of lead. The difference lies only in how the lead is created.
Creating a Lead from Map View
To create a lead from Map View:
Click anywhere on the map to drop a pin.
Complete the lead information.
The lead form includes the following information:
Status
Lead Name
Campaign
Contact Information
The Contact Info section allows you to enter:
Contact Name
Contact Type
Email Address
Phone Number
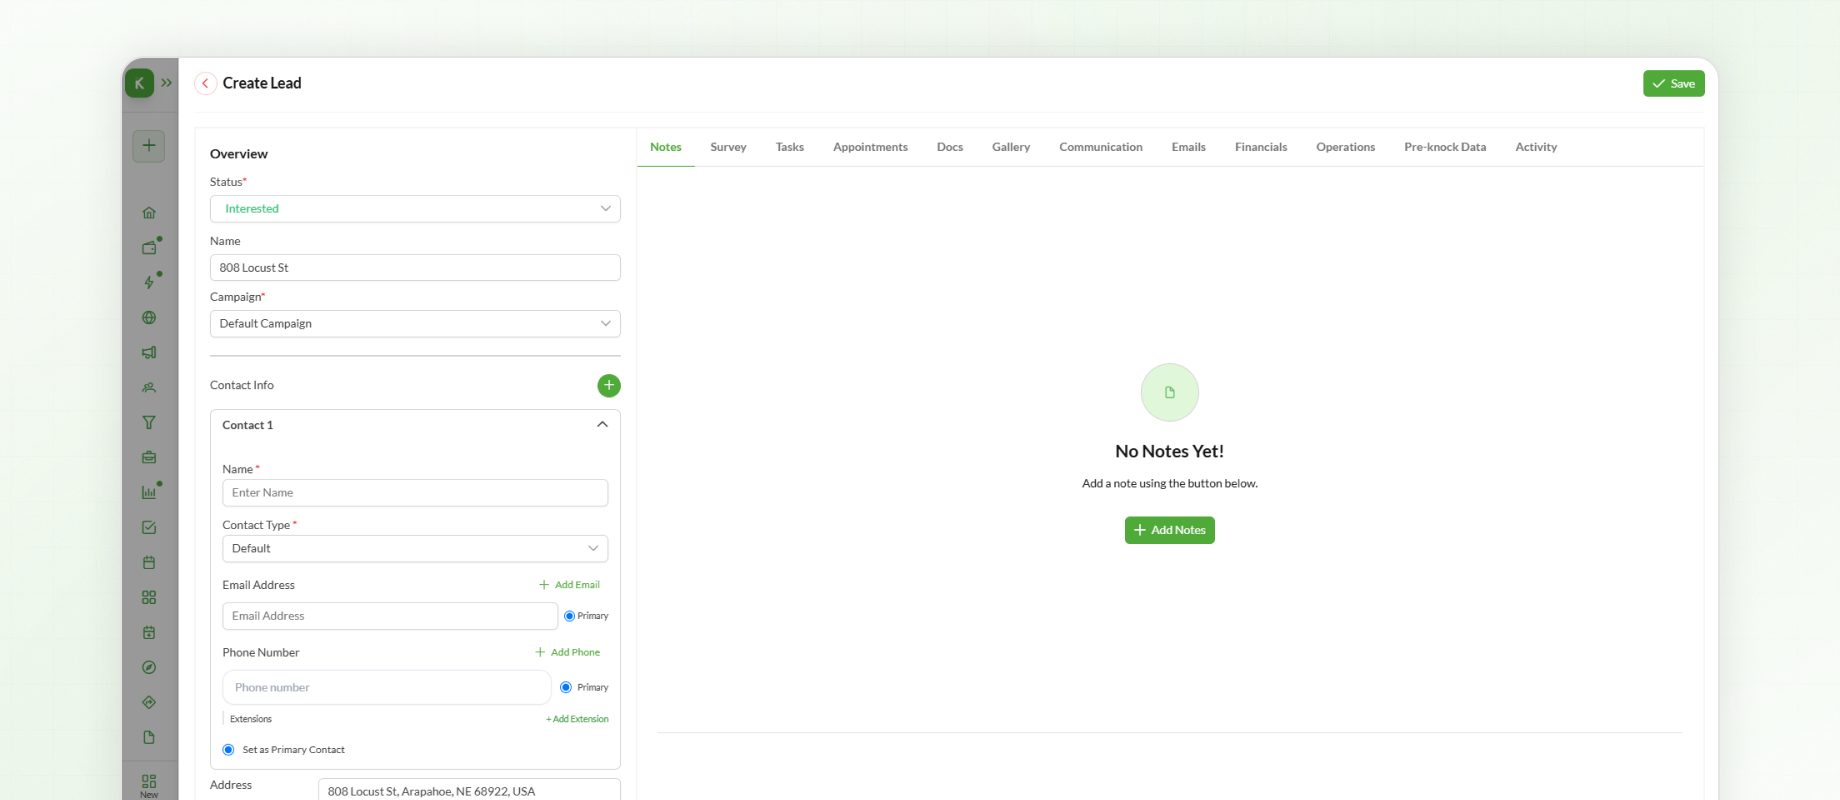
Some statuses require contact information before the lead can be saved, depending on how the status has been configured.
The address is automatically populated based on the location where the pin was placed.
If the selected status includes any assigned Custom Fields, they will appear automatically within the form. Required Custom Fields must be completed before the lead can be saved.
After completing the required information, click Save.
The lead is now created.
Note: If the lead's status is changed later (for example, from Interested to Follow-up), certain Custom Fields may no longer appear. This occurs because Custom Fields are assigned to specific statuses. If the new status does not include a particular Custom Field, it will no longer be displayed.
Managing a Lead
After a lead has been created, several additional actions become available from the lead details page.
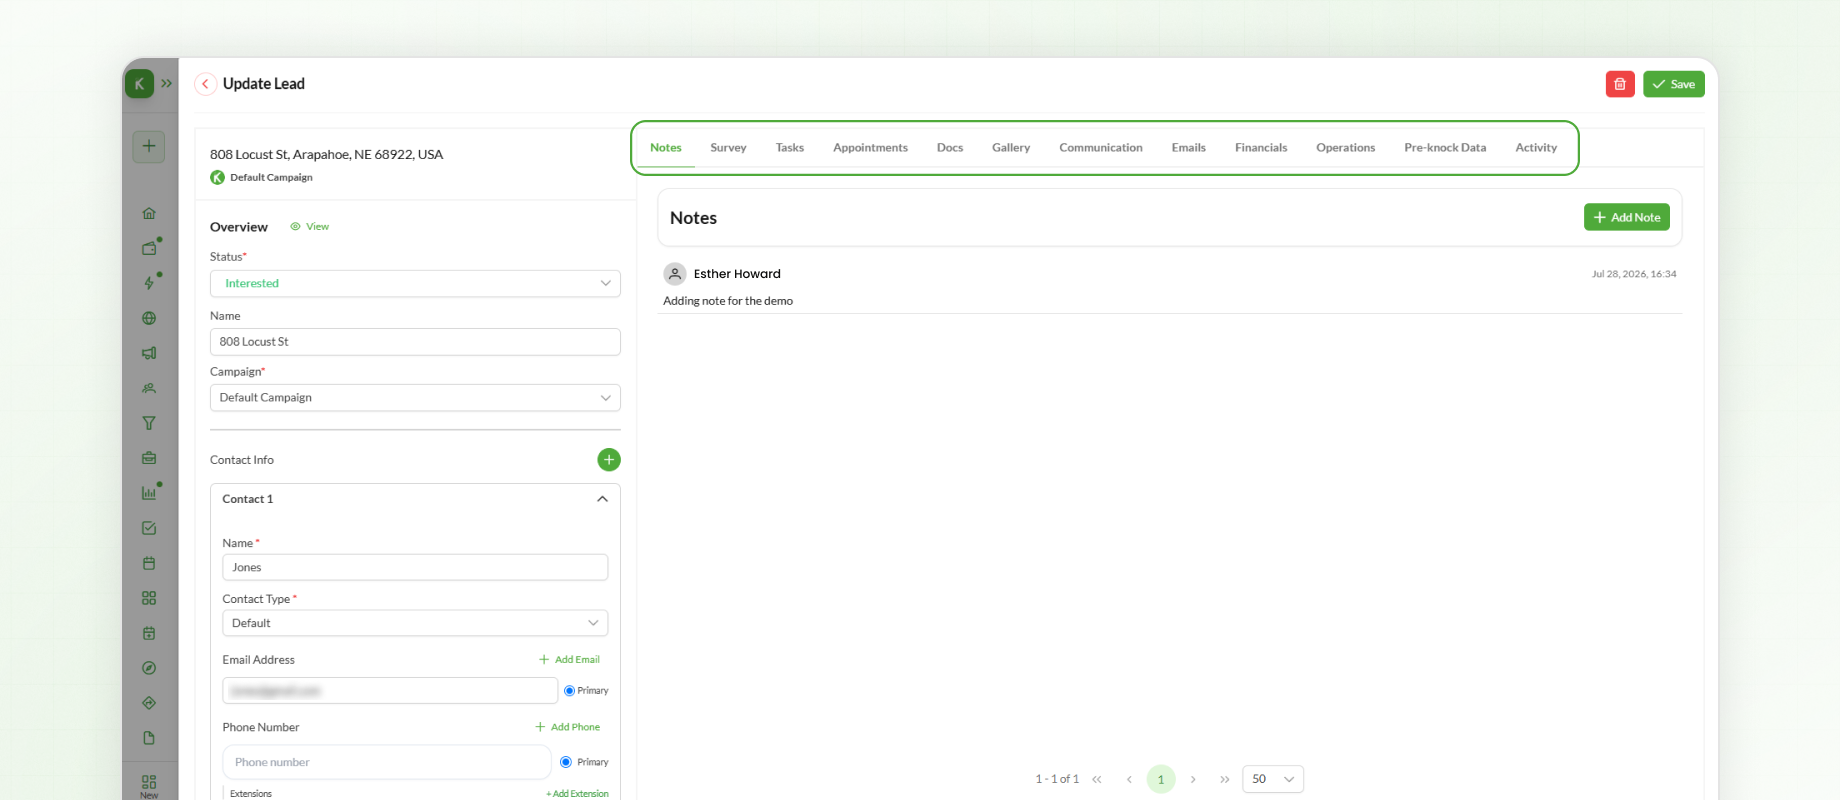
Notes
The Notes section allows users to add comments and updates to a lead.
Users can also mention other workspace members using @username.
Mentioning another user does not automatically grant them access to the lead. Access continues to depend on the user's assigned role permissions and whether the lead falls under Full or Assigned data access.
Tasks
Tasks can be created directly from within a lead.
To create a task:
Open the Tasks tab.
Enter the task name.
Select a due date.
Assign the task to a user.
Add a description or reminder if required.
The task will then be linked to the lead.
Appointments
Appointments can also be scheduled directly from the lead.
To create an appointment:
Open the Appointments tab, from the left-hand menu.
Enter the appointment name.
Select a colour.
Add one or more team members.
Knockio automatically displays available time slots where all selected team members are available for the chosen duration.
Additional options are available under Advanced Information, including:
Description
Reminder
Recurring appointments
Appointments can also be created independently from the Appointments module. Creating them within a lead simply associates the appointment with that specific lead.
Communication
If the lead includes a contact with a phone number, messages can be sent directly from the Communication section.
If email has already been configured for the workspace, users can compose and send emails directly from the Email section of the lead.
Financials
The Financials section allows users to manage the financial information associated with a lead.
Users can create and manage:
Estimates
Invoices
Vendor Bills
Payments
This allows the complete financial lifecycle of a job to be managed directly from the lead.
Operations
The Operations section provides access to operational documents used during project planning and execution.
Users can create and manage:
Work Orders
Material Takeoffs
Purchase Orders
These records remain linked to the lead, allowing field and office teams to manage project operations from a single location.
Pre Knock Data
The Pre Knock Data section displays property and homeowner information collected before visiting a lead.
Depending on the available data, users can review details such as property information, ownership records, and other relevant insights to better prepare before making contact.
Activity
The Activity panel displays a complete history of actions performed on the lead.
Examples include:
Lead creation
Status changes
User actions
Other activity performed throughout the lead's lifecycle
This provides a chronological record of updates made to the lead.
Creating a Lead from List View
Users with Growth or CRM plans can also create leads from List View.
To create a lead:
Switch to List View.
Click Create Lead.
Complete the required information.
Click Save.
Regardless of whether a lead is created from Map View or List View, the resulting lead behaves exactly the same.
Creating & Managing Leads on the Mobile App
The Knockio mobile application provides a streamlined workflow for field representatives.
Creating a Lead
To create a lead:
Open Map View from the home screen.
Search for a location or tap directly on a property.
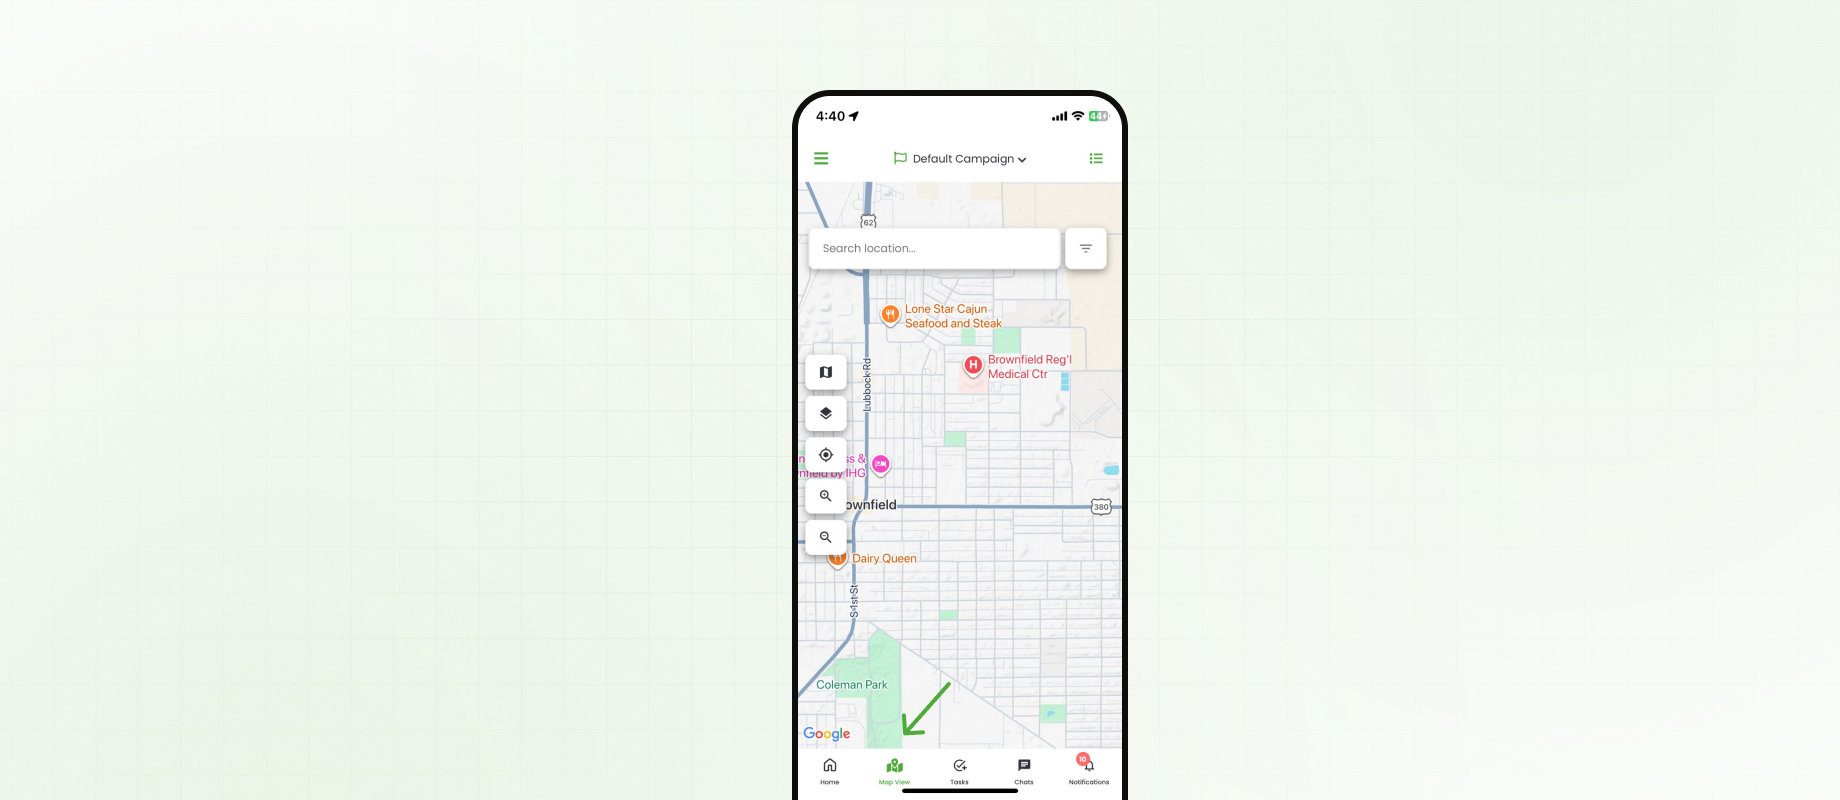
After selecting a location, a list of available statuses appears.
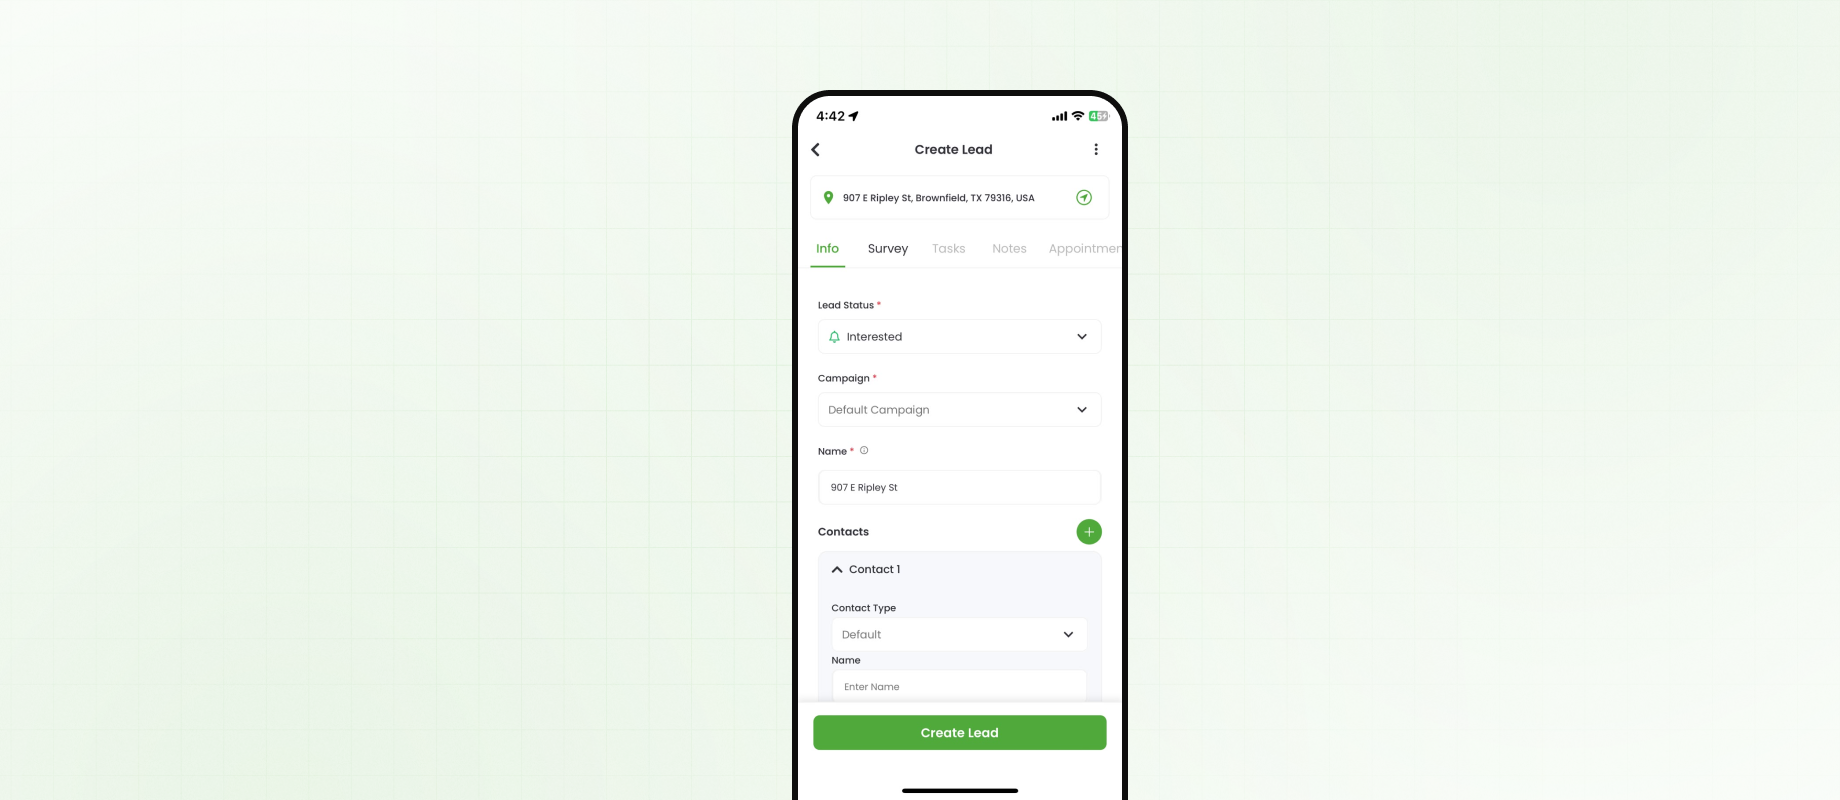
If the selected status does not contain any required fields, the lead is created immediately, allowing the user to continue to the next location.
If required fields exist, a form appears prompting the user to complete the necessary information before saving the lead.
Updating an Existing Lead
To update an existing lead:
Tap the lead pin.
Select Update Lead.
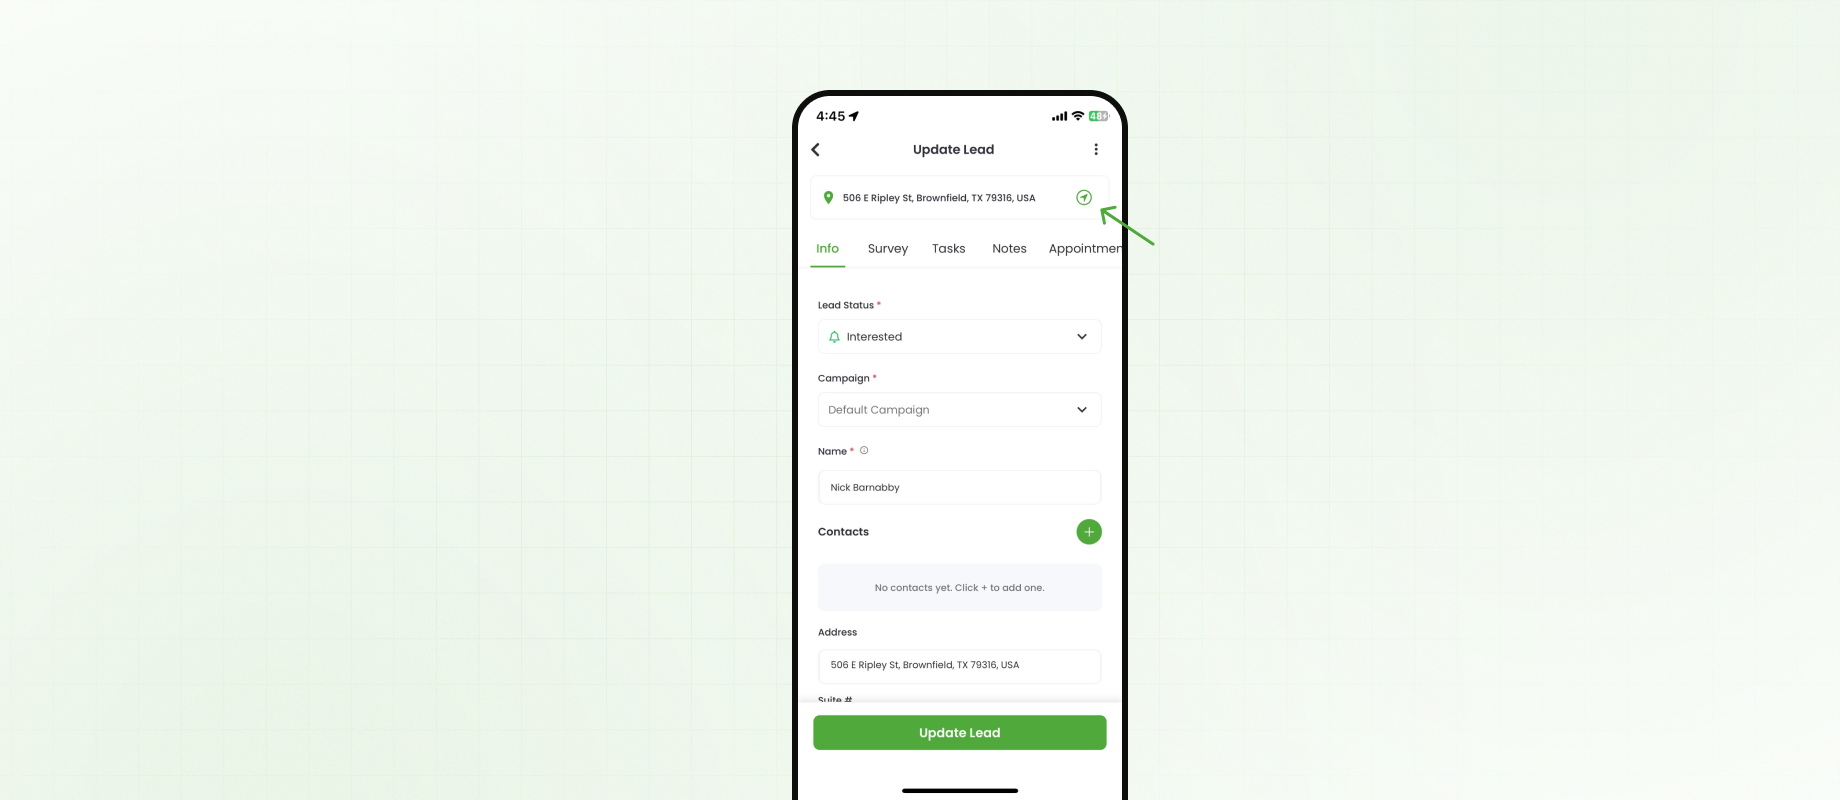
The lead details screen opens, allowing the information to be viewed or modified.
Mobile Lead Actions
Within the mobile lead details screen, users can:
Update lead information.
Add contacts.
Create tasks.
Add notes.
Create appointments.
These features mirror the core lead management functions available on the web platform.
Mobile Navigation & Views
The mobile application includes several navigation and mapping features to support field operations.
Directions
Selecting the arrow icon beside the lead address opens Google Maps, providing driving directions to the property.
Switching Between Map & List Views
Users can switch between Map View and List View using the icon in the top-right corner.
A long press on the Map View icon also allows the view to be changed.
Switching Campaigns
The campaign selector at the top of the screen allows users to switch between available campaigns.
Campaign visibility depends on whether the user's role has Full or Assigned access to Campaigns.
Switching Territories
The territory selector on the left side of the map allows users to switch between territories assigned to them.
Map Types
Users can switch between:
Standard Map View
Satellite View with Addresses
Satellite View without Addresses
Notifications
The notifications icon in the bottom-right corner provides access to all account notifications.
Next Steps
Once leads have been created and managed, the next step is using Boards to organize leads into structured workflows. Boards help different departments manage lead progression while keeping every stage of the workflow organized and connected.