
Creating and Managing Campaigns
Set up campaigns to manage your field operations efficiently.
Table of Contents
Overview
Campaigns serve as the central workspace within Knockio, bringing together users, territories, presentations, financial templates, surveys, and other resources required to manage field operations efficiently.
Once a campaign has been configured, your team has everything they need to begin working within a structured environment.
This article explains how to create and manage campaigns and configure the resources associated with them.
Accessing the Campaigns Section
To create or manage campaigns:
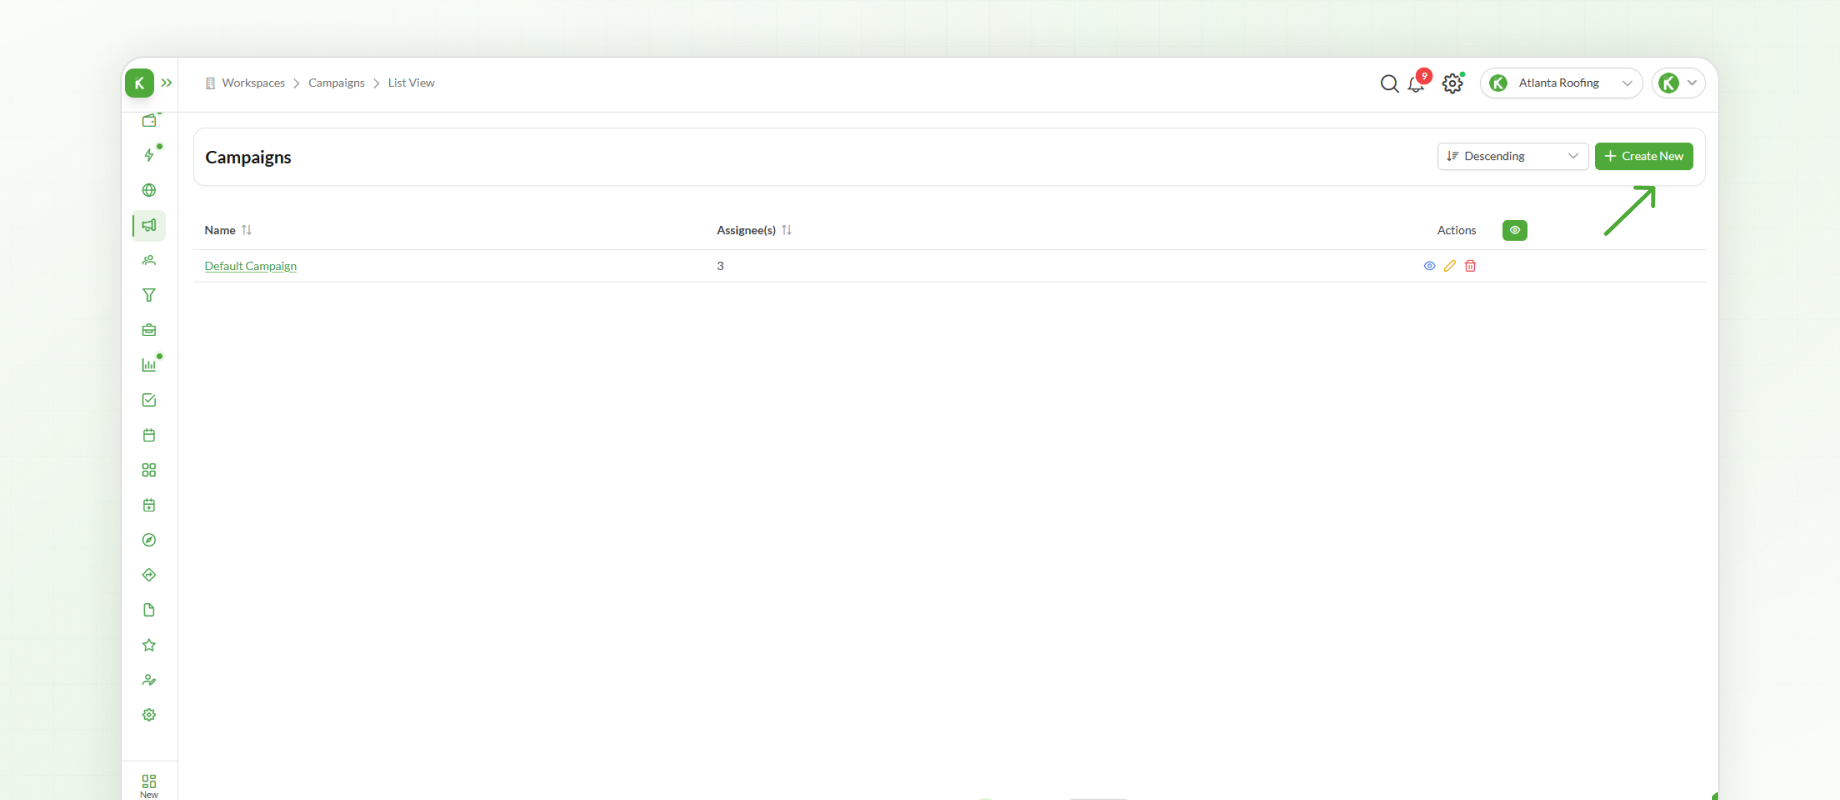
Select Campaigns from the left-hand navigation menu.
The Campaigns section displays all campaigns within the workspace. Existing campaigns can be edited at any time, or new campaigns can be created as your business grows.
To create a new campaign, click Create New.
Configuring Campaign Details
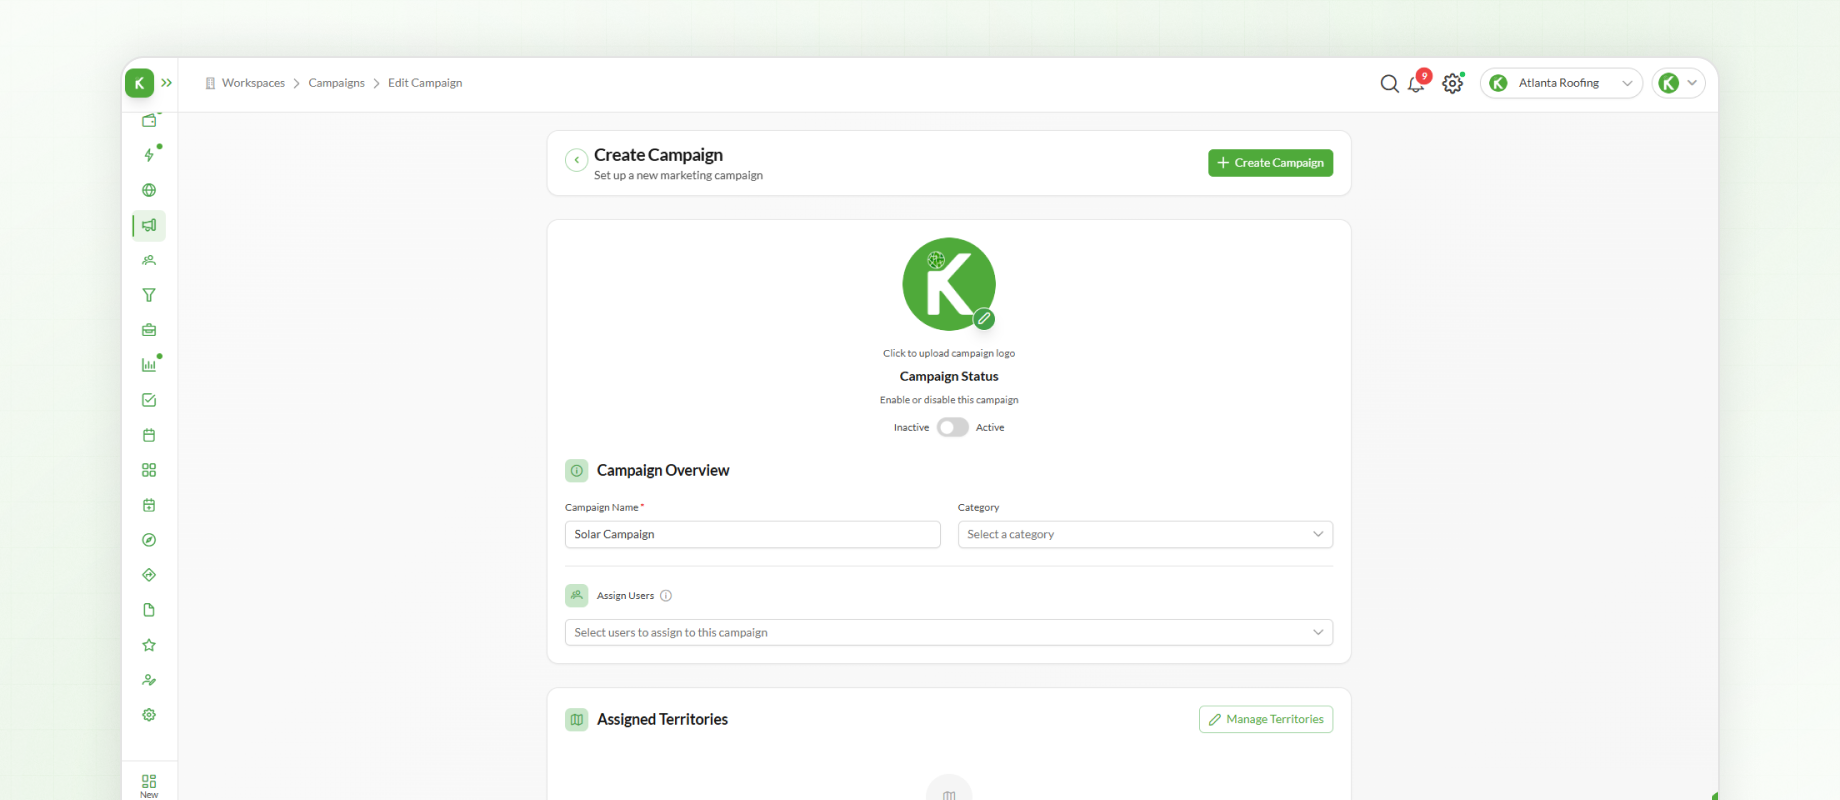
Begin by entering the basic campaign information.
Campaign Logo
You can optionally upload a Campaign Logo to make the campaign easier to identify throughout the workspace.
Campaign Status
Each campaign can be marked as either Active or Inactive.
Active campaigns are available for day-to-day operations.
Inactive campaigns remain within the workspace but are no longer available for active use.
Campaign Information
Enter the following details:
Campaign Name
Category
For example, you may choose Solar Energy as the campaign category.
Assigning Users
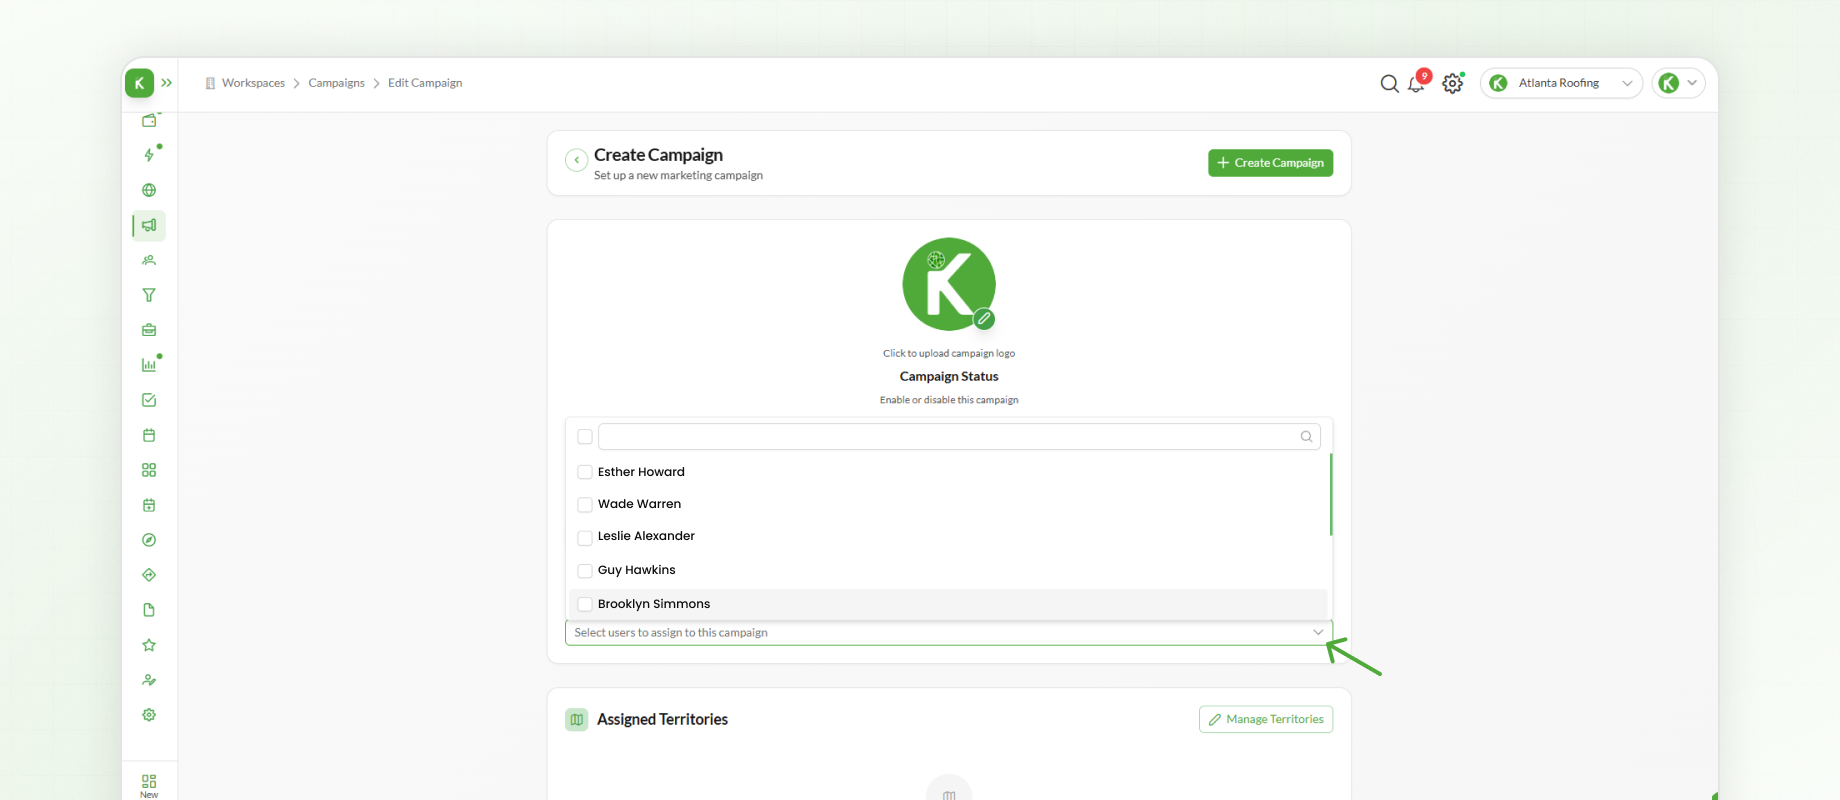
Assign the users who will be working within the campaign.
Only users assigned to the campaign, or users whose roles provide Full access to Campaigns, will be able to work within that campaign.
Assigning Territories
The Assigned Territories section allows territories to be linked to the campaign.
To assign territories:
Click Add Territories.
Select one or more existing territories.
Save the changes.
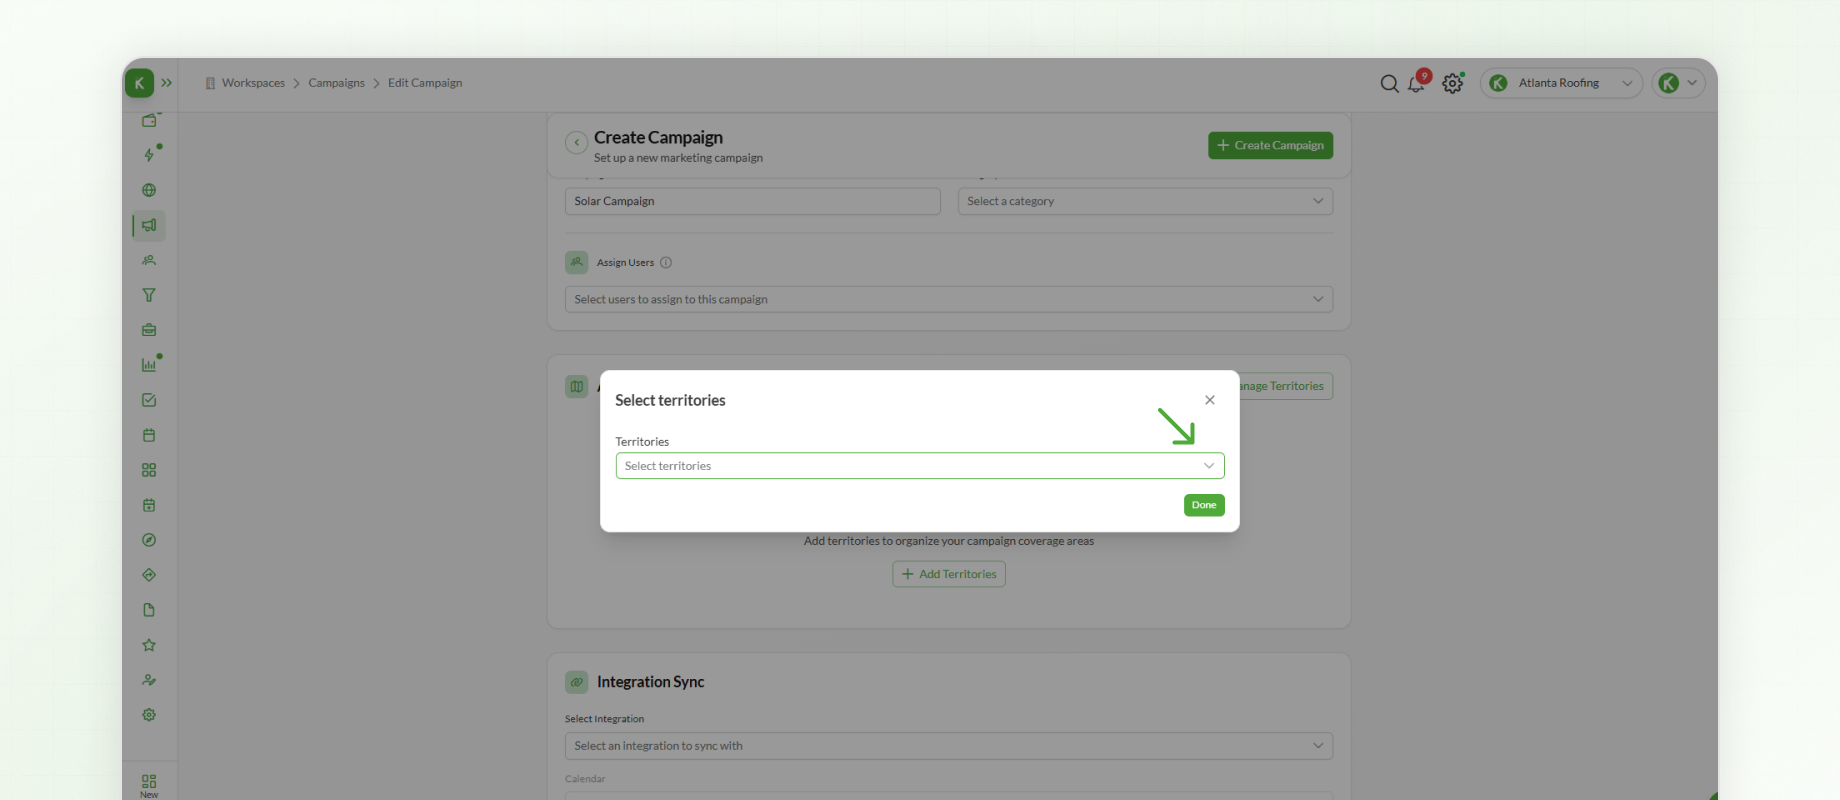
Associating territories with a campaign helps ensure field teams work within the correct service areas.
Integration Sync
The Integration Sync section allows supported integrations to be connected to the campaign.
Select an available integration and connect a calendar to synchronize appointments and schedules.
Keeping calendars synchronized helps teams stay organized while ensuring scheduling information remains up to date across connected platforms.
Presentation Files
The Presentation Files section allows campaign-specific documents to be uploaded.
Examples include:
Sales presentations
Product brochures
Pricing guides
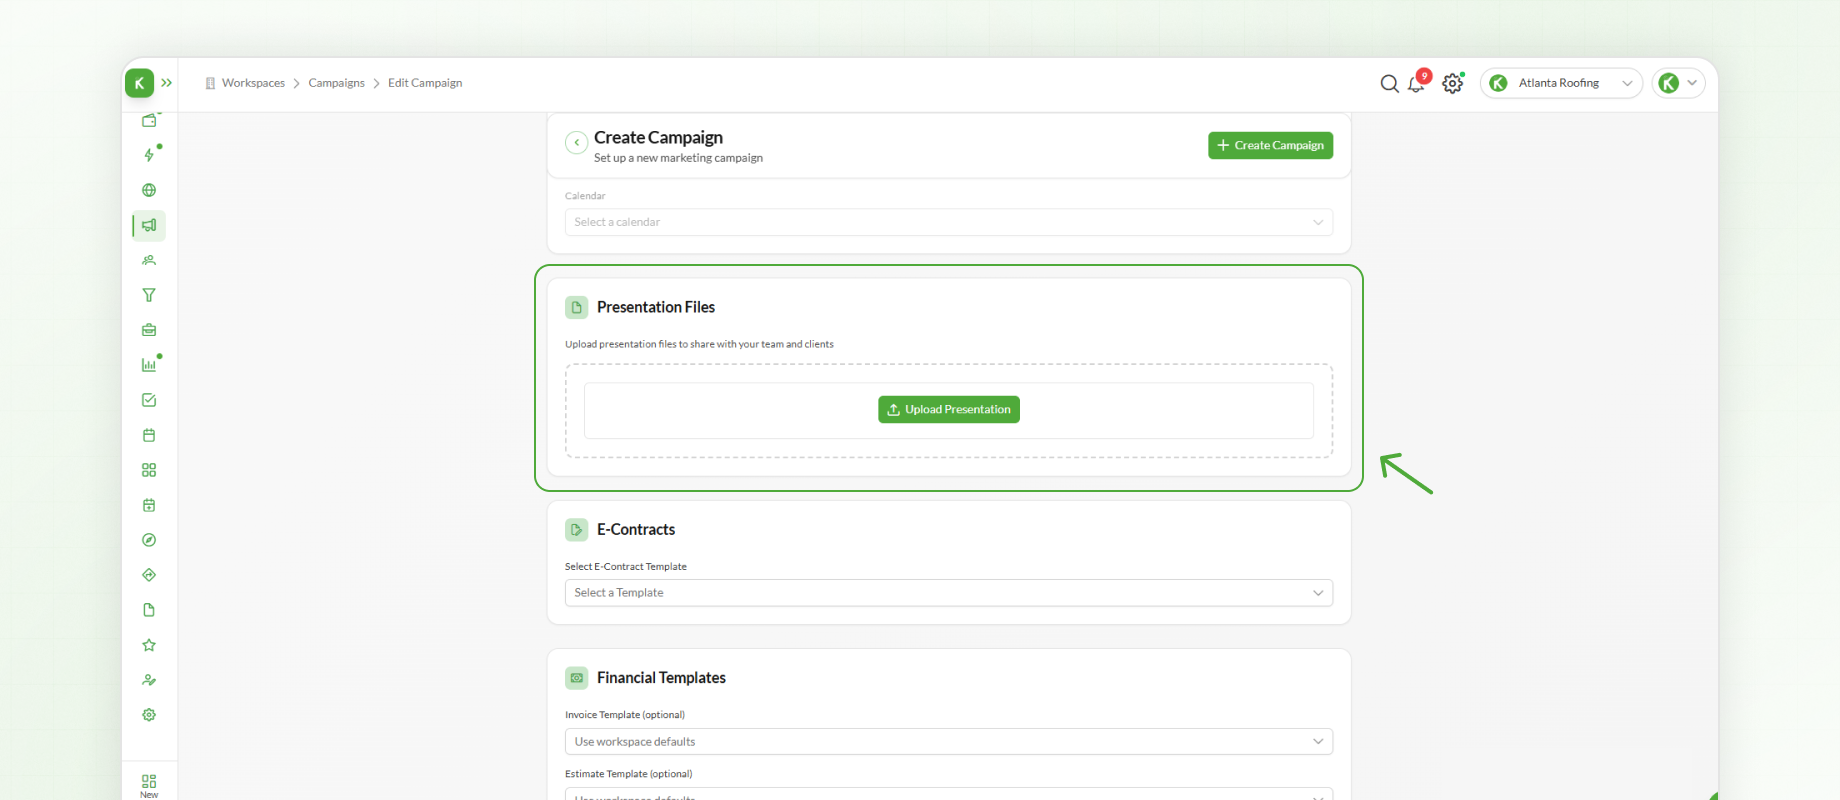
These files can be accessed or shared with customers whenever needed during field operations.
E-Contracts
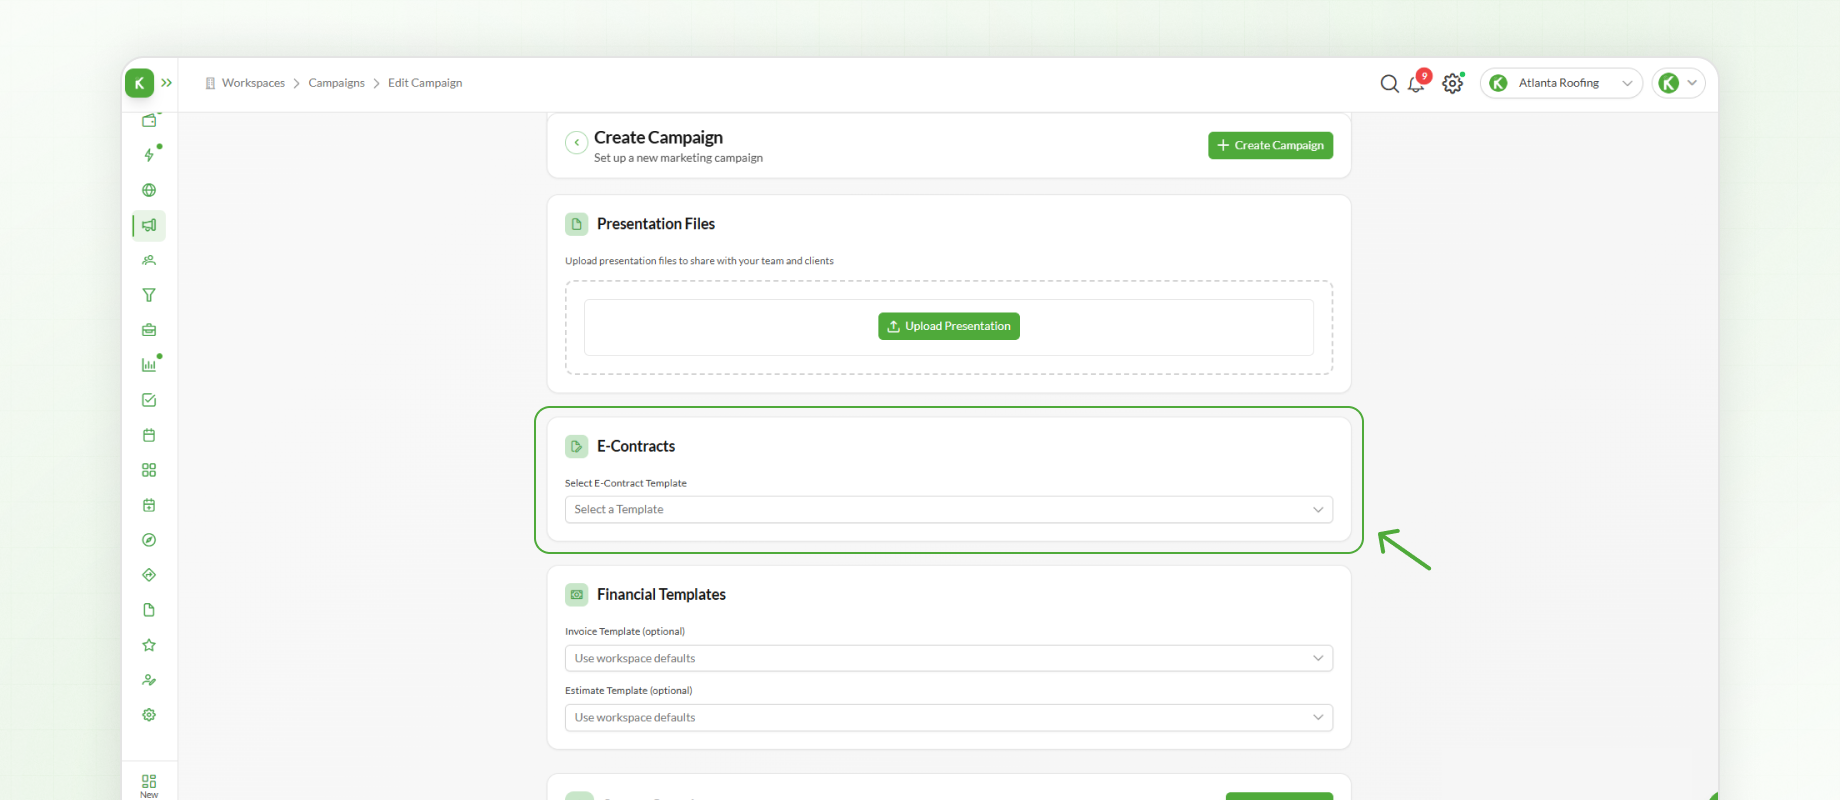
The E-Contracts section allows contract templates to be associated with a campaign.
Select one or more available contract templates to make them accessible throughout the campaign whenever contracts need to be generated and signed.
Using predefined templates helps maintain consistency across customer documentation.
Financial Templates
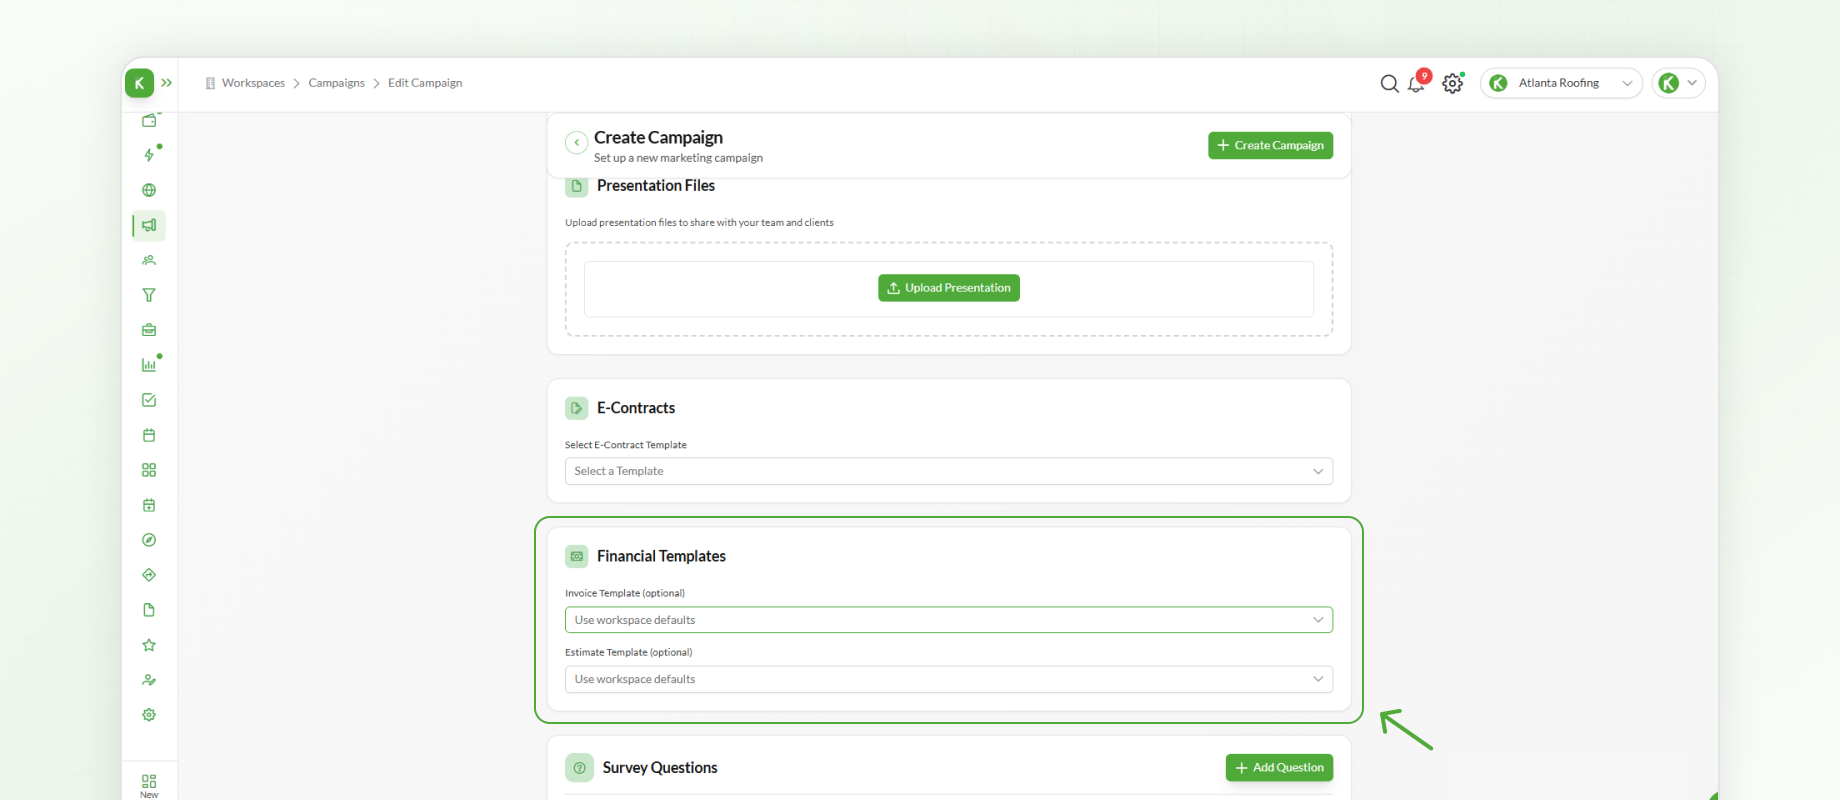
Campaigns can also be configured with financial templates.
Select the Estimate and Invoice templates that should be used within the campaign.
This ensures financial documents follow a consistent format across all projects associated with the campaign.
Surveys
The Surveys section allows survey questions to be added to a campaign.
If your workflow requires surveys, add necessary questions within this section.
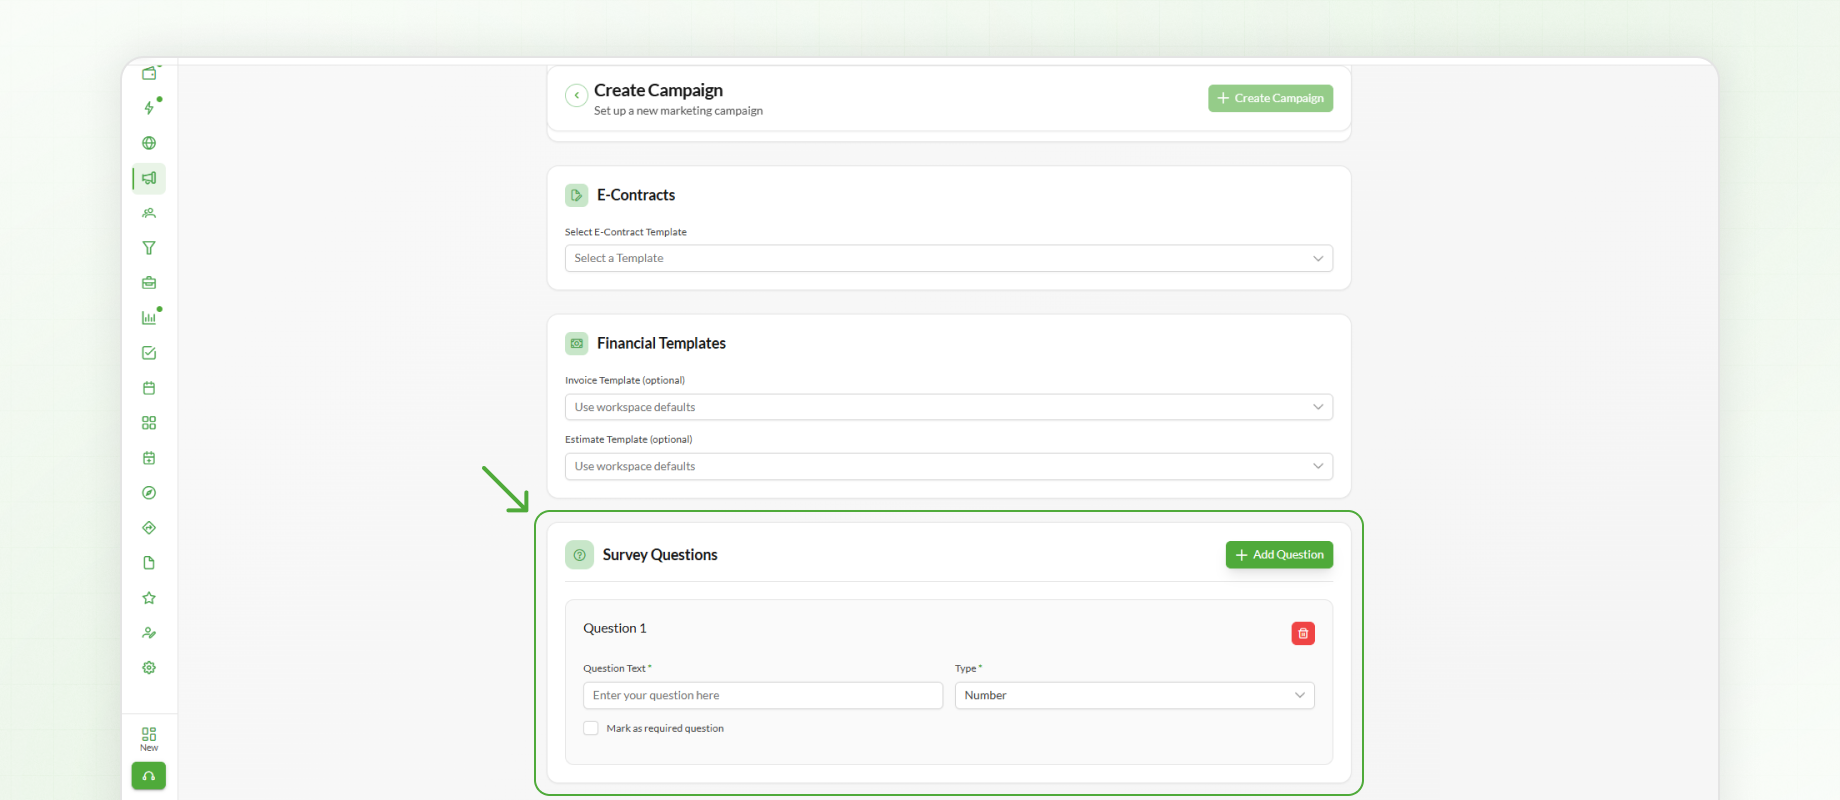
These surveys can then be used whenever responses are required during field operations.
Creating the Campaign
After reviewing all campaign settings, click Create Campaign.
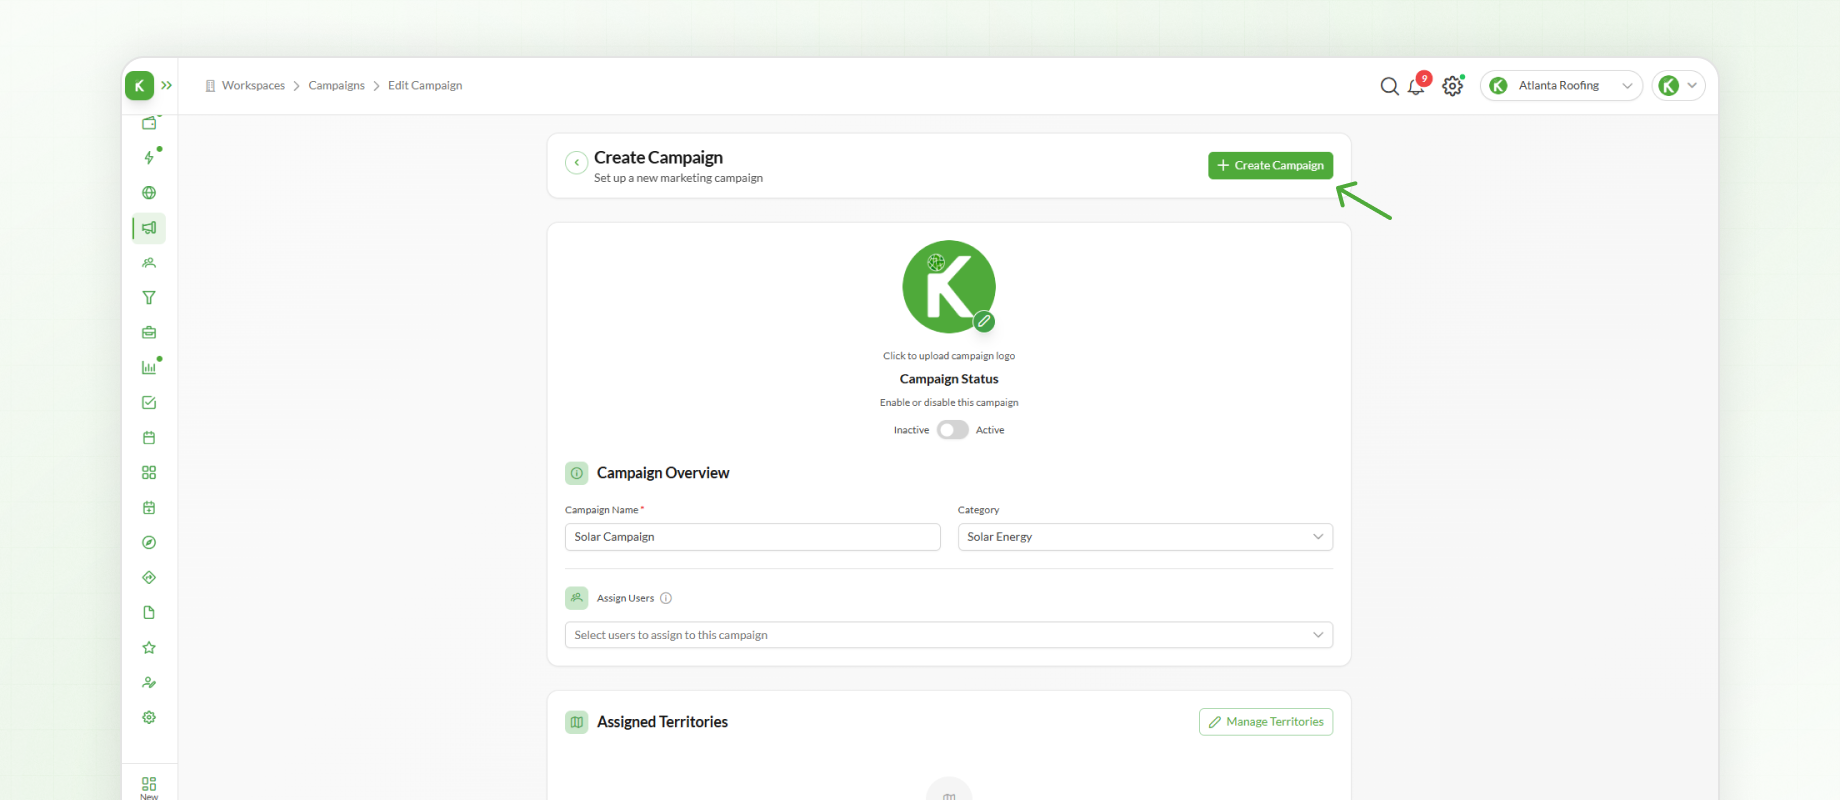
The campaign is now ready for use.
Campaign settings can be revisited and updated at any time as business requirements evolve.
Next Steps
Once a campaign has been created, the next step is creating Territories. Territories define service areas, help organize field operations, and ensure work is assigned to the appropriate locations and teams.