
Create and Manage Territories
Create territories to improve team coverage and planning.
Table of Contents
Overview
Territories help divide your service area into manageable regions, making it easier to organize campaigns, assign field teams, and manage coverage efficiently.
This article explains how to create territories, define their boundaries, explore the available mapping tools, and view the properties within each territory.
Accessing the Territories Section
To create or manage territories:
Select Territories from the left-hand navigation menu.
The Territories section displays all existing territories within the workspace. Existing territories can be viewed, edited, or updated at any time.
To create a new territory, click Create New.
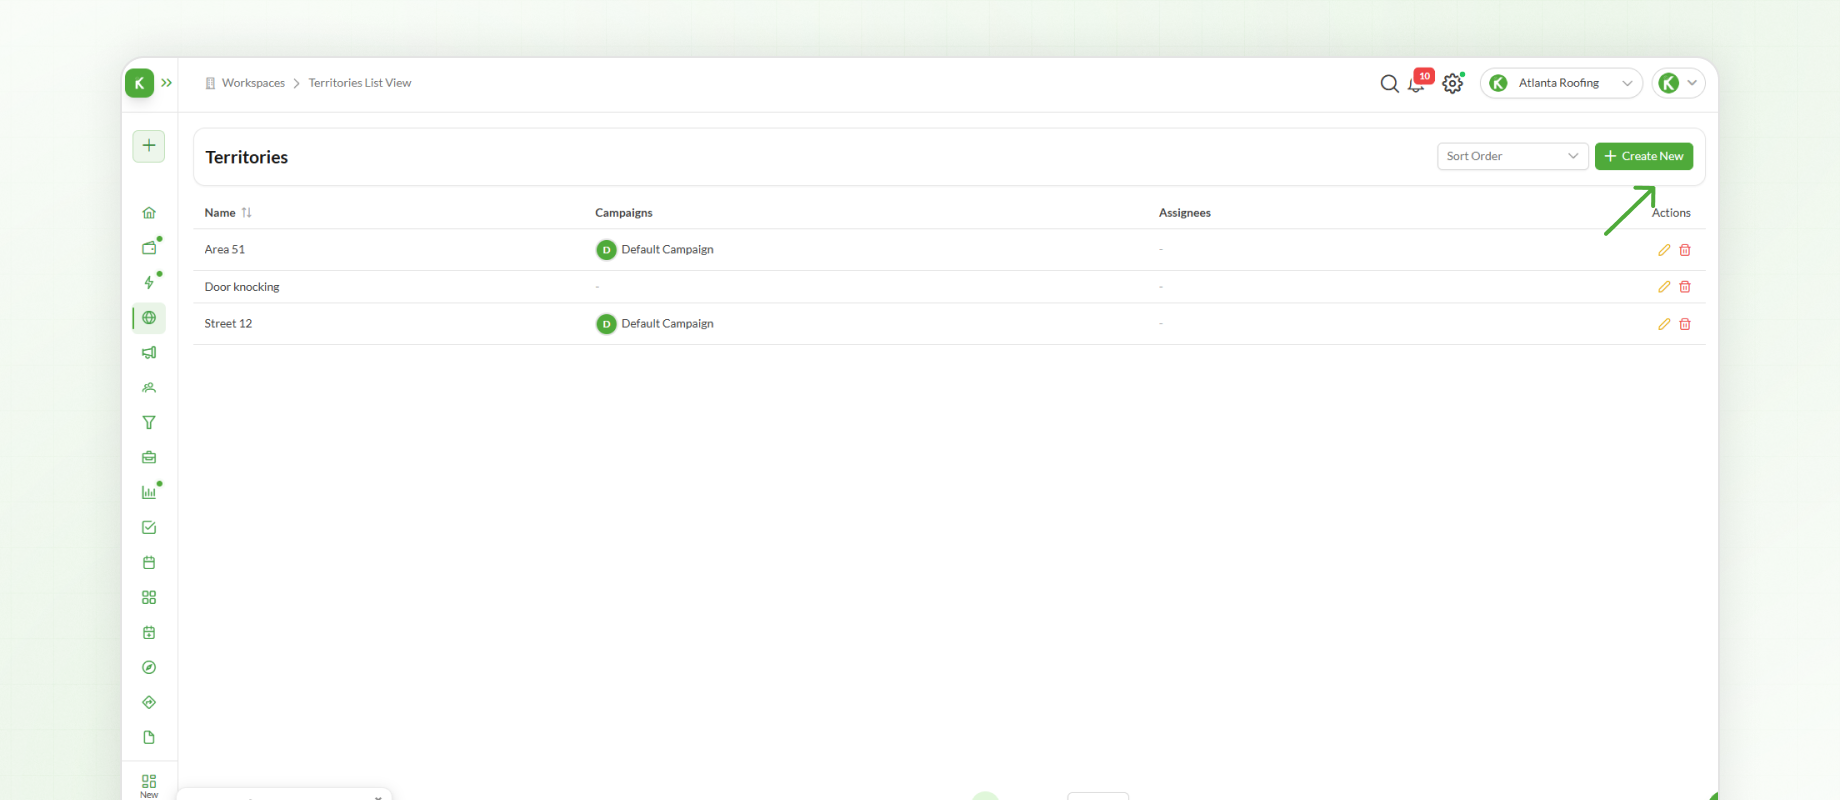
This opens the Territory Map, where territory boundaries can be created and managed.
Creating a Territory
Before defining the territory on the map, complete the required information.
Enter the following details:
Territory Name
Campaign
Assignee(s) (optional)
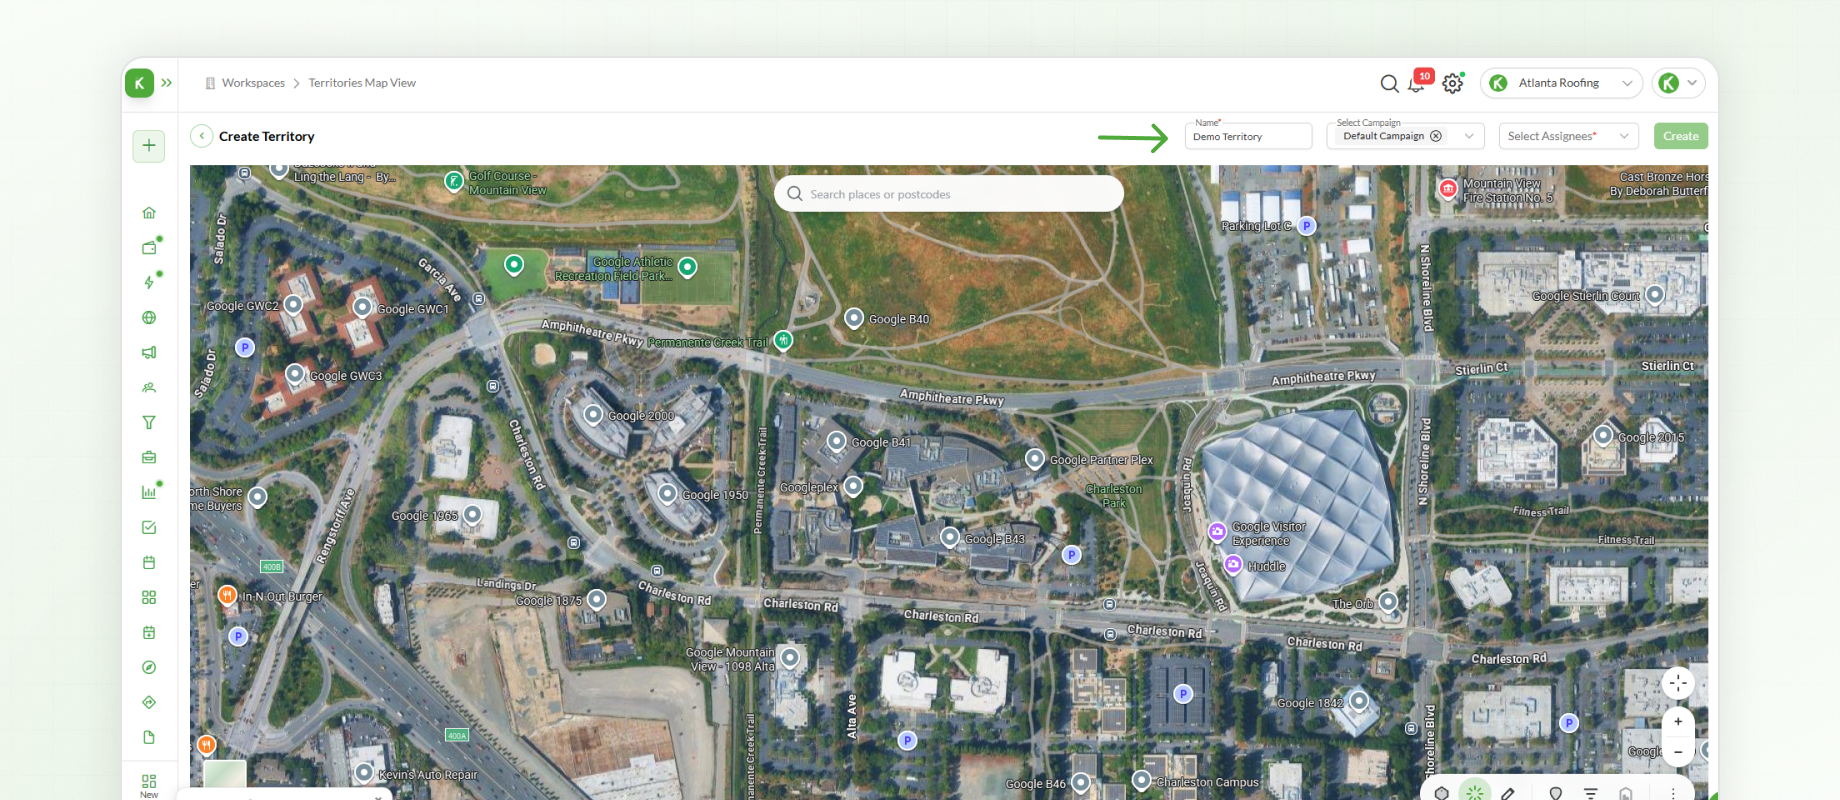
Selecting assignees during creation allows the territory to be allocated immediately to the appropriate team members.
Once these details have been completed, the territory boundary can be defined on the map.
Drawing a Territory
Knockio provides several tools for creating and managing territory boundaries.
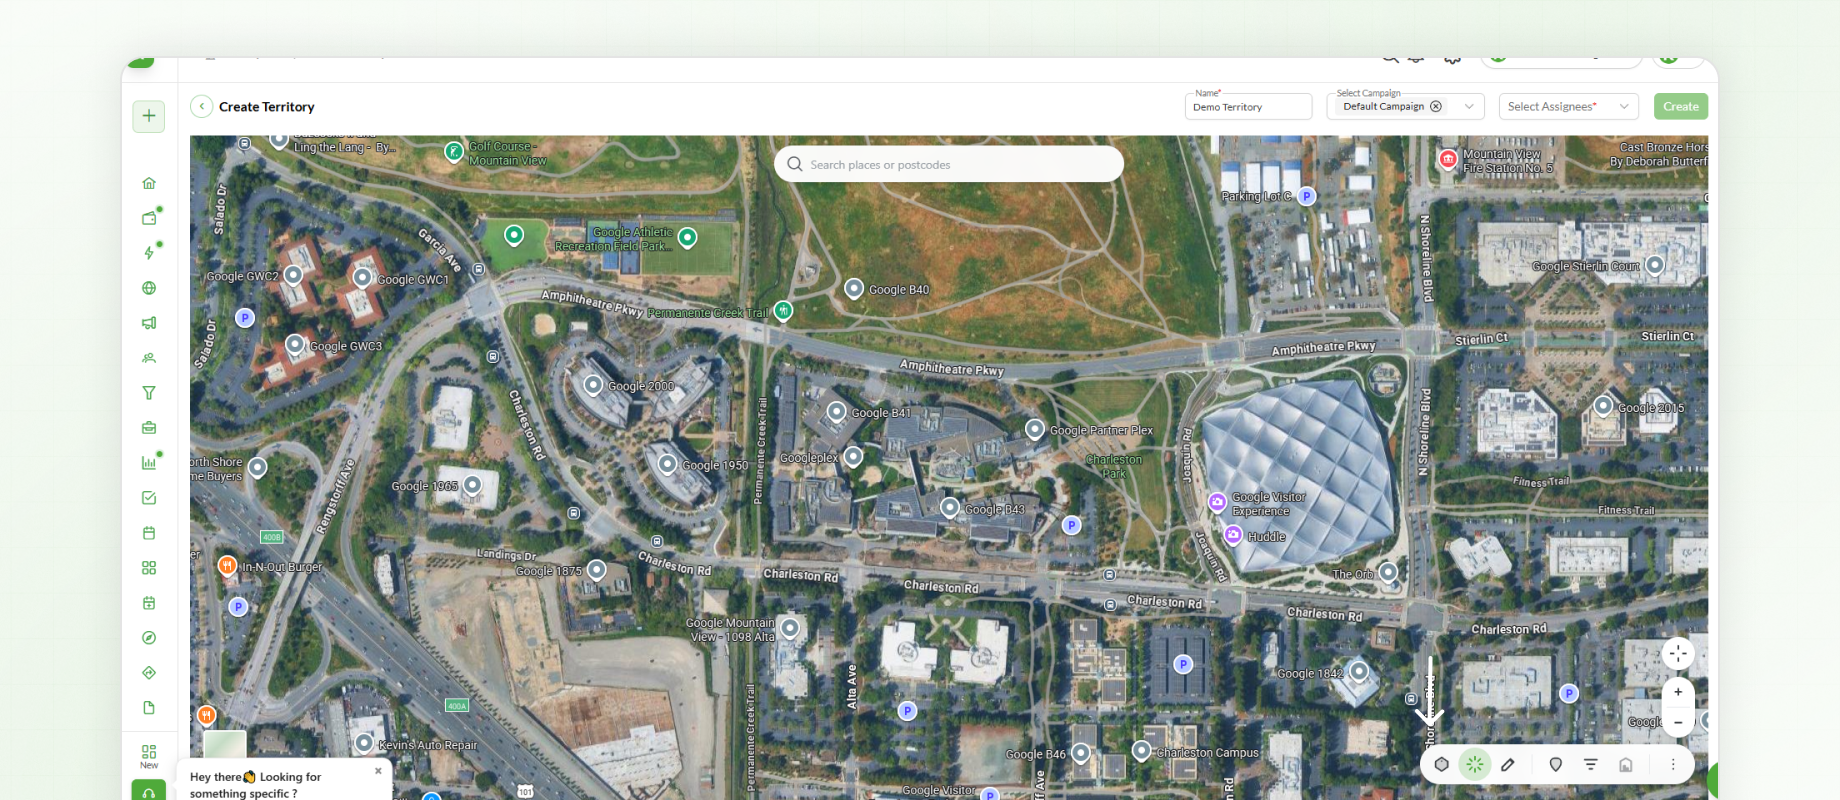
Draw Polygon
The Draw Polygon tool allows you to create a custom territory by outlining an area directly on the map.
To create a territory:
Select Draw Polygon.
Click around the desired area to define the boundary.
Complete the shape to create the territory.
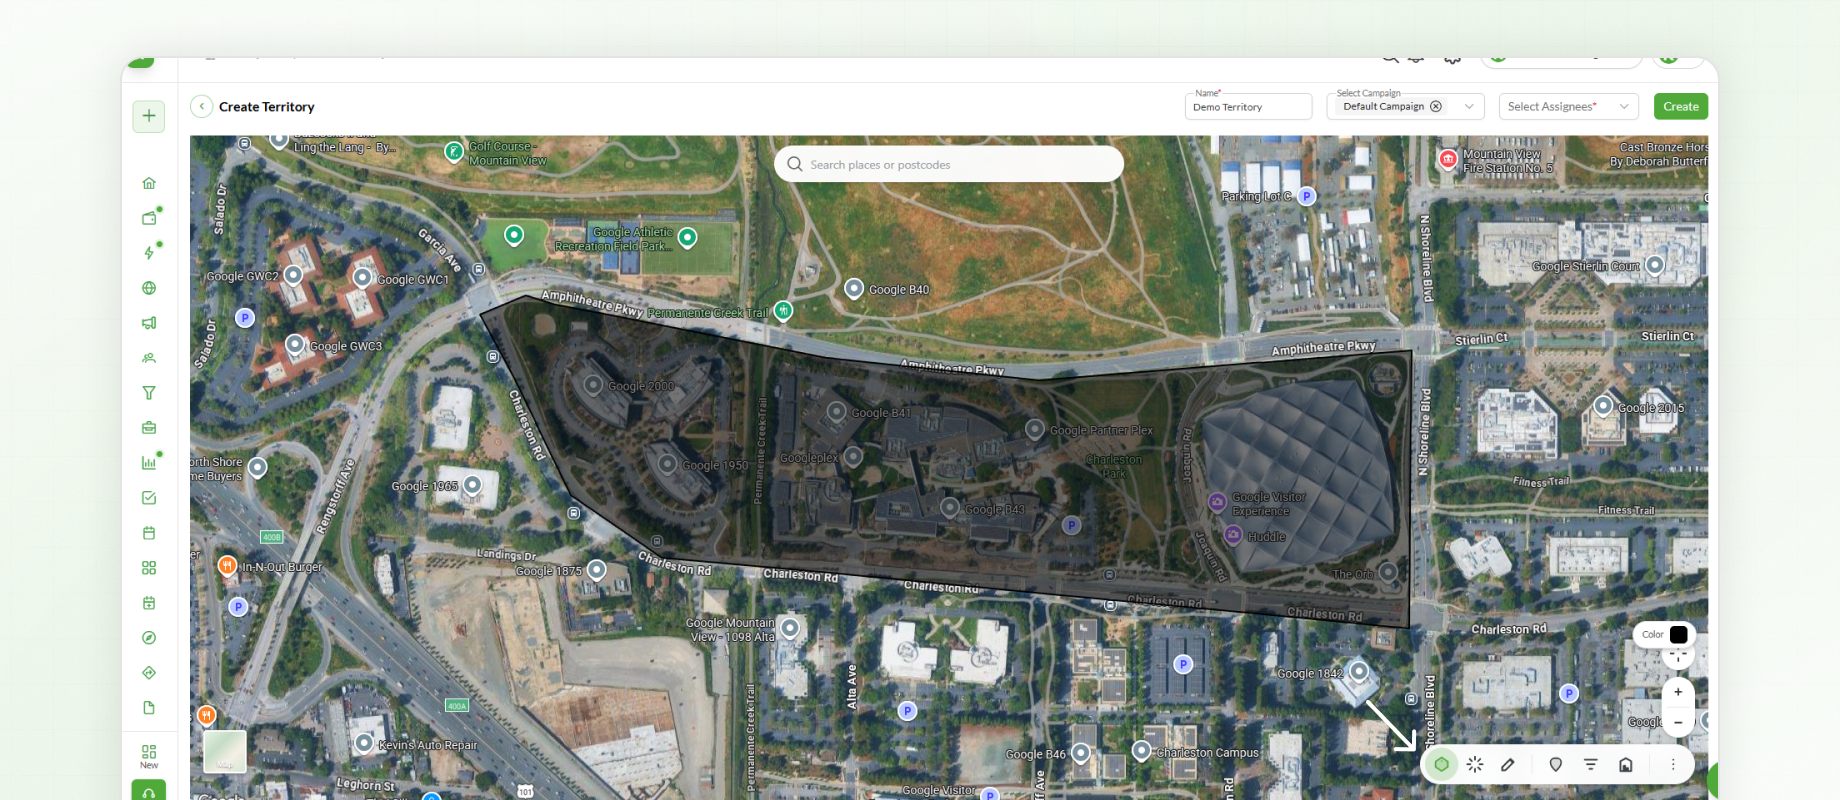
This is the most commonly used method for creating territories.
Pan Map
The Pan Map tool allows you to move around the map without modifying the territory boundary.
This is useful when working with larger geographic areas.
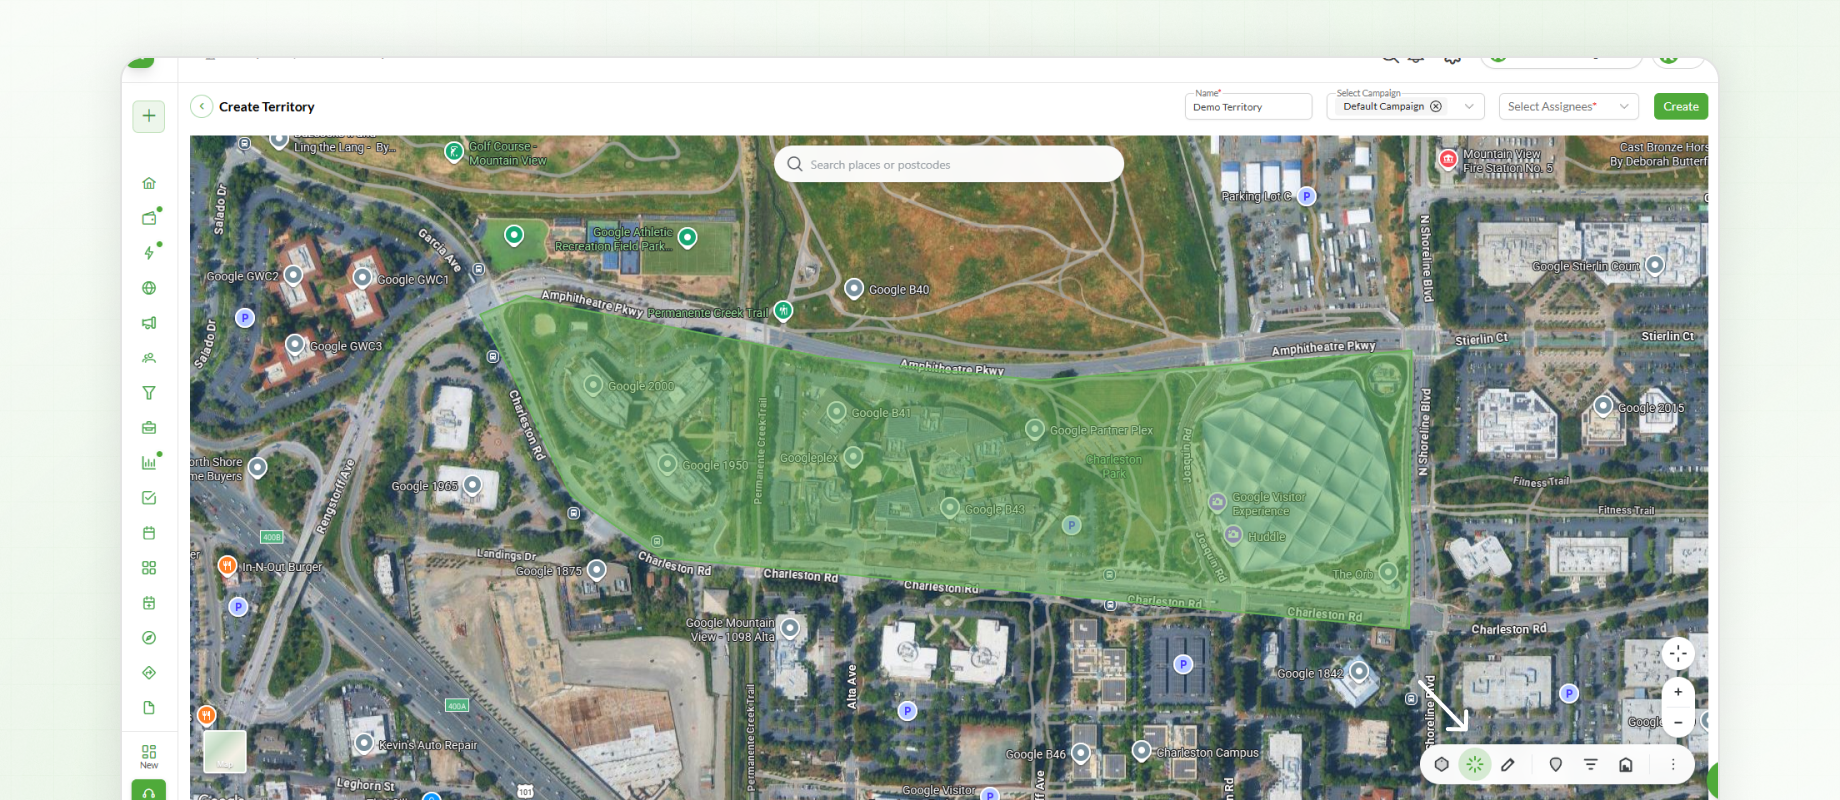
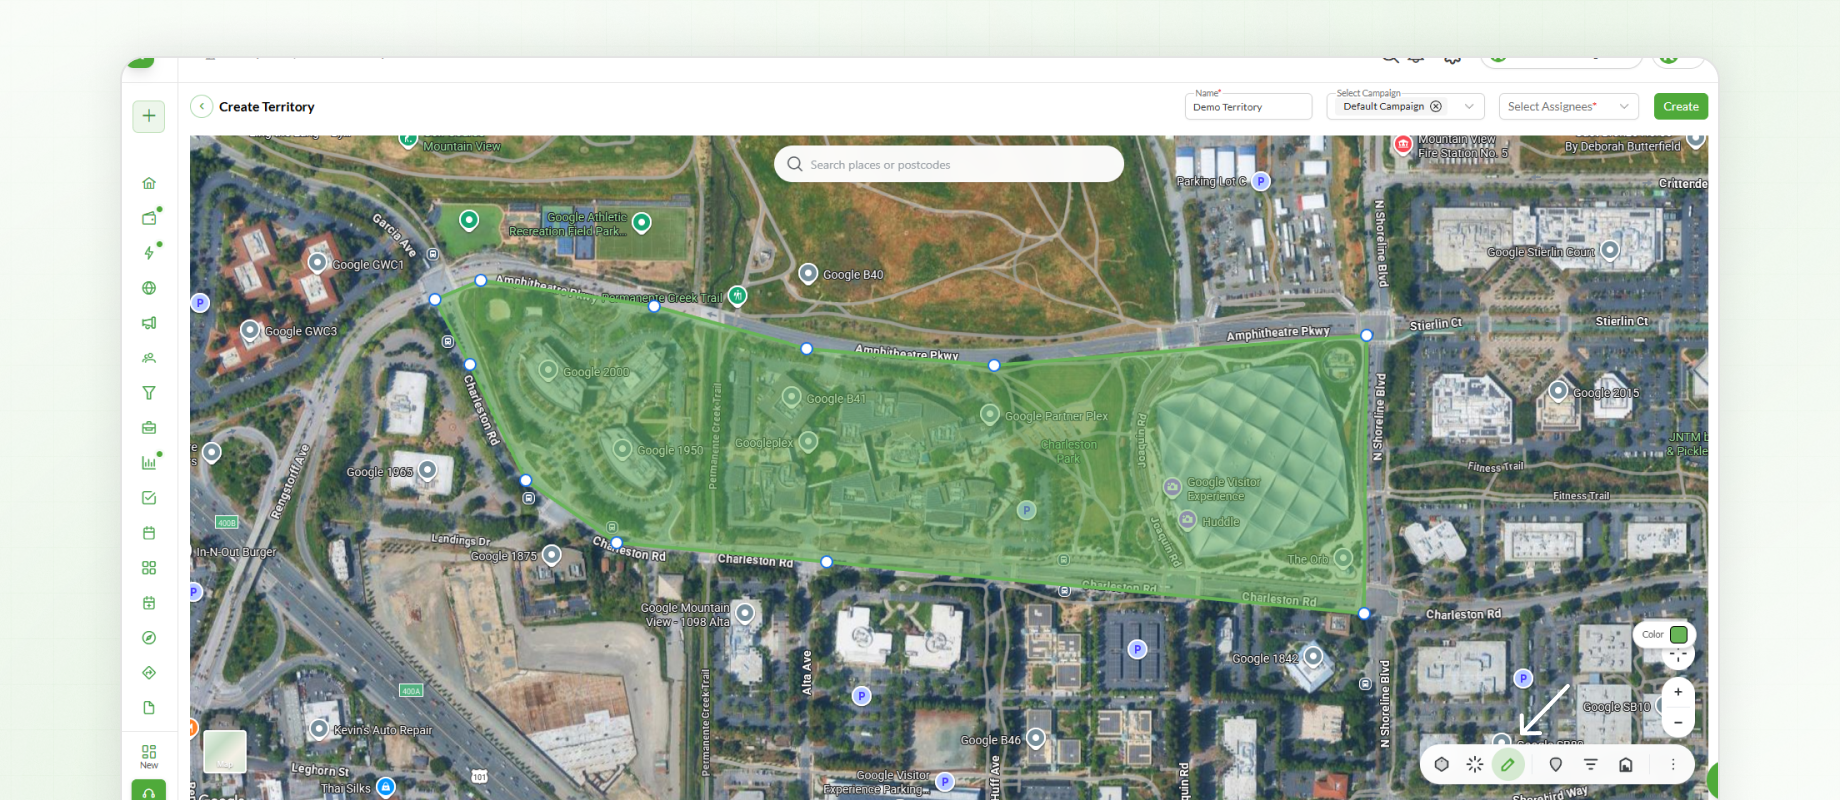
Edit Shape
The Edit Shape tool allows existing territory boundaries to be adjusted.
Use this option to:
Move existing points.
Reshape boundaries.
Refine the territory after it has been created.
Territory Selection
In addition to manually drawing a territory, Knockio also supports automatic territory creation using Territory Selection.
To use this feature:
Select Territory Selection.
Search for a location using a place name, postcode, ZIP code, or address.
Select the desired location.
Knockio automatically generates a territory boundary around the selected area.
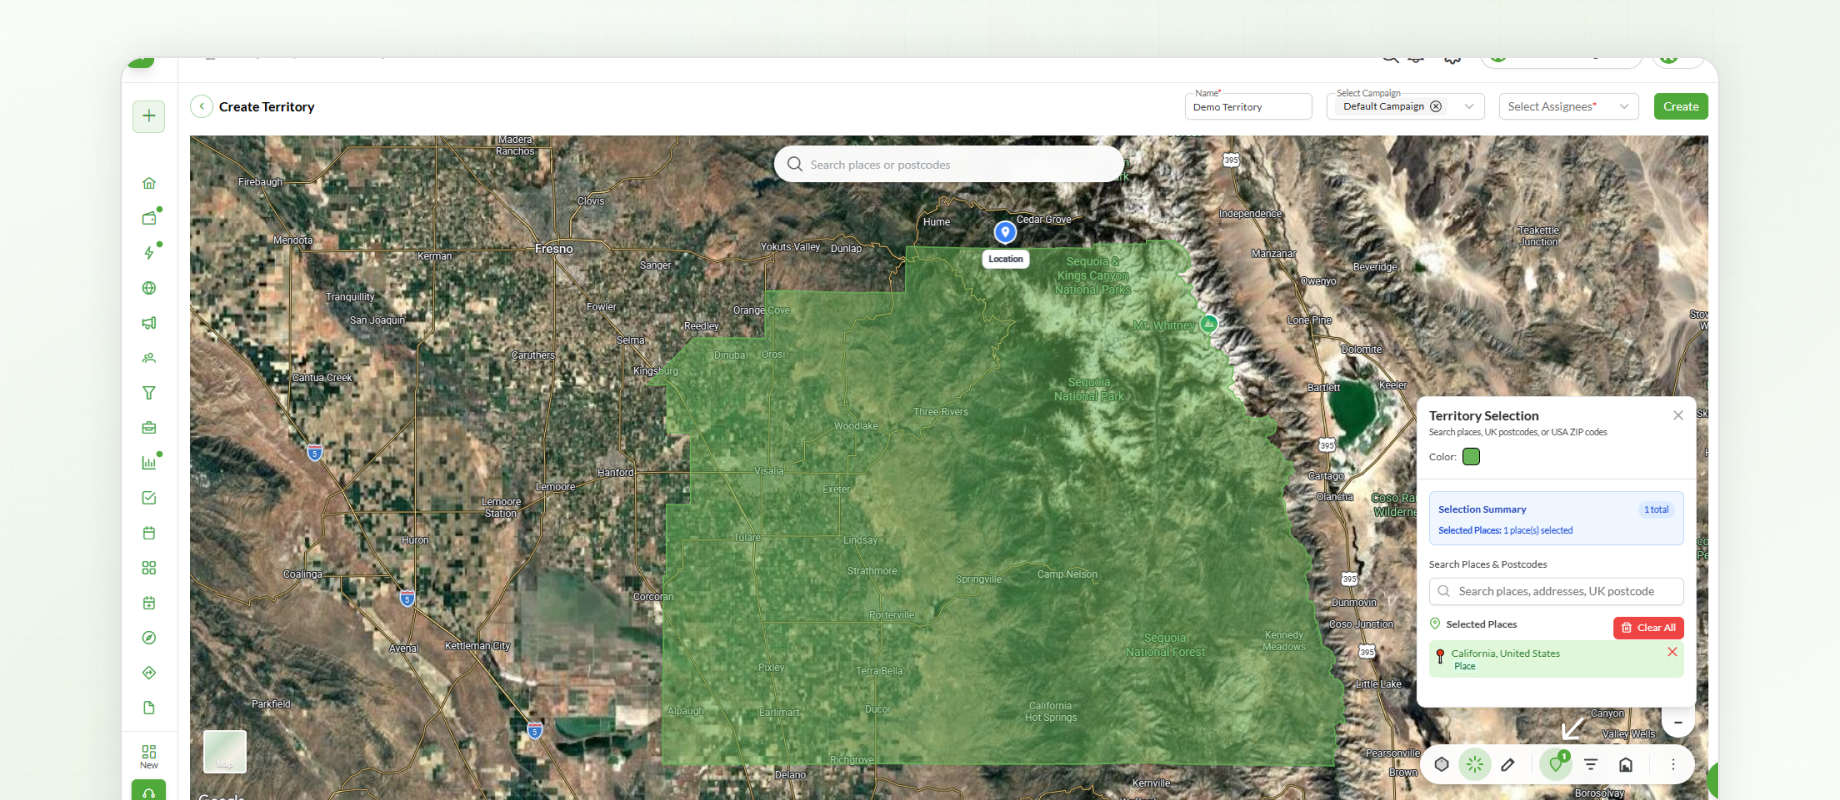
Each selected location is added to the Selected Places list, where it can be reviewed or removed at any time.
The Selection Summary displays the total number of selected places, making it easy to monitor the current territory.
A colour can also be selected to help identify the territory on the map.
Viewing Territory Properties
Once a territory has been created, property information within that territory can be viewed.
To view available properties:
Open Properties in Territory.
Click Find Properties.
Knockio scans the selected area and displays the properties located within the territory.
The summary includes:
Total properties found
Properties with addresses
Properties requiring review
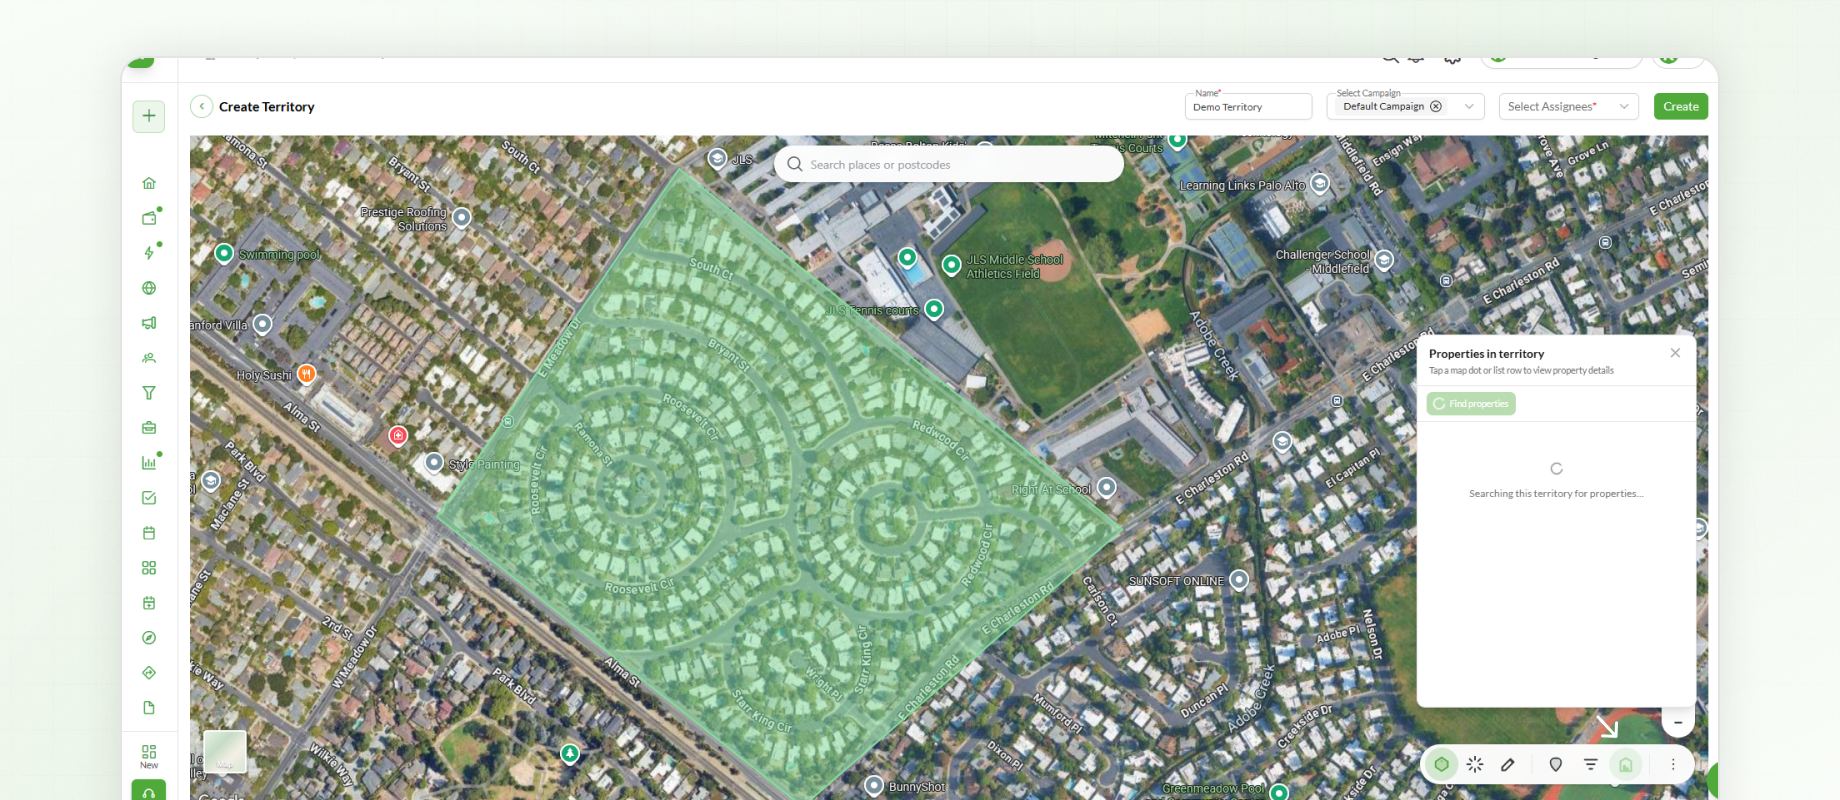
Specific properties can be searched and their details viewed directly from this panel.
This information helps field teams understand the service area before canvassing begins.
Using Filters
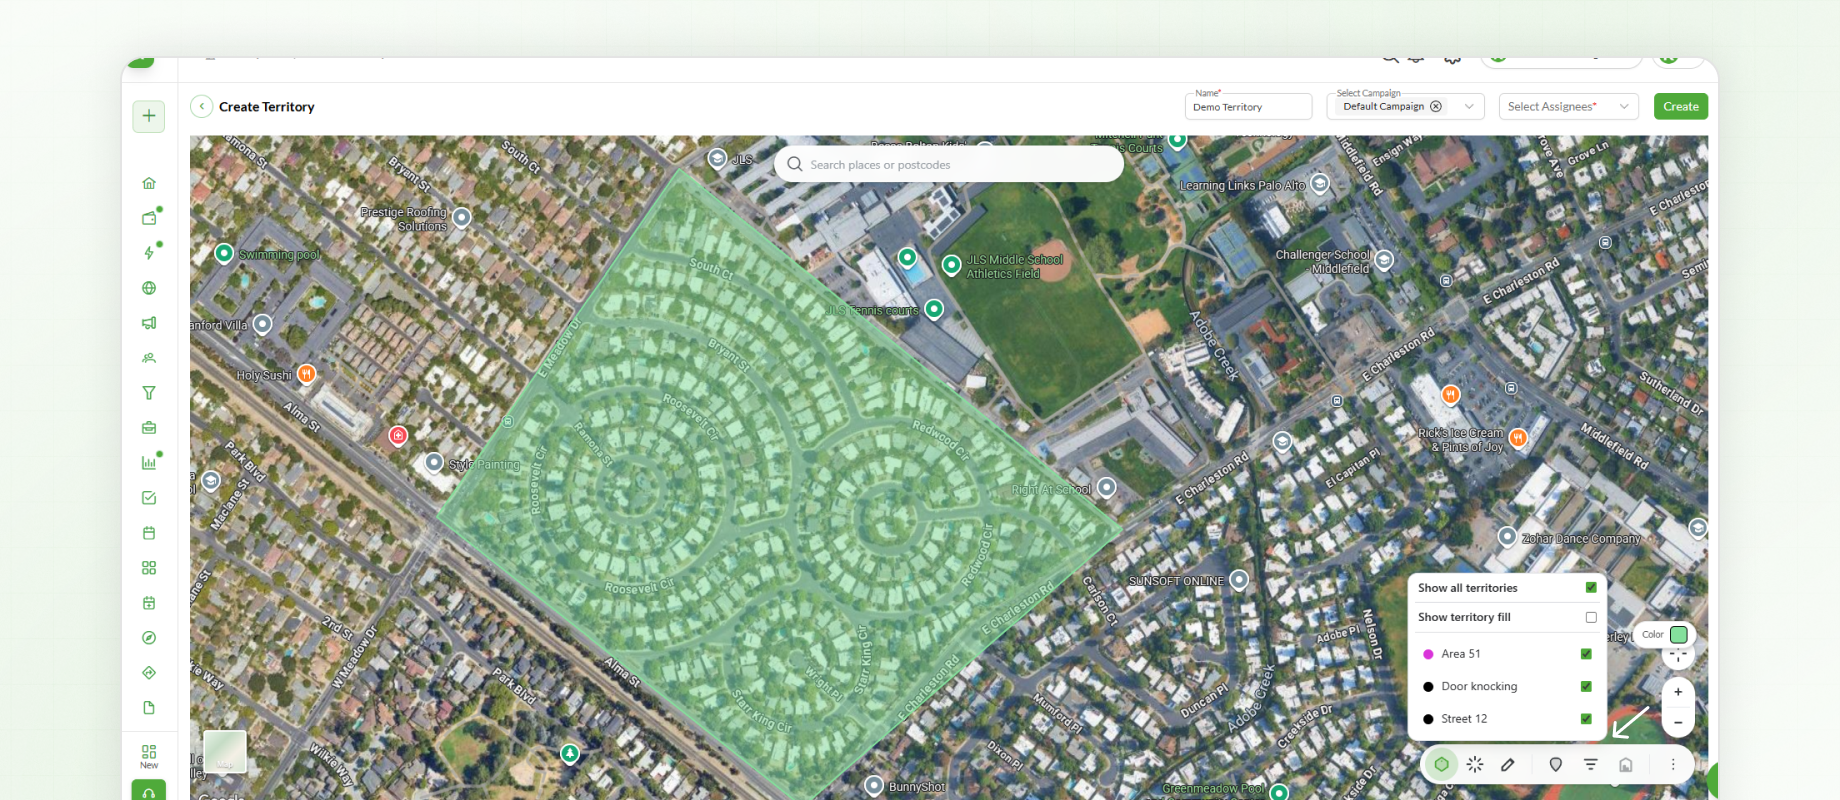
The Filters menu provides options for controlling how territories are displayed on the map.
Available options include:
Show or hide all territories.
Show or hide territory fills.
These controls make it easier to compare territories and plan field coverage.
Additional Map Tools
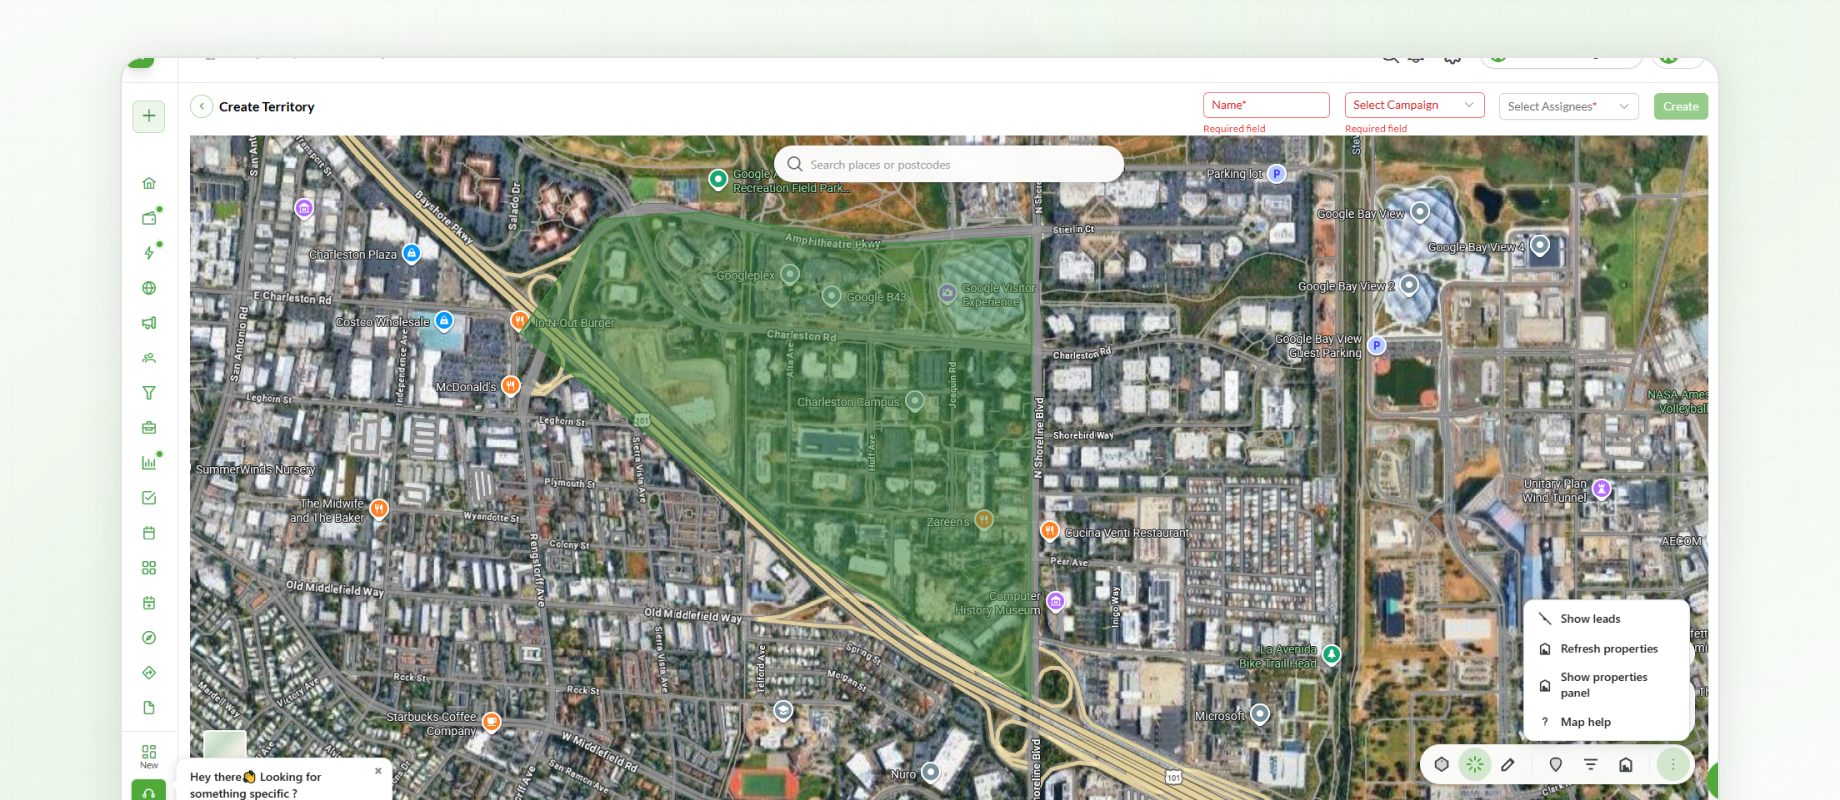
Several additional tools are available to support territory management.
These include:
Show Leads – Displays leads on the map.
Refresh Properties – Updates available property information.
Show Properties Panel – Opens or hides the properties panel.
Map Help – Provides guidance on using the available map tools.
Map Options
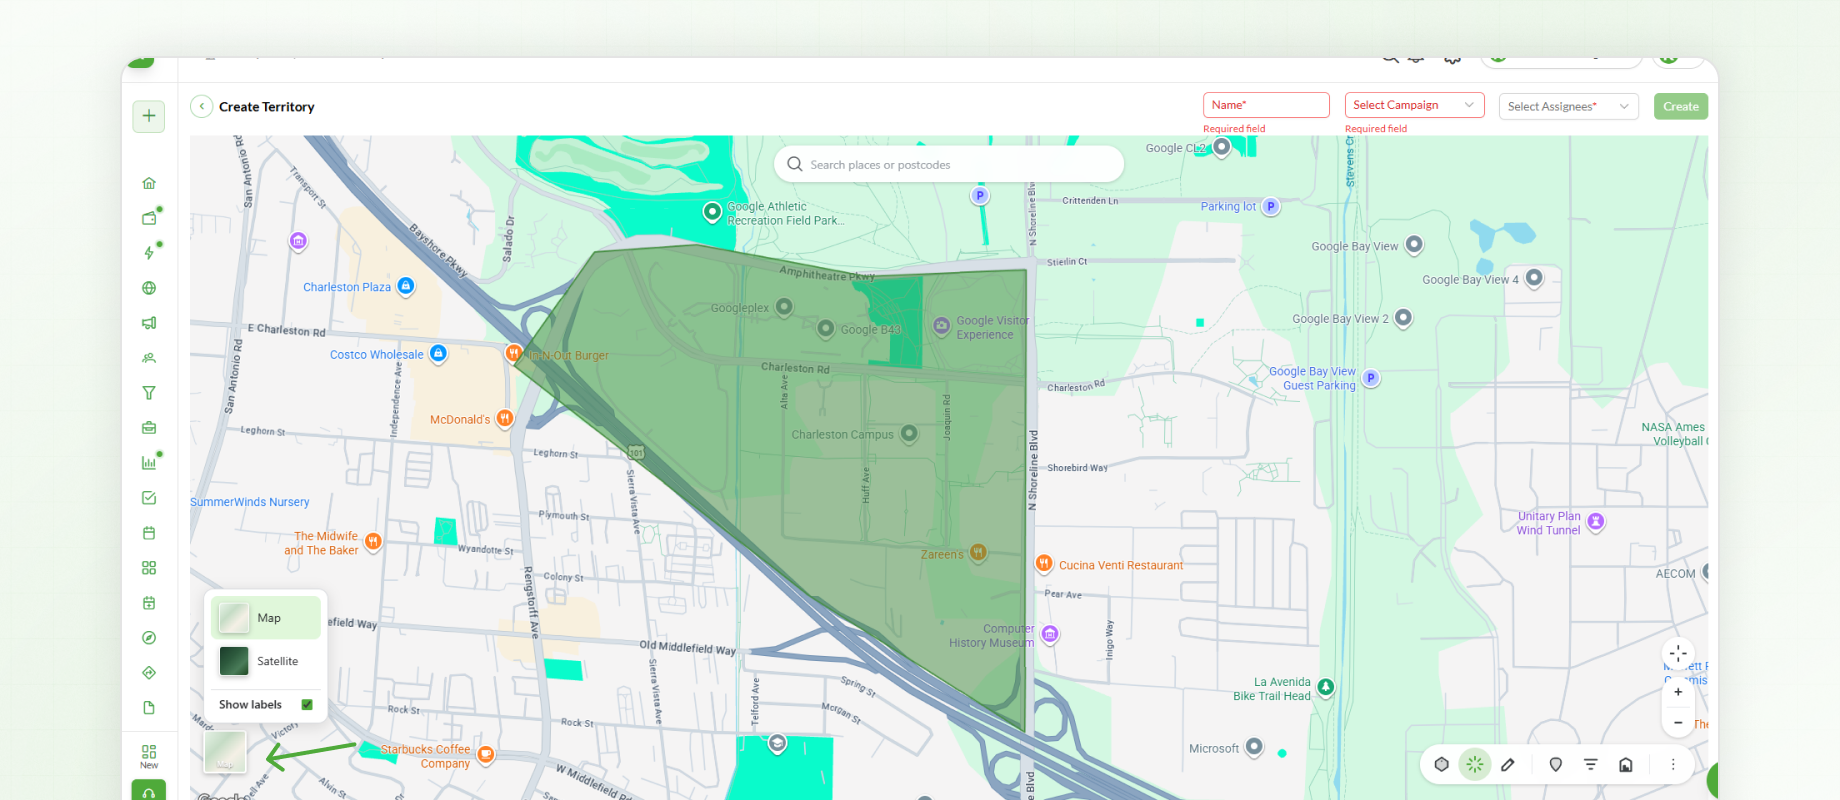
The Map Options menu is located in the bottom-left corner of the map.
Available options include:
Map View
Switch between:
Map View
Satellite View
Choose the view that best suits your planning requirements.
Labels
Street names and other map labels can be shown or hidden as needed to improve visibility while planning territories.
Saving a Territory
Once the territory boundary has been defined and all required information has been completed, click Create.
The territory is now available for assignment and can be used throughout the workspace.
Next Steps
After creating territories, the next step is managing Leads. The Leads module allows users to create and manage leads from both the web platform and the mobile application while supporting tasks, appointments, communication, and other day-to-day field activities.