
Configuring Your Email
Connect your email acoount to send and receive emails in Knockio.
Table of Contents
Overview
Knockio allows users to send and receive emails directly from within the platform. Before an email account can be used, an email configuration must be created for the organization's email provider and then assigned to the appropriate users.
This article explains how to create an email configuration, connect an email account, and configure supported email providers.
Creating an Email Configuration
Before connecting an email account to a user, an email configuration must first be created.
To create an email configuration:
Click the Settings icon in the bottom-left corner of the screen.
Select Mail Configuration.
Click Add Configuration.
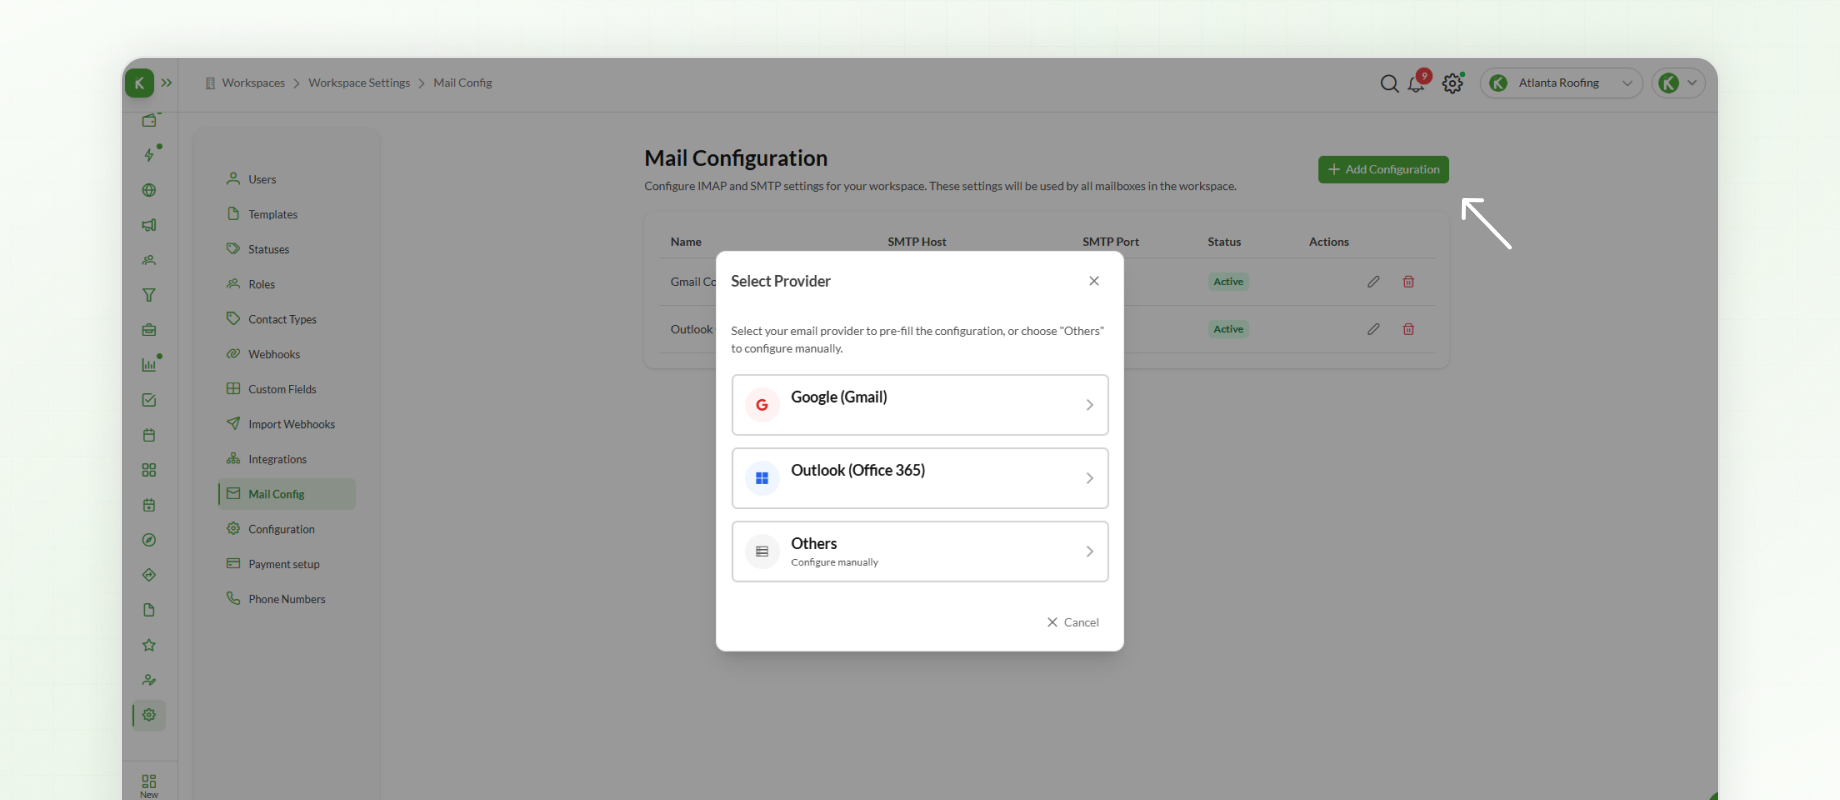
A list of supported email providers will appear.
Gmail
If your organization uses Gmail:
Select Gmail.
Save the configuration.
Outlook
If your organization uses Outlook:
Select Outlook.
Save the configuration.
Other Email Providers
For any other email provider:
Select Others.
Enter the required server details.
Save the configuration.
Once the configuration has been created, it can be assigned to one or more users.
Assigning an Email Configuration to a User
After creating an email configuration, it must be connected to the appropriate user.
To assign an email configuration:
Open Settings.
Select Users.
Locate the user you want to configure.
Click the three-dot Actions menu.
Select Configure Mailbox.
Choose the email configuration that was created earlier.
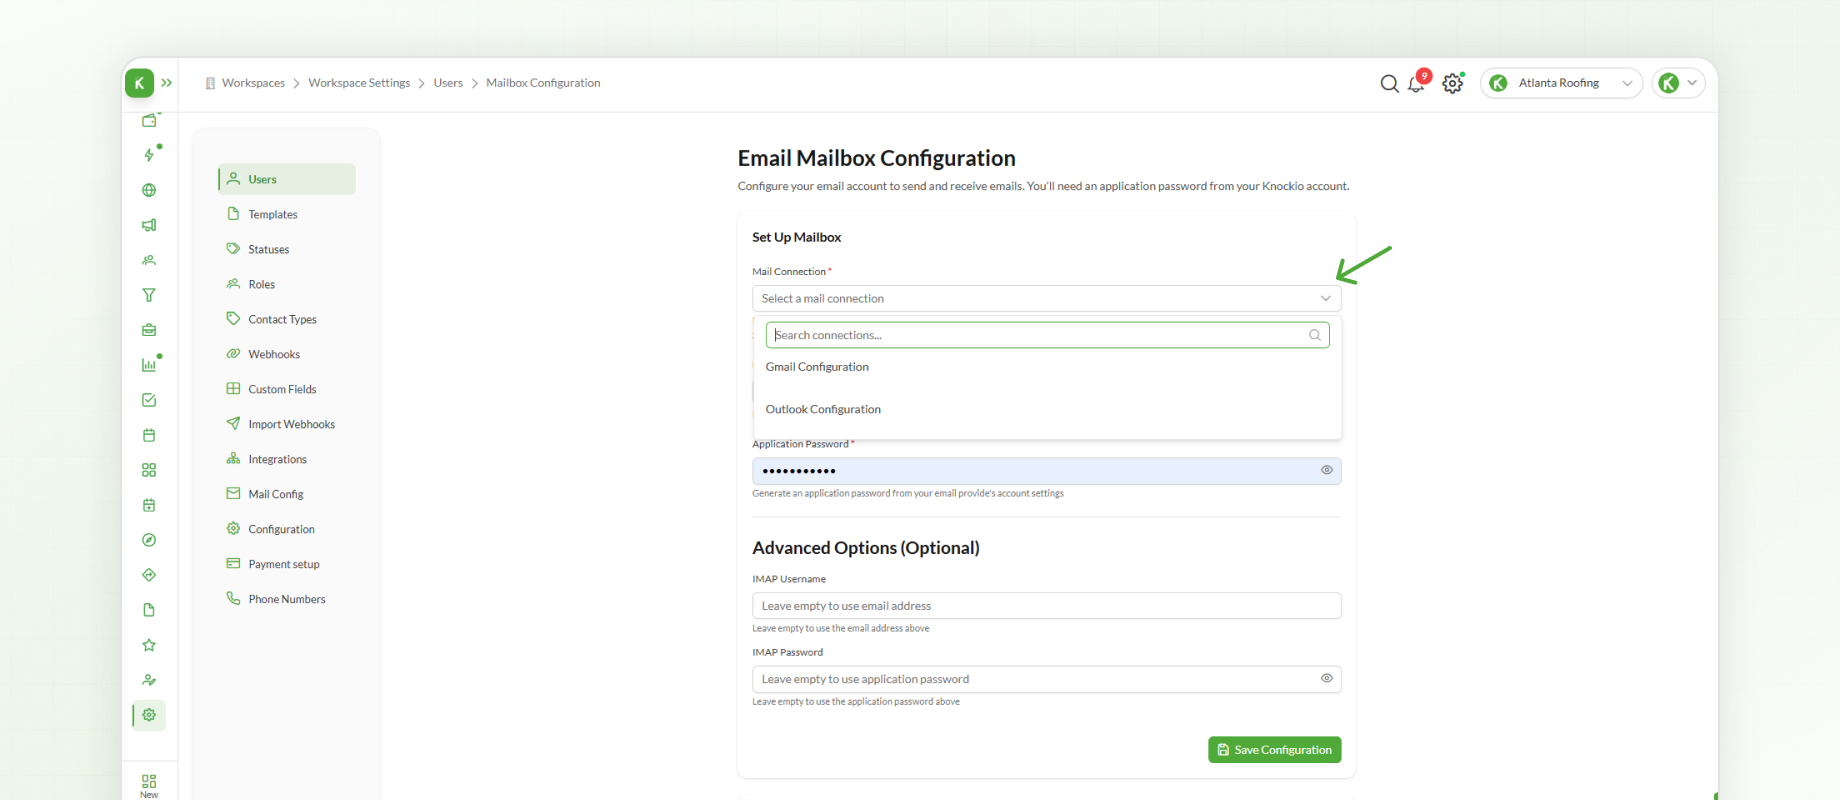
The remaining setup process depends on the selected email provider.
Connecting an Outlook Account
Connecting an Outlook account requires a simple authentication process.
To connect Outlook:
Click Connect.
Sign in to your Microsoft account.
Complete the authentication process.
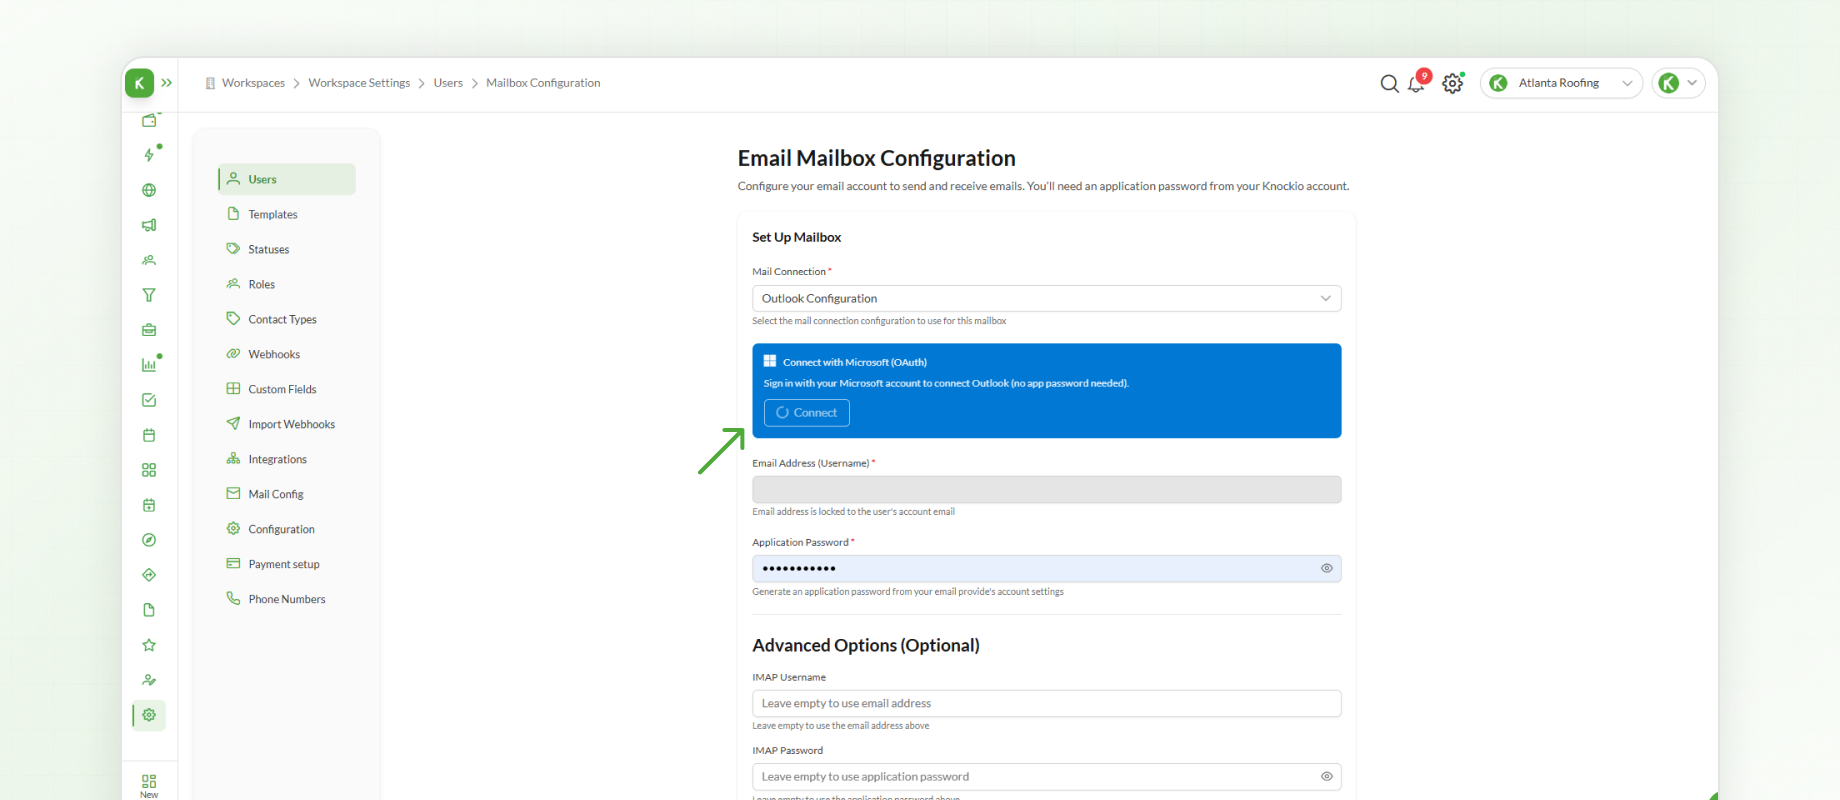
Once authentication is complete, the Outlook mailbox is connected and ready to use within Knockio.
Connecting a Gmail Account
Gmail requires a Google App Password instead of the regular account password.
To connect Gmail:
Open your Google Account.
Search for App Passwords.
Generate a new App Password.
Enter a name for the password, such as Knockio Email.
Copy the generated App Password.
Return to Knockio.
Paste the App Password into the Password field.
Save the configuration.
Your Gmail account will now be connected successfully.
Email Communication
Once an email account has been configured, users can send and receive emails directly within Knockio.
Keeping email alongside phone calls and messages provides a centralized communication experience, allowing customer interactions to be managed from a single platform.
Next Steps
After configuring email, the next step is creating and managing Campaigns. Campaigns bring together users, territories, presentations, financial templates, surveys, and other resources into a single workspace, providing everything your team needs to operate efficiently.